
Once you have worked out the camera settings required for landscape Painting with light, you can take some photographs. Or can you? There are some things that you need to plan first if you are working outdoors:
Time of day:
I suppose it goes without saying that you need it to be dark (although maybe not pitch black). Therefore we are looking at either first thing in the morning or last thing at night, so a lot depends on whether you are a morning or nighttime person. I suppose that a night shoot is probably best – if you overrun your time in a morning shoot, everything will get lighter as the sun rises, spoiling the mood.
Time of year:
Fortunately, the best seasons for Painting with light are those when it stays dark later in the morning and gets darker earlier at night, i.e. Autumn and Winter. During these seasons, you get the autumnal golden foliage, snow and frosts – all of which make for some great shots.
Weather:
Since we have already ascertained that Autumn and Winter are good times of the year, I think it is reasonably apparent that it may get cold. However, you need to avoid very wet and foggy days. These diffract the light too much and the shots will look out-of-focus and lack detail. Also, because you will be making long exposures you won’t want a breezy day (unless you want to show the movement of the trees).
Location:
We will look at composition in a later blog post, but you need to find locations that lend themselves to having elements illuminated while creating an attractive picture. You also need somewhere relatively secluded so that you have the time to take multiple exposures whilst walking around with your torch without getting accosted by well-meaning strangers.
Single shot or composite?
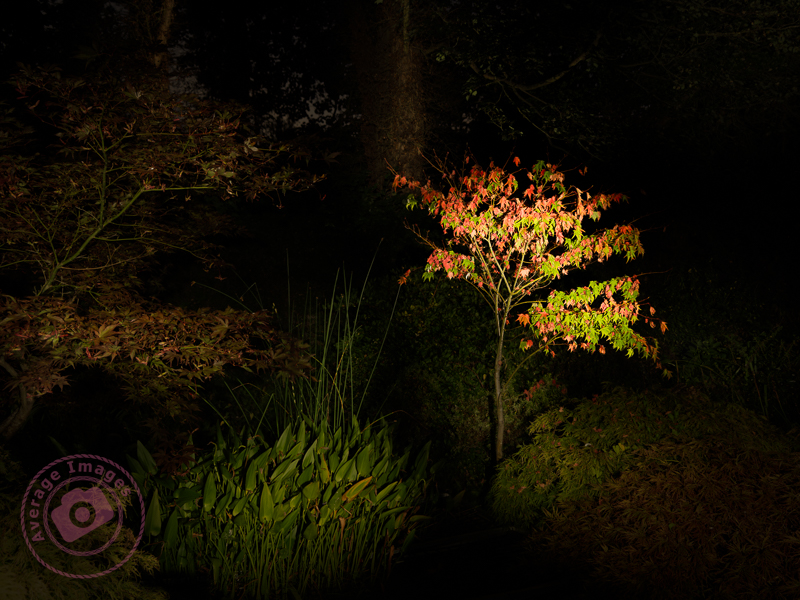
Although you can do Painting with light in a single shot, it does make it a rather trial-and-error process. If you don’t light up the correct areas, you get some stray light glaring back into the lens, or you get yourself in the shot, it’s all for nothing and you have to start all over again. It is far better (provided that you are happy carrying out the post-processing) to take multiple shots with different areas lit, and then create one composite image from all of them.
Company:
It is best to have a companion with you during these shoots if possible. Not only are you working in the darkness (and so could stumble and require assistance), but you are working with expensive camera equipment and often some distance away from it. Unfortunately, some in society would gladly take it away from you, so stay safe and take someone with you (preferably someone with much patience!)
As a footnote to this post I should mention that during post-processing of this image I found that I couldn’t open the images in Photoshop directly from Lightroom. If I chose ‘open as layers in Photoshop’ (as I normally do) all that happened was that the Photoshop window opened, but no images. After some Googling it appeared that the way around it was to uninstall and then reinstall both Photoshop and Lightroom. It was a long-winded faff, but it worked. I have no idea why this occurred; it was working fine the day before and there had been no updates or other changes. Strange.
Discover more from Ironbridge Images
Subscribe to get the latest posts sent to your email.


Wonderful image!!!
LikeLike
Thank you, much appreciated.
LikeLike