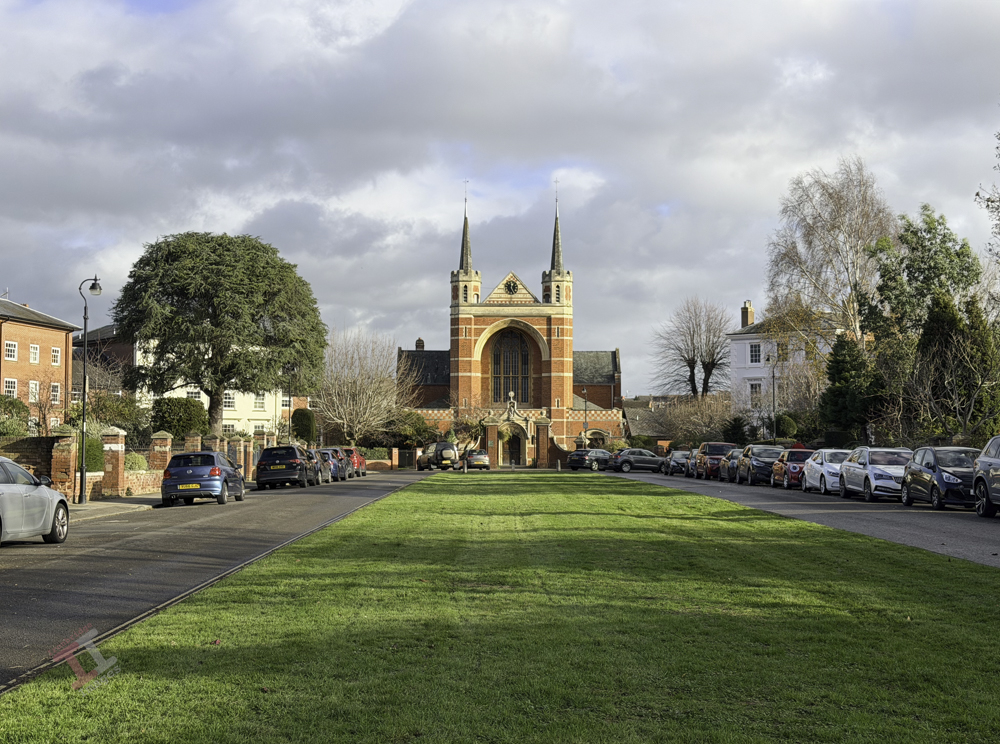
Yesterday we spent the morning in the city of Worcester and I made a considered effort to take some photographs with my phone camera, on the basis that my mission for the New Year is to (a) use it more often, and (b) learn how to use its various functions.
There is clearly much to be done. Apart from the fact that I was clumsily touching the screen and randomly turning the camera off whilst I was trying to use it, I was also struggling to come to grips with the new ‘camera control’ button, that I didn’t have on my previous iPhone, which, apart from activating the shutter, also has various functions that I didn’t know about and (again) my stubby fingers were changing settings without me realising.
Back at home, I also found that the default HEIC image format isn’t fully compatible with Photoshop and so that has now been changed so that I can easily choose between JPEG and RAW. I have also downloaded a book onto Kindle called “iPhone 17 User Guide” which I will now actually read so that I don’t get so frustrated the next time.
Anyway, here is a shot of St Georges Square, Worcester, with St Georges Church in the background – which was built in an Arts and Crafts style in 1895. I may convert this into a day-to-night image later on.
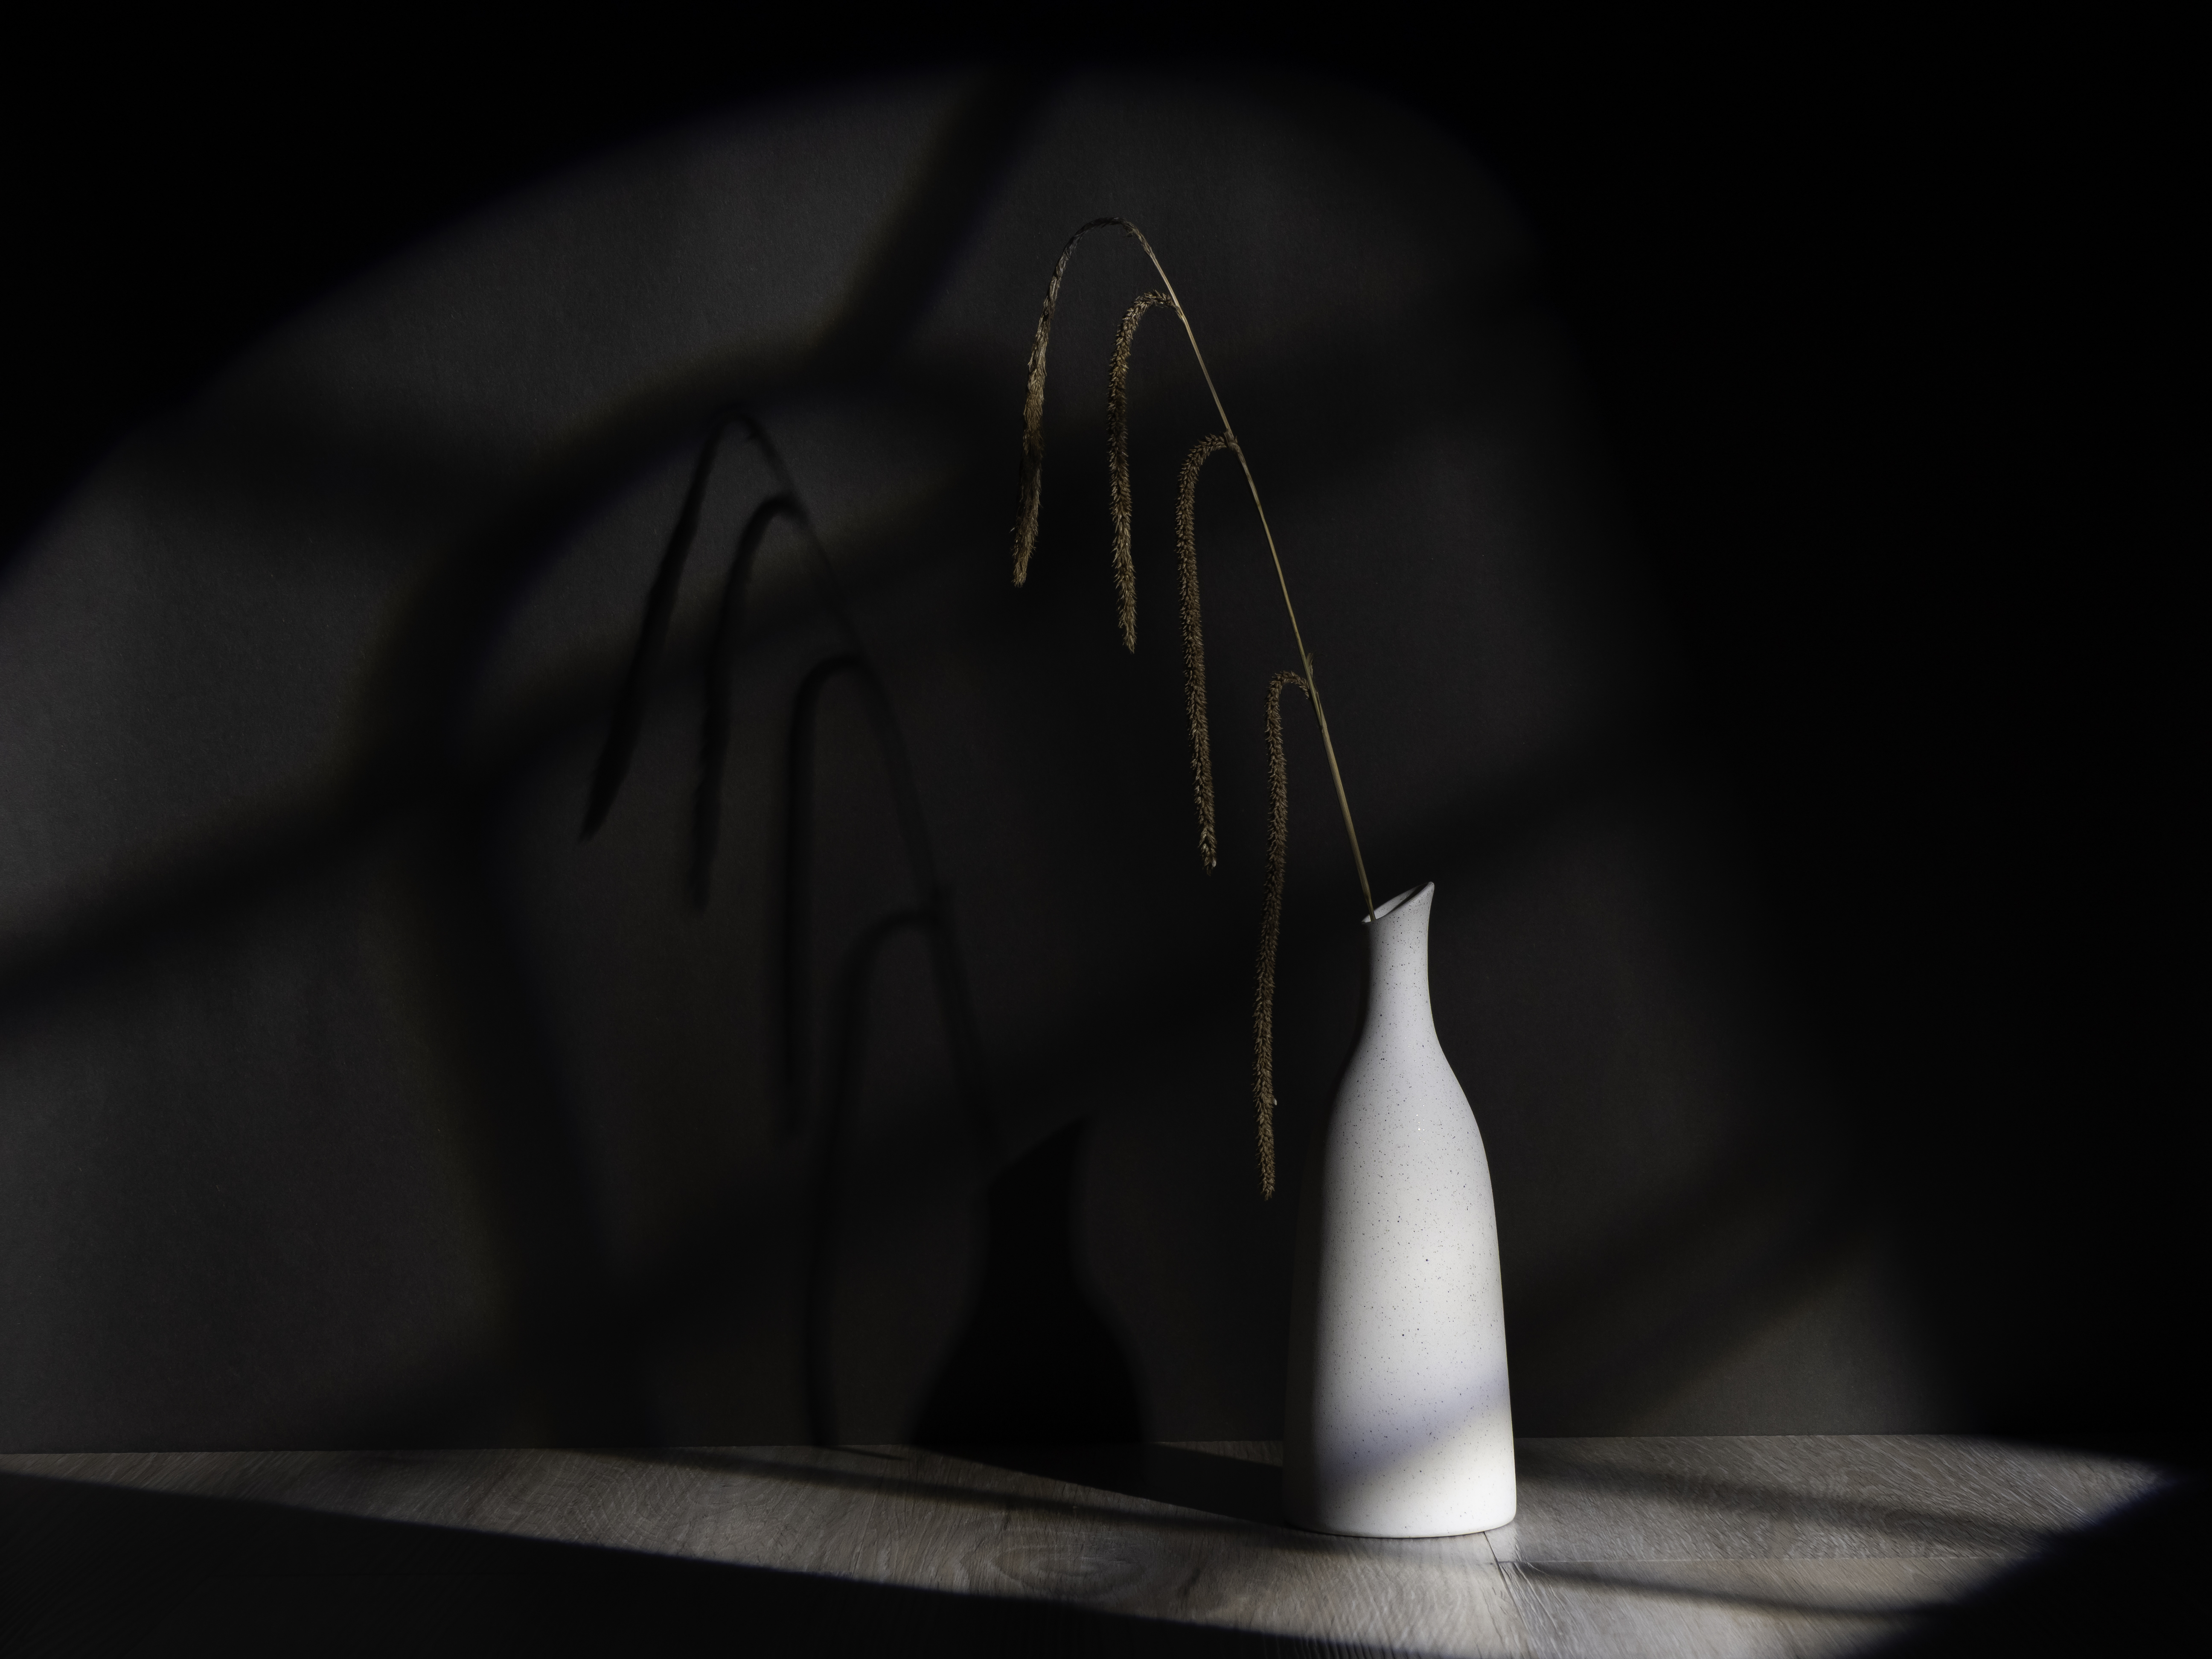
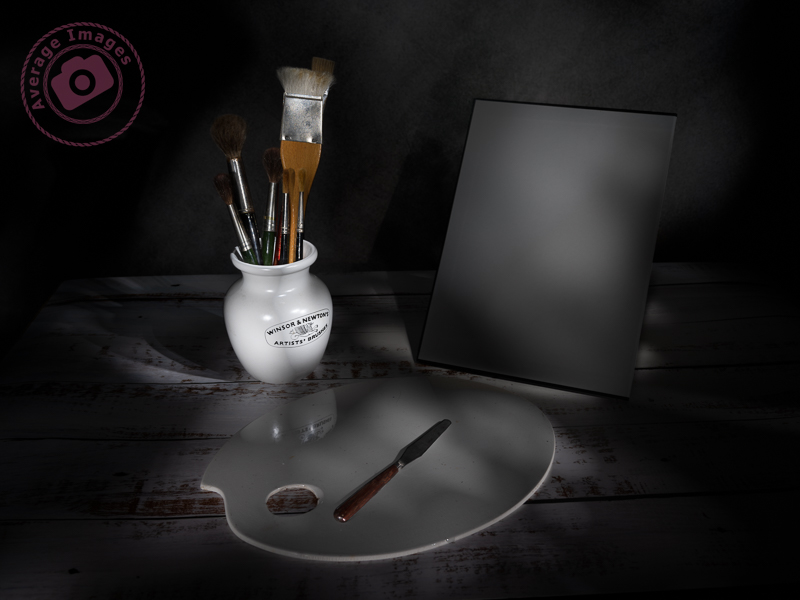
With a new studio and and an additional projector lens for one of my strobe lights, I have changed direction back to still life photography, which should keep me occupied throughout the winter months. Here is one of my initial trial shots using the afore-mentioned projector lens, which I think will provide a multitude of ideas moving forward.
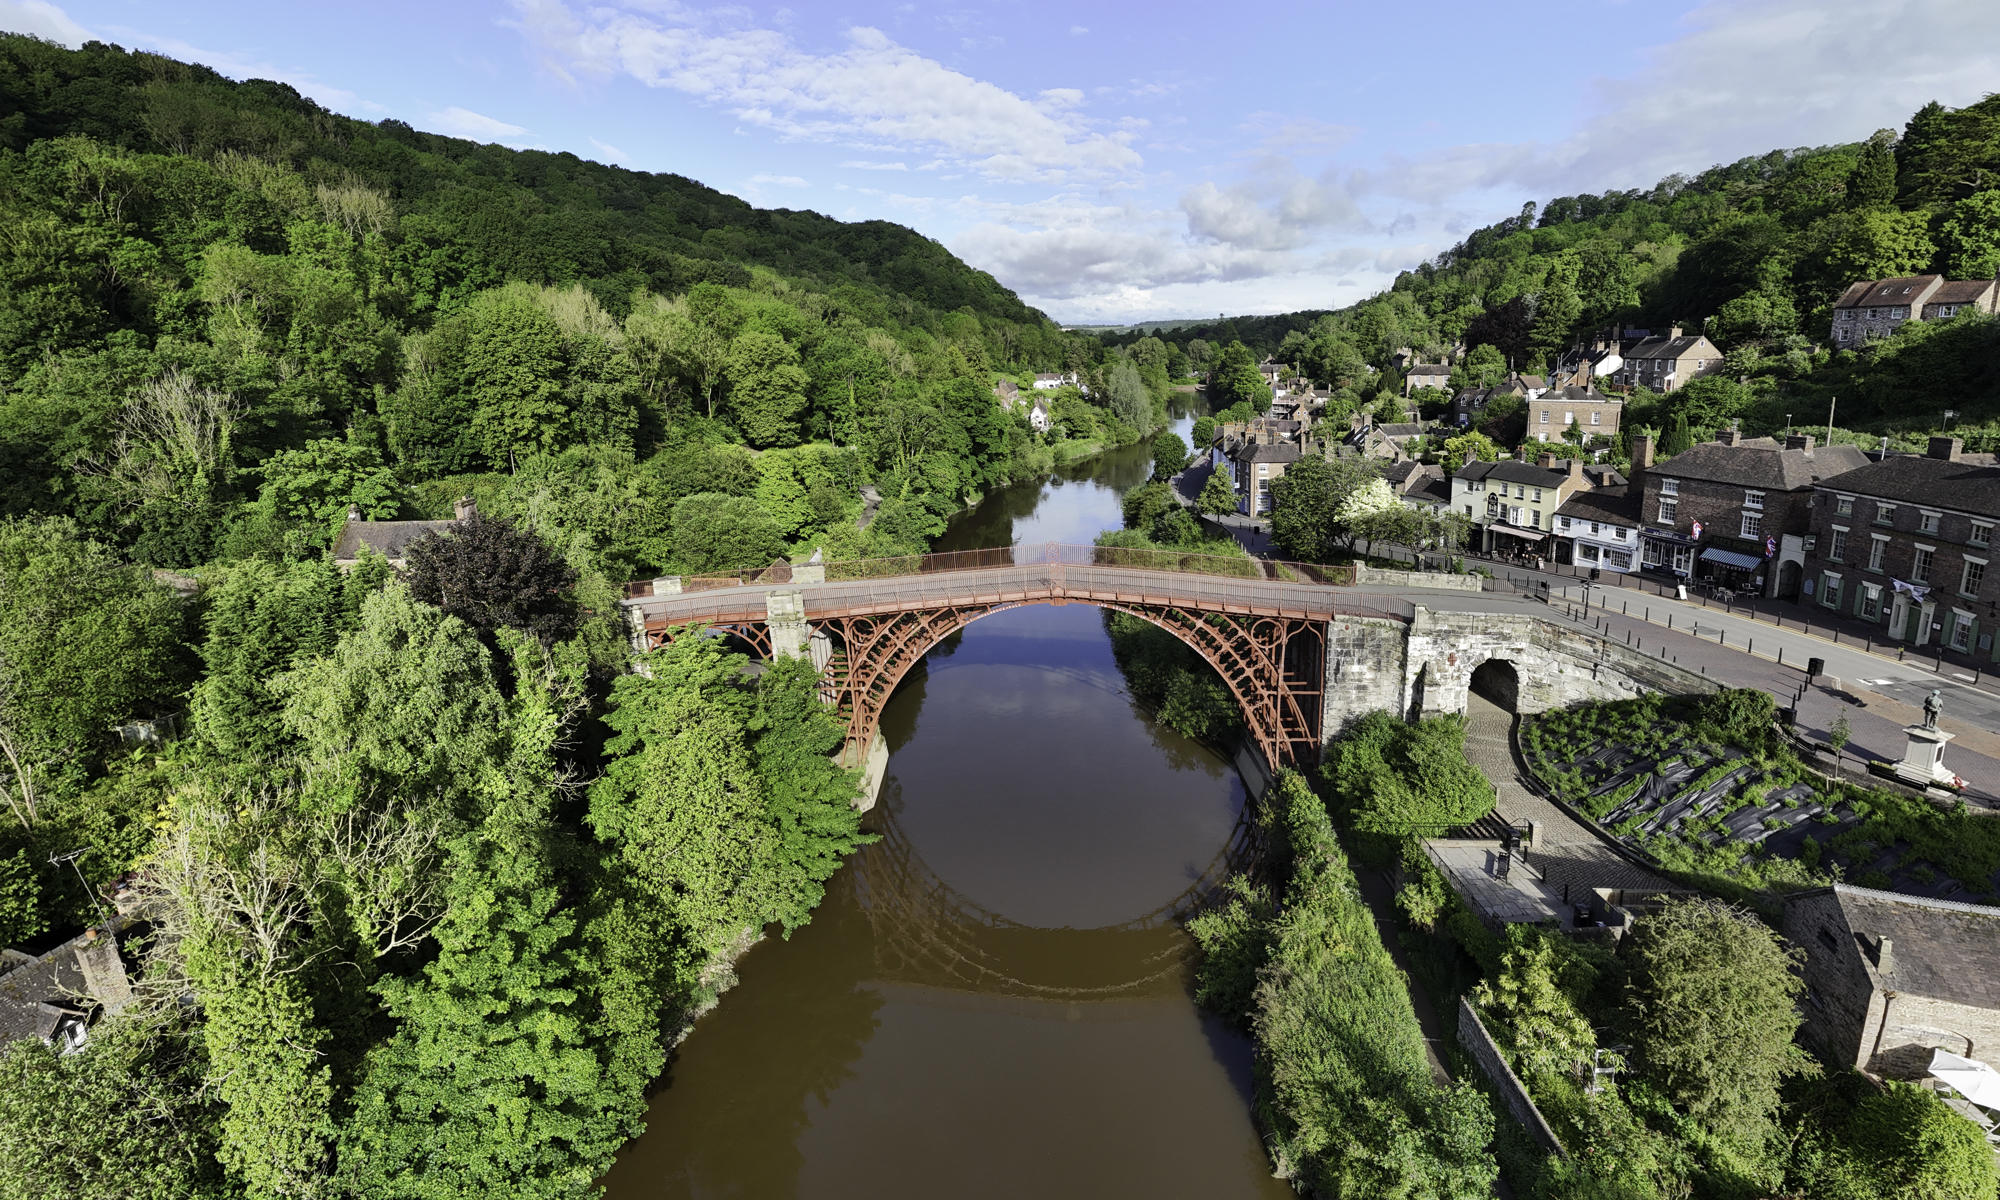
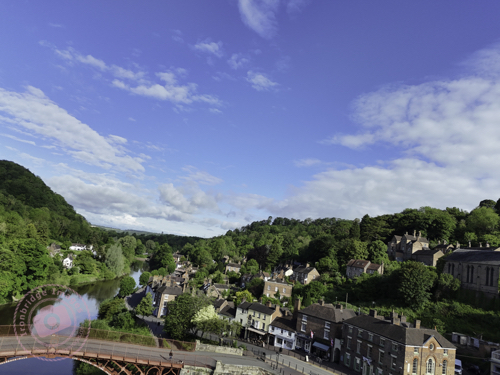
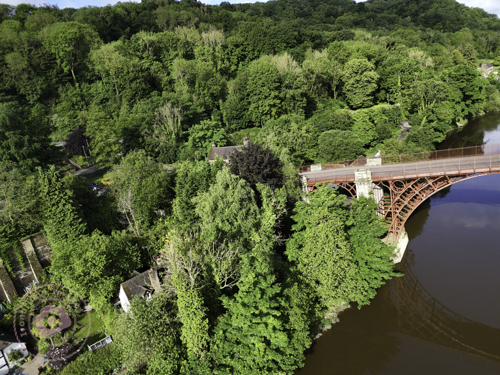
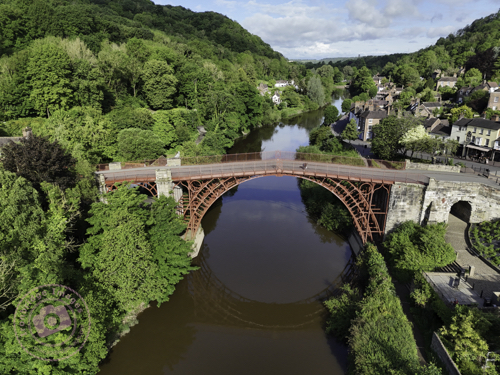
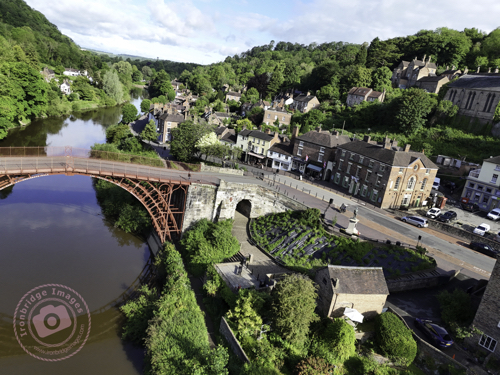
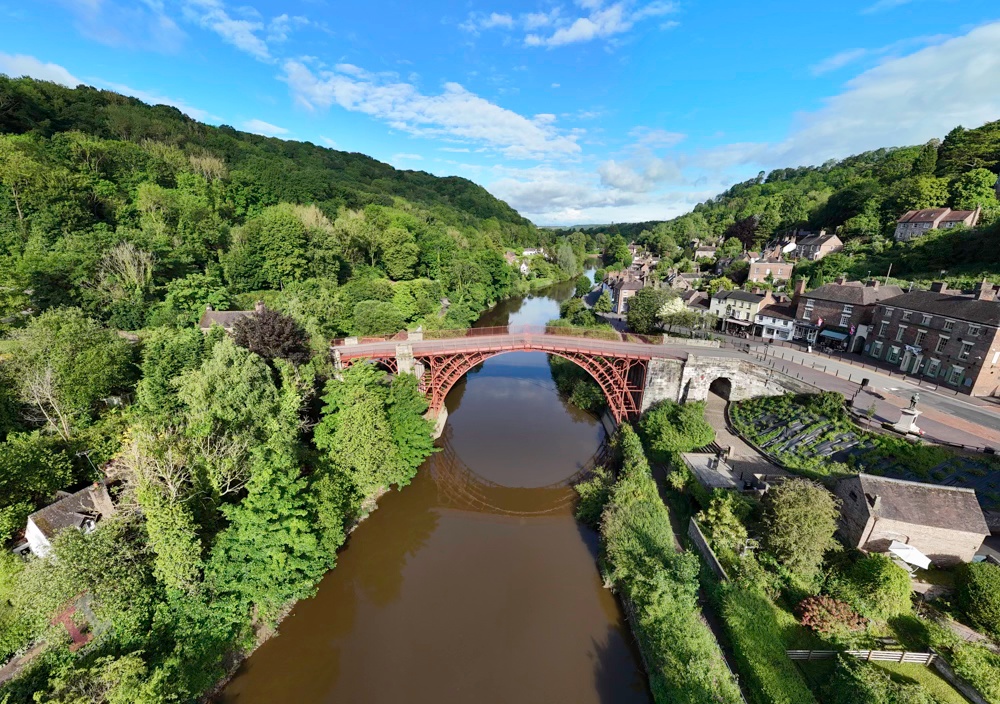
Yesterday I managed to complete another task off my to-do list; and took a photograph in order to create new headers for my website and Facebook page. The dimensions for both are quite specific (and different to each other) and it required a wide-angle shot so that it could be cropped quite heavily to suit the size and aspect.
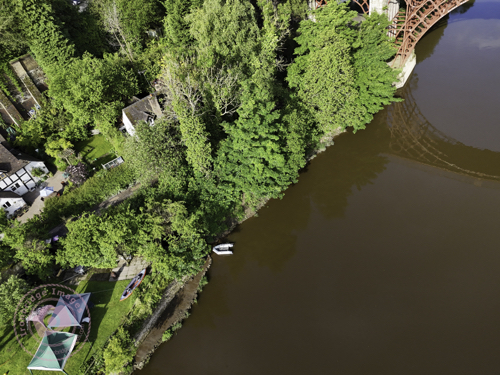
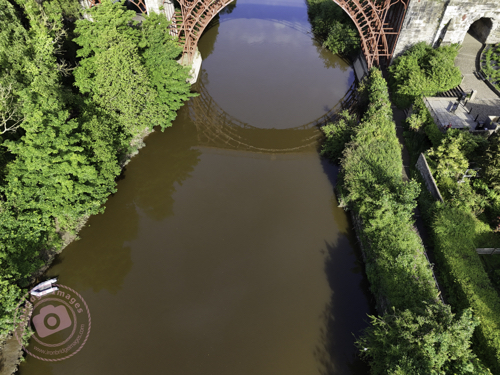
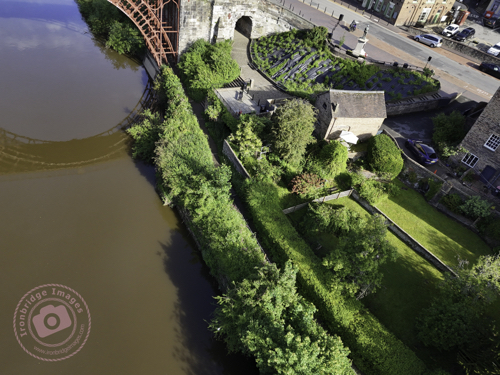
I wanted an aerial shot of the Iron Bridge, and so this either meant taking it from a long way off (and then losing detail) or using the panorama function of my DJI Mini 4 Pro drone – the latter turning out to be the ideal choice.
Even though it was 8.30am on a Bank Holiday, it was surprisingly quiet and deserted, and therefore ideal to fly the drone from a seating area directly in front of the bridge. There are four panorama options on the drone; Sphere, 180o, wide-angle, and vertical, but my preferred one, that produces a more natural image without too much stretching of perspective, is the wide-angle – which takes 9 shots in succession and seamlessly stitches them together (within the drones software) to create one large image. You can then output not only the large panorama image, but also the 9 individual shots.
And here is the complete panorama, which I later cropped to produce the headers for my website and Facebook page:
Iron Bridge Panorama
Please don’t forget to visit my new Facebook page and give it a ‘like’. Thanks
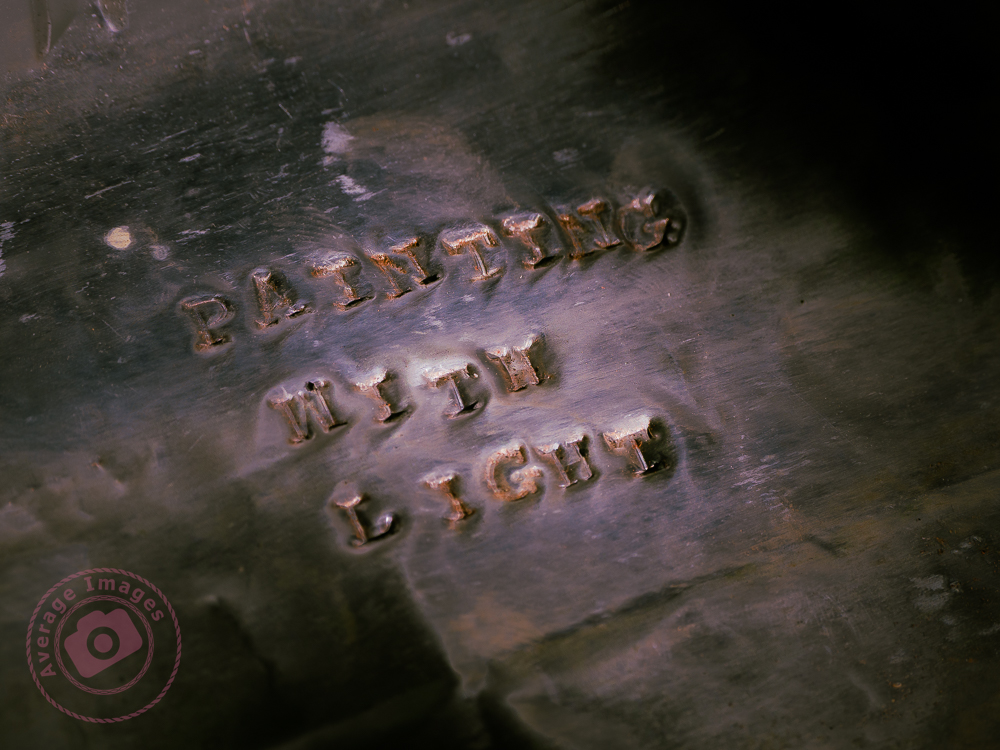
So, ‘that’s a wrap”, as I believe they say in the film industry. This is the final post in my Painting with light series, but before I sign off, here are some advanced tips and tricks to make your Painting with lightstand out from the crowd:
Don’t just shine your torch whilst standing behind your camera; the image will look flat and 2-dimensional. Move to the sides and paint the light from there. This will bring out shadows and texture to give the image depth.
Don’t paint the light from the same height every time. Stoop down or hold the torch above your head to vary the direction of the light beam. This will also give depth to the image.
Move the beam of light in strokes (a bit like a paintbrush) – slow, overlapping strokes to create brighter areas, and faster, sparser strokes for duller ones. The image will be far more interesting with varying intensities of light.
Keep the light moving at all times to reduce the chance of hot spots.
Remember that different surfaces react differently to the light; dark, rough surfaces require more lighting than pale, smooth ones.
Unless you are standing directly behind something solid, don’t point the torch back towards the camera otherwise you will create flare (or use a modifier).
Try to include some ambient light into outdoor images, maybe the faint glow of the sky, moonlight or stars.
Used coloured gels to create interesting variations in the lighting of your image.
And some post-processing tips:
Take many shots of small areas of the scene to create multiple layers – you can then adjust each one individually to create a detailed final image.
Create a layer mask for each layer and paint out everything other than the torch-lit area. This gives you full control of each element of the final image.
Vary the opacity to reduce the brightness of each layer to change how imposing they are in the final image.
Create an individual adjustment layer for specific layers so that you can change the exposure, contrast, light balance and even colour.
Keep your monitor clean. When working with very dark images, every smear or speck of dust shows up – and I’ve lost track of how many times I’ve tried to remove a blemish using Photoshop only to find out it’s actually on my monitor!
You can keep up-to-date with all of my blog posts by subscribing for free to receive updates via your email inbox or the Reader app:
Lighting a close-up with Painting with light is far more difficult than with a still life or landscape shot – it is very easy to over-expose the shot and far more difficult to limit the amount of light over-spilling onto an adjacent area. For the shot below, I only managed 6 shots before I had lit every area, compared with over 20 in some of my earlier blog post shots. I used my small snoot tool, but possibly need to create an even smaller one for future close-up shots.
Other than that, Painting with light for close-up (or macro) shots is pretty much the same as with a landscape: take multiple shots with different areas lit, and then combine the shots in post-processing.
I have an old bench-top lathe that belonged to my father (who was a watchmaker) that he utilised to turn down new watch cogs when a direct replacement wasn’t available. It was his pride and joy for many years, and my mother used to joke that if he ever left home, the first thing that he would pack would be his lathe.
I decided, for this shot, to photograph a close-up of the lathe with a small watch cog and use the Painting with light technique to illuminate the scene. At the same time, I wanted to try out a function on my Olympus E-M1 Mark iii, called Live Time.
Live Time allows you to watch the exposure gradually develop on the Live View screen. Basically you use the cameras Bulb mode and press once to open the shutter, and press a second time to close it. When the shutter is open, you can shine your torch at the subject, whilst watching the screen to see how the exposure looks, in ‘live time‘. It worked quite well, albeit that the exposure times were quite short because of how close the light was to the subject. It may work better with still life shots, although not so effective with landscapes, when you need to leave the back of the camera in order to operate the torch.
There is another function on the camera called Live Composite. This works in a similar manner and is something that I will try out in a later blog post.
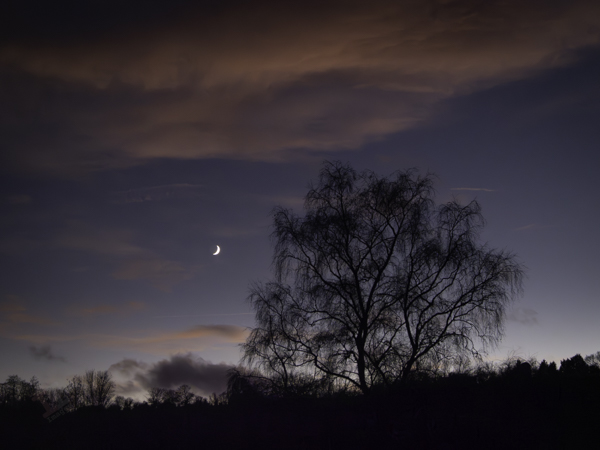
As I was on the way back home this evening, I noticed that there was a beautiful sunset developing with a Waxing Crescent moon, and so I took a few shots with my OM-D E-M1 Mark iii. This is one of the many advantages of this small camera – I can quickly take it out of my shoulder bag and grab shots that I may have previously missed. I unashamedly admit to having it set on program mode as standard, on the basis that the small, but powerful, onboard computer chip will, 98% of the time, make a better, and quicker, judgement about exposure settings than I will – thus allowing me to concentrate on the composition. I know this will have many ‘serious’ photographers spluttering into their milk, but I also admit that I drive an automatic car and write this blog post with a computer and not a quill and ink.
Waxing Cresent Moon
As I uploaded these images I remembered a few I took earlier in the week of our Christmas decorations. These may be future stock images but it’s too late for this year and so I’ll upload them ready for Xmas 2024.
As you may have gathered from my post Warning Light I have recently purchased a Wacom Intuos Pro graphics tablet to aid with my Painting with light composite post-processing. I chose to buy the ‘small’ version which has a working area of 6.3 x 3.9 inches (160mm x 100mm). To me, this is a more than adequate size to be able to work without moving my hand around too much, and is pretty much the same area that a mouse covers on a mouse mat. Even so, the actual tablet itself is still about the size of a piece of A4 paper, and I have seen numerous reports from people who have bought the (larger) medium size and then wished they had gone for the small instead for precisely these reasons. Bigger isn’t always better!
Note: There is a difference between a graphics tablet and a drawing tablet. Graphics tablets have no screen, and you need to work with a computer monitor to see what you are doing. Drawing tablets have their own screen, and so you can work directly on them.
Wacom Intuos Pro (S)
The tablet itself plugs into the computer via a supplied USB cable (it can work via Bluetooth but then you have to purchase an optional battery) but the pen requires no batteries or charging. There is a nicely weighted stand for the pen (it advises against standing the pen up in storage to prevent wear & damage of the nib) which also acts as a storage compartment for a range of spare nibs and a nib removal tool. There are black nibs, white nibs and a spring-loaded nib – I have no idea what the difference is between them but will try them out in due course. There is also a handy storage bag to keep the surface of the tablet dust-free when not in use.
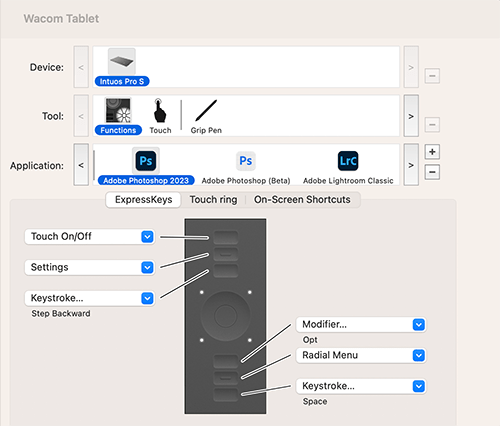
Wacom Tablet software
The driver and software are simply downloaded from the Wacom website and allow a multitude of customisations to the way that the tablet & pen work and feel. So far I have pretty much left it at its factory settings but maybe after prolonged use I may feel the need to add some customisation. Interestingly, you can have different customised settings for different programs; so you can have one set for Photoshop and another for Lightroom, for example.
I still find that I instinctively use my mouse and so I’ll really have to make the effort to use the tablet until it becomes second nature.
Mention IBIS, and some of you may think of the French budget hotel chain of the same name; others may think of the heron-like wading bird. Photographers, however, think of In Body Image Stabilisation, which works by physically moving the sensor within the camera to counteract any movement created by the photographer. This then enables longer shutter speeds when hand-holding the camera.
Although it is often described as a new innovation, every Pentax DSLR that I have ever owned had IBIS (they call it Shake Reduction) – which works using built-in gyroscopes to provide stabilisation across the 5 axis: Yaw (left & right twist), Roll (back and forth rotation), Pitch (side to side rotation), Horizontal (side to side) and Vertical (up and down).
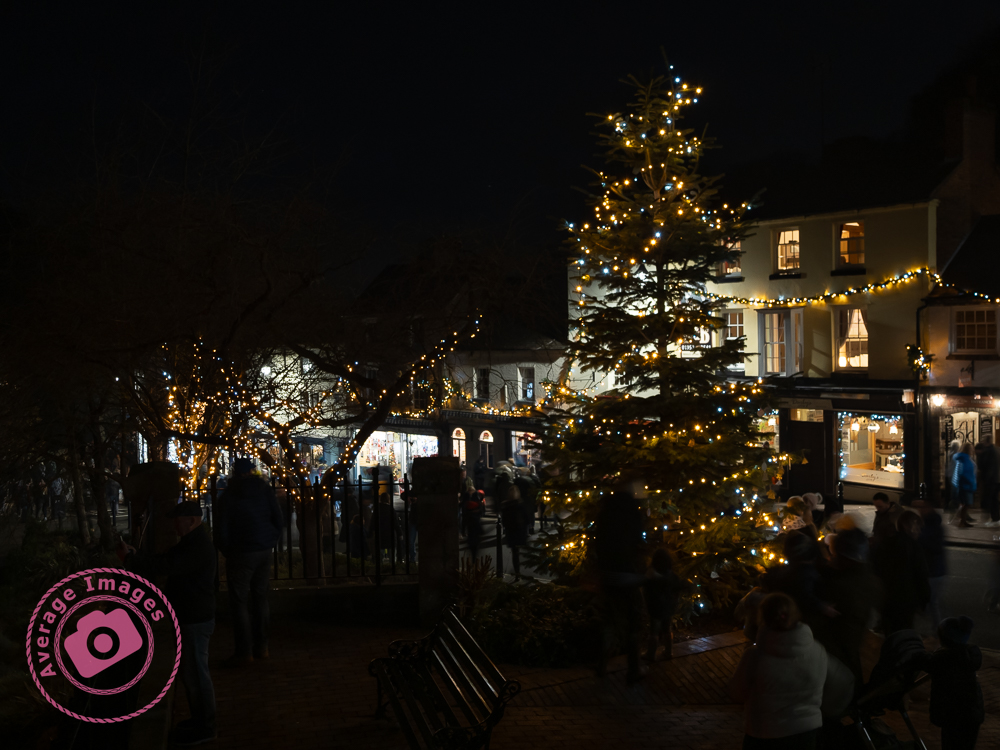
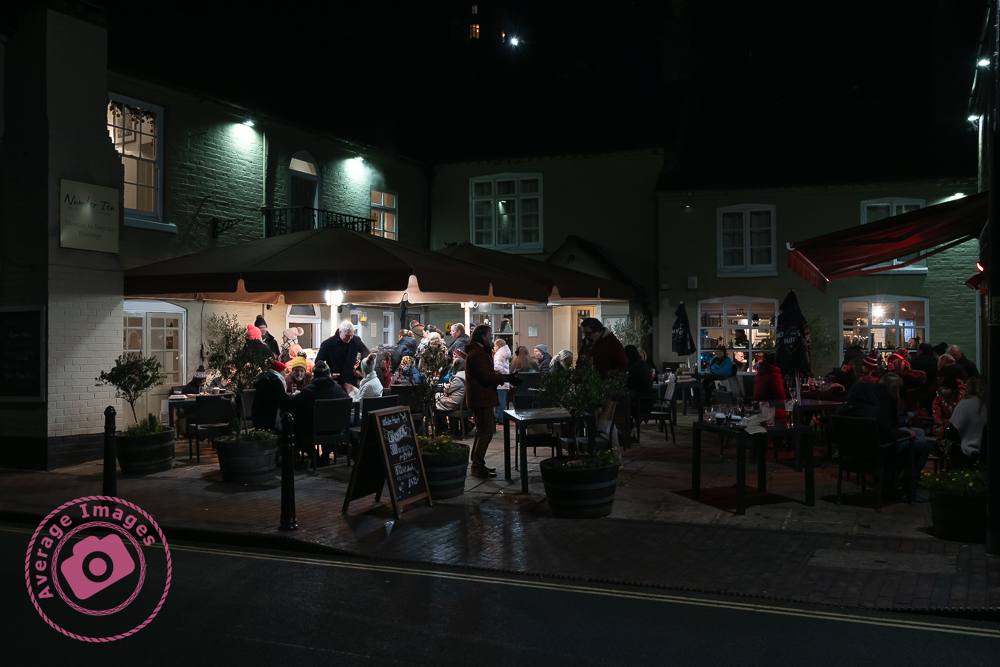
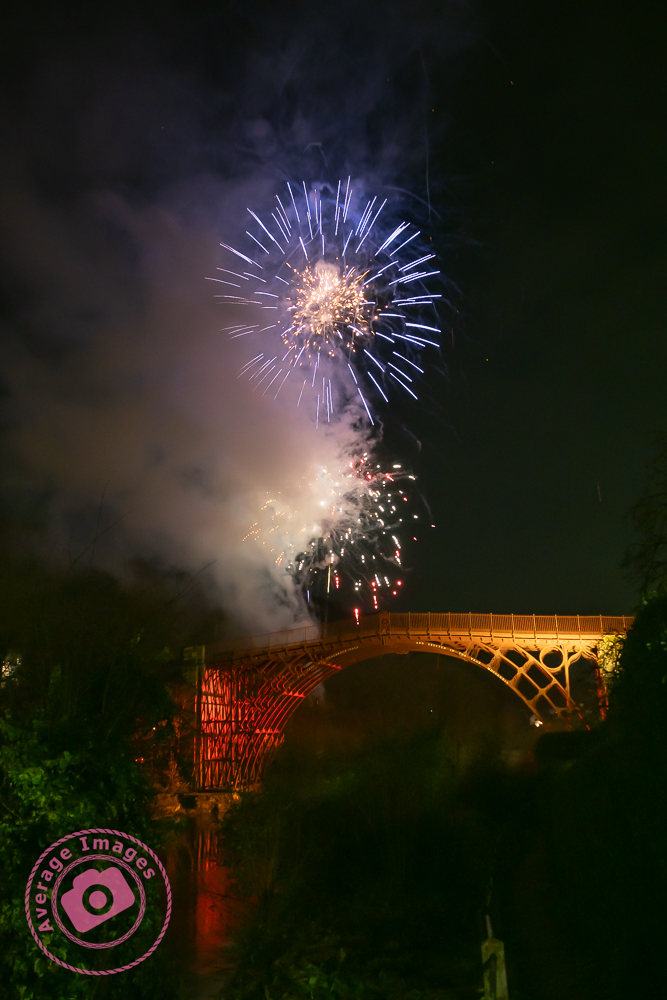
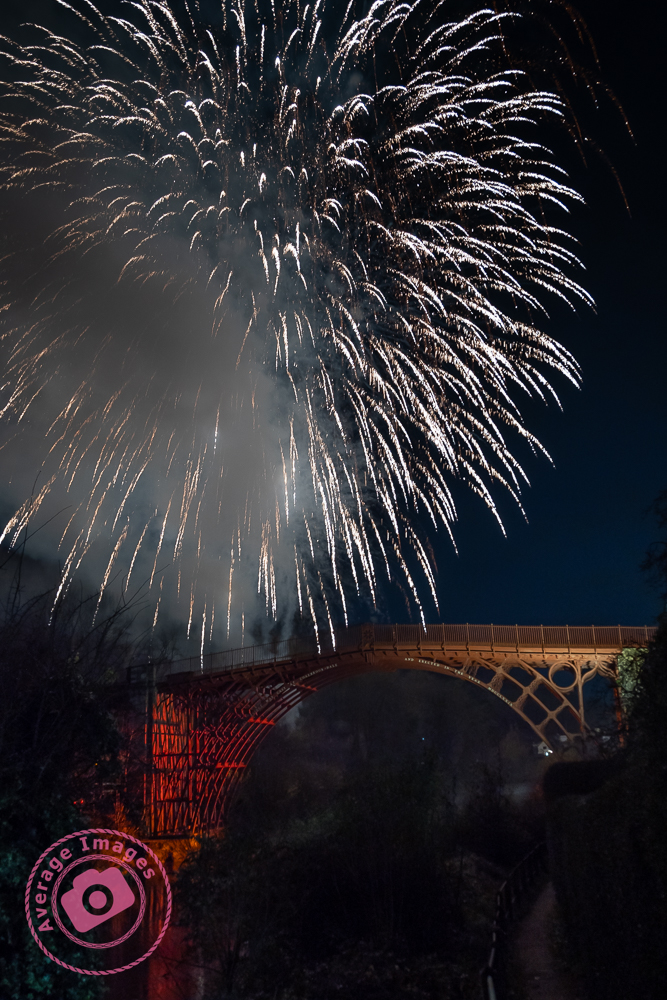
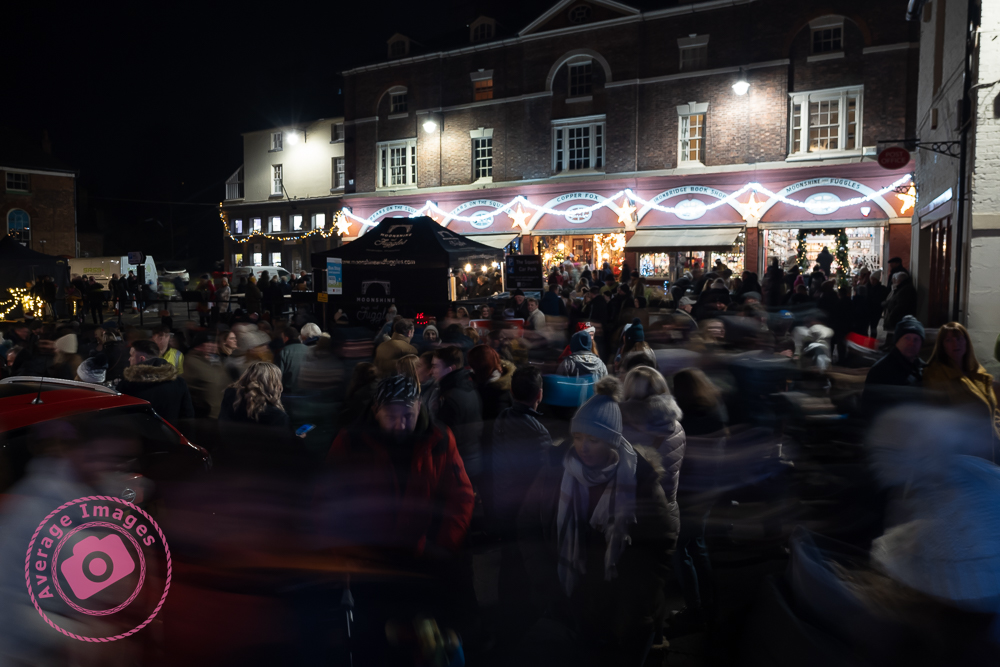
The Olympus OM-D E-M1 Mark iii also has IBIS, which provides up to 7.5 EV of shutter speed compensation when combined with an image-stabilised lens, such as the Olympus M.Zuiko ED 12-100mm f/4 IS PRO. I put this to the test last night when I attended the annual Christmas lights switch-on at nearby Ironbridge town in Shropshire.
To be honest, I wouldn’t usually take any photographs at such events, mainly due to the need to use either a tripod or a flash gun, but this was an opportunity to try the camera hand-held in some pretty testing light conditions, and it didn’t let me down.
Footnote: The Olympus OM-D E-M1 Mark iii also puts the IBIS technology to another use: ‘High Res Shots‘, but I’ll cover that in a later blog post. You can find out when if you subscribe:
For my Painting with lightcomposites, I use Adobe Photoshop to blend two or more images together, but I often find that using a mouse is not very accurate – which can be annoying, especially when making detailed adjustments. I was therefore toying with the idea of buying a graphics tablet – but a decent Wacom Intuos Pro is £200 just for the small one, which is a lot to spend if I subsequently found I didn’t get on with it (I should mention at this point that many years ago I had a graphics tablet but never really used it – although I wasn’t using Photoshop in the same manner back then, and it was only a cheap one).
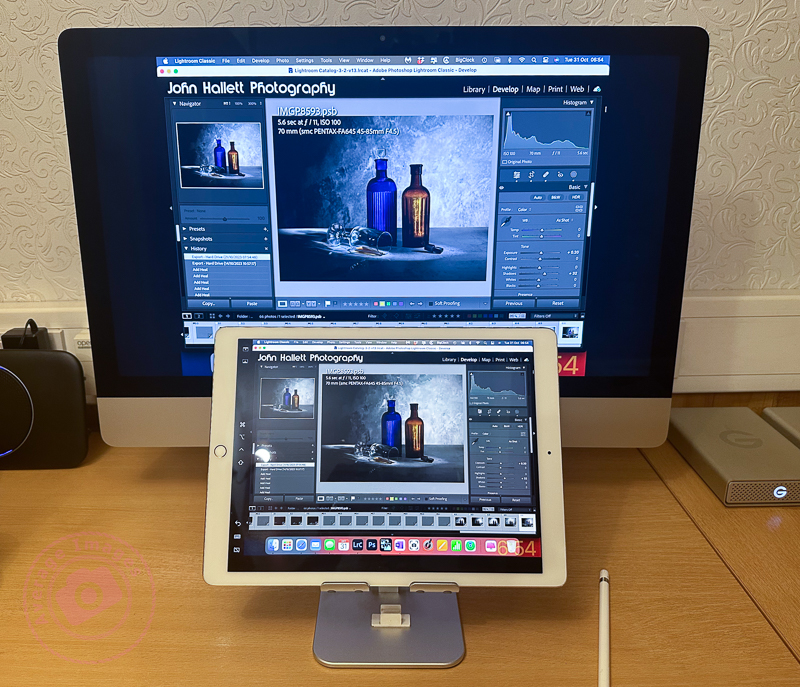
As I was reviewing alternative models, it reminded me that I could use my iPad, not only as a second display but also as a second input – thus also utilising my underused Apple Pencil. Now I had already tried this before and was less than impressed. However, I had heard that the process has improved with later software upgrades, so I decided it was worth another try.
These are the minimum requirements in case you are considering trying the same thing: You will need to be running MacOS Catalina or above on your main computer and iPadOS 13 or above on your iPad.
As soon as I tried it, I remembered why I didn’t like it the first time. If I set the iPad as a duplicate monitor, the aspect size on the primary monitor changed to suit the aspect size of the tablet. The program screens also moved into new positions, which meant relocating them before starting. The editing itself worked OK once everything was in the correct position (see below) but it was somewhat disconcerting to have the program screens a different size and position from normal. If I set the iPad as a secondary monitor, I then had to drag Photoshop onto the tablet and do the editing on that. Although the Apple Pencil gave much better precision than a mouse, I was now working on a much smaller screen – which was all somewhat counterintuitive.
Duplicating the monitor on an iPad
The other problems were that the Apple Pencil isn’t detected until it actually touches the screen, which means you are working ‘blind’ when trying to locate the pencil on the image to start editing (this is worst when using the duplicate monitor setting, and you are using the pencil on the iPad but looking at the image on the primary monitor) – and that the area being edited by the pencil didn’t seem to match the position of the cursor exactly which created some error when making fine adjustments.
Unfortunately, despite trying hard to make it work (I really wanted to find a good use for the Apple Pencil), I ultimately decided there were too many compromises. I therefore took the plunge and ordered a Wacom Intuos Pro. Look out for the follow-up blog post to find out how I got on.
As you do more Painting with light, you will probably start to discover some of the shortcomings of working with your torches – particularly doing still-life indoor shots when the beam of light may be too broad and too strong.
This is where light modifiers come in very handy. As the name implies, they modify the light from your torch to make it more suitable for the task at hand. Of course, you could buy a range of torches with different types of light beams, but that would be rather expensive, alternatively you can make the modifiers below very cheaply and easily.
Light fitting sleeve:
I do suggest that before you start making any light modifiers you think about how you are going to attach them to your torch. You may think that just holding them on, or taping them on each time, will be sufficient. But remember that you are going to be using them in the dark and, if outside, probably in the cold as well. Therefore try and choose a torch that will accept a tubular sleeve so that you can just slide it on and off.
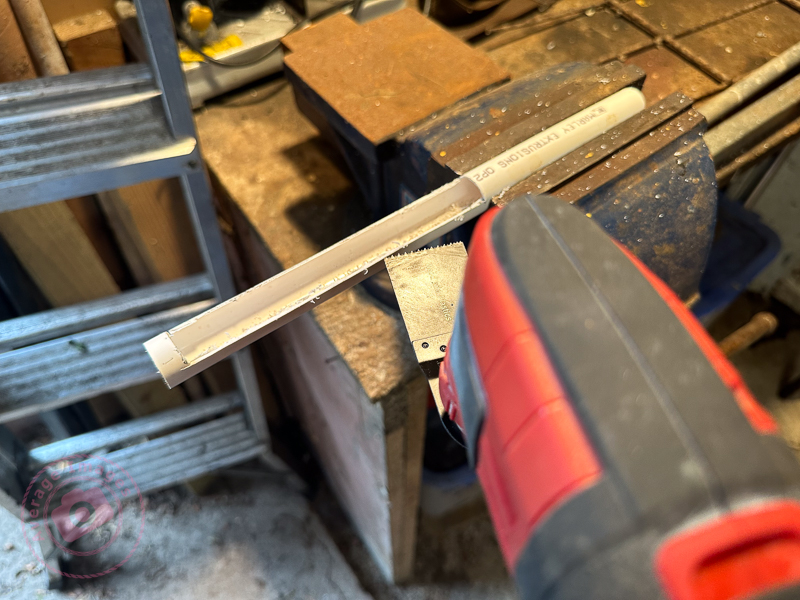
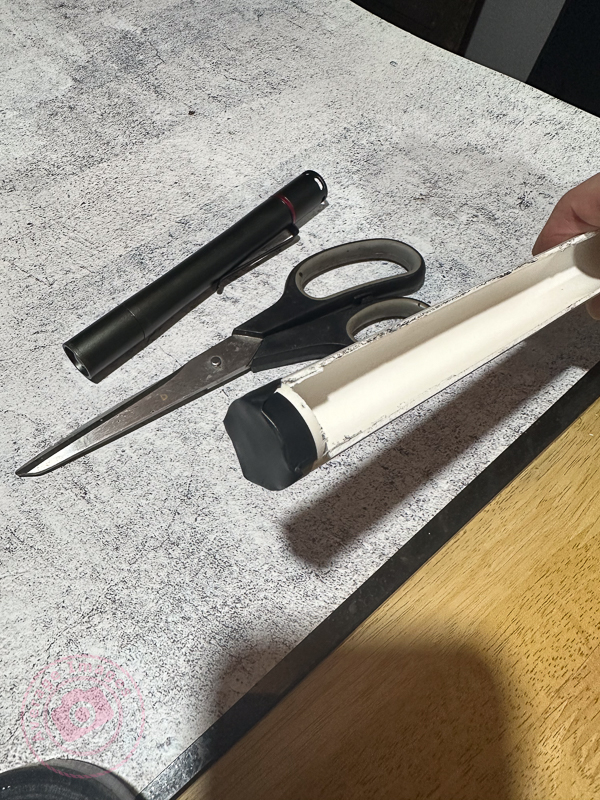
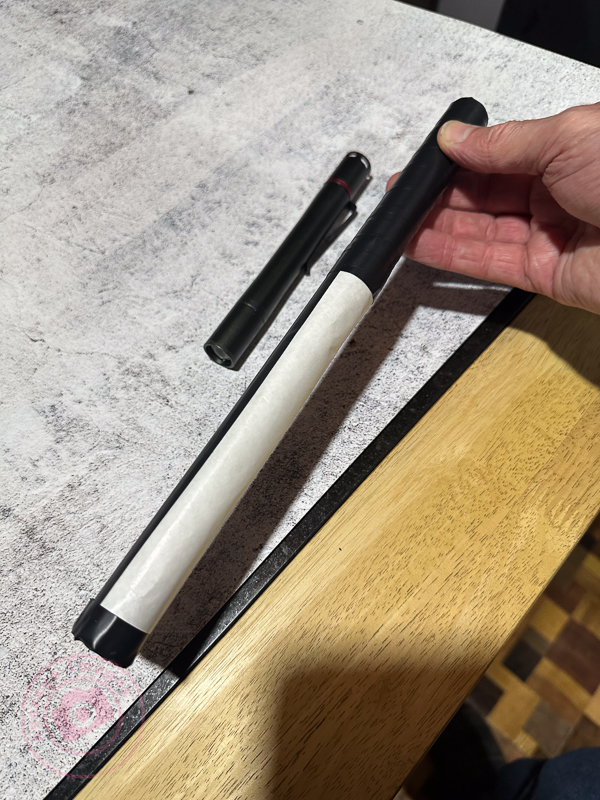
In my case, I found a length of plastic conduit pipe in my shed, which had an inside diameter that exactly matched the diameter of my Scangrip Matchpen pen torch. It was long enough to be able to cut multiple lengths so that each of my modifiers can be permanently attached to one. If you aren’t fortunate enough to find a piece of tube of the correct diameter then use some cardboard core from inside a kitchen roll, cut it through lengthways and then roll it to the diameter that you need and tape it up.
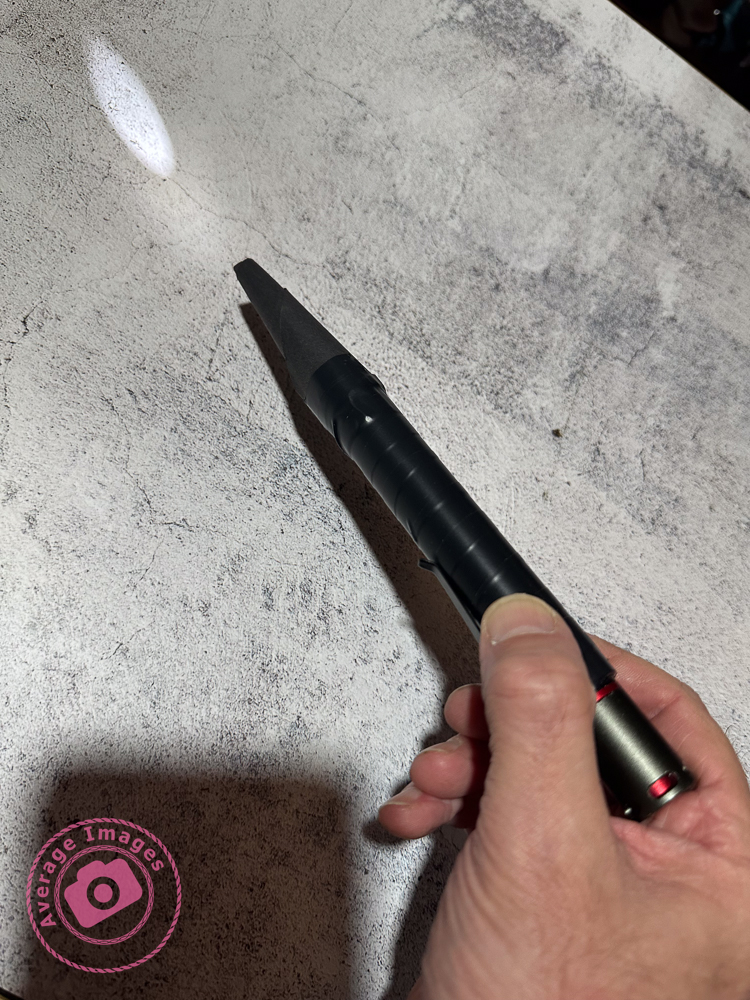
Snoot:
A snoot is a funnel shape and narrows the light beam down to allow you to finely light individual areas for detail. These are easily made with card (or thick paper) rolled into a conical shape. The cone can then be simply cut with scissors to match the light fitting sleeve at one end and the size of the desired light opening at the other.
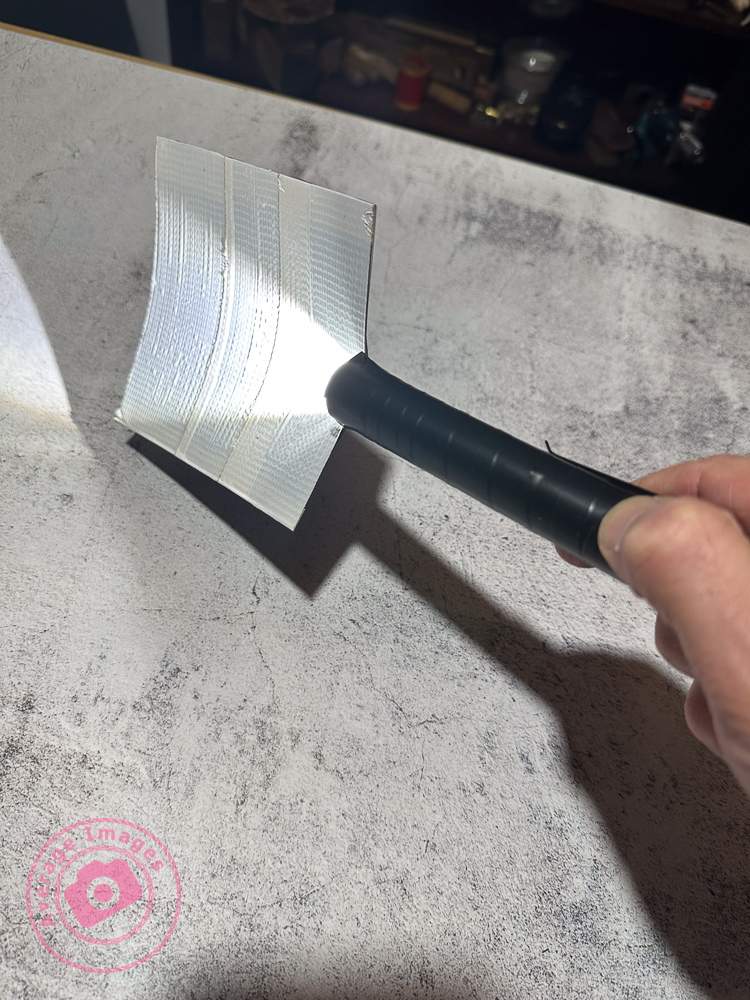
Shield:
If you are trying to back-light an object with the torch facing the camera you will get light trails showing in the image. To prevent this, make a shield which will hide the end of the torch. This is simply a flat, rectangular, piece of stiff card, attached to a light fitting sleeve. The size of the rectangle is largely down to personal preference.
Wand:
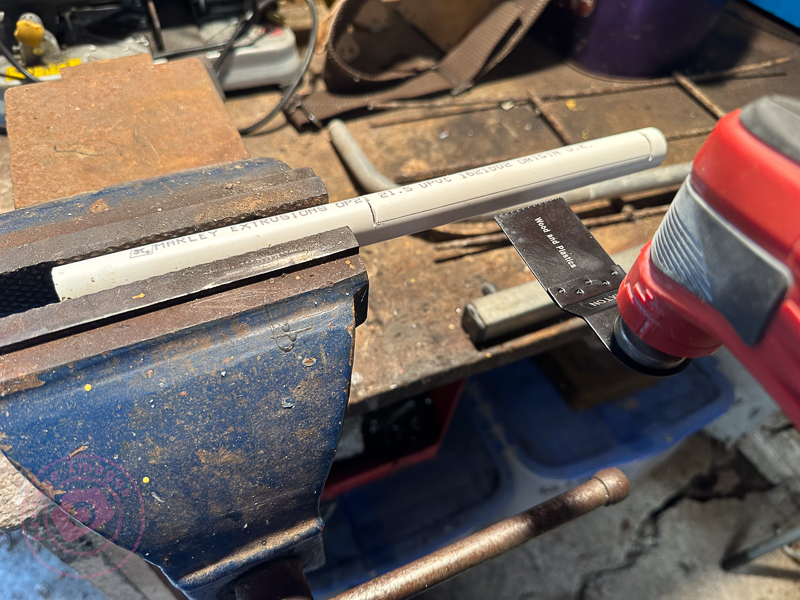
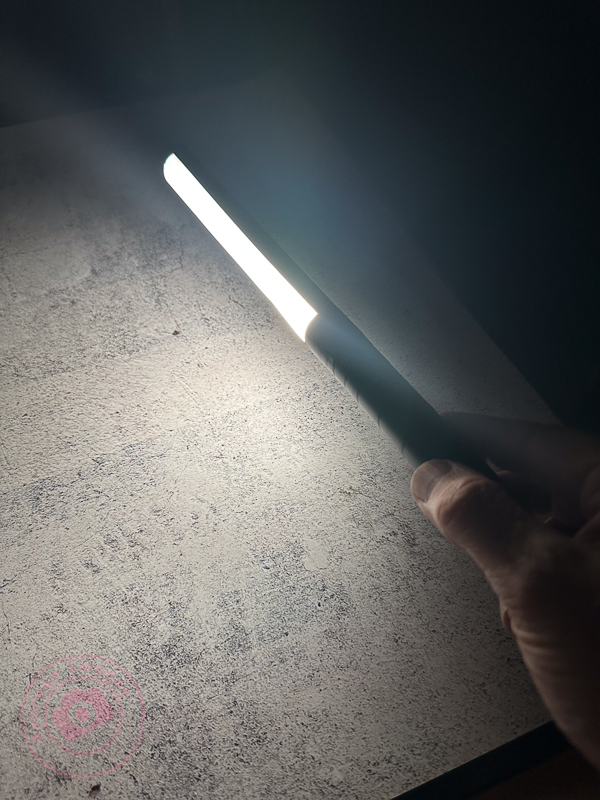
When doing still-life images and working quite closely to the subjects with your torch, it is easy to get ‘hot-spots’ of light, and very harsh shadows, which are difficult to blend in during post-processing. To prevent this, use a light wand – a long strip of diffused light, which you can ‘wave’ over the subjects. You can buy them, of course, but you can also make one very easily with just a few tools.
Take a length of white plastic tubing (look in the plumbing or electrical section of your local DIY store) and cut a suitable length that will attach to your torch but leave about 30cm for the actual light wand.
You then need to cut a slot down the length of the tube, whilst leaving the ends intact to maintain its shape. I used a multi-tool but you could use a sharp knife, if you are careful.
Don’t forget to seal the end of the tube to stop the light coming out
Cover the slot with a diffusing material (thin tracing paper or baking paper works well). Then wrap the rest of the tube with non-reflecting black tape. I used electrical insulating tape.
When using a light wand you will have to spend a lot more time than with your torch alone to get the same exposure, due to the light being diffused.
Prevent reflections:
In all cases, cover all of the outer surfaces of the modifier with black tape to prevent reflections on the surface being picked up during a long exposure.
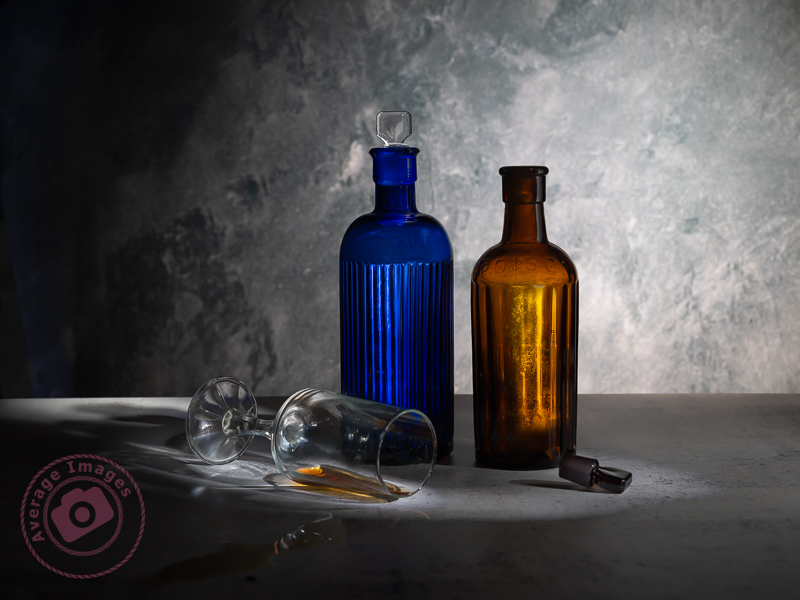
The shot Poisoned Chalice (above) was lit using my set of modifiers to control the light. Curved glass is notoriously difficult to light successfully because it readily picks up reflections from any nearby light source and I found that painting with light (with modifiers) was considerably easier than using strobes in this situation.
“Blinded by the light’ was a song written and performed by Bruce Springsteen in the early 1970’s although it was subsequently sung (albeit modified) by Manfred Mann’s Earth Band, which is the version that most people recognise.
In my previous blog post Panic at the packaging factory? I mentioned that I had used Photoshop to fill in the gaps in the upper corners of an image background. Due to the short time I had to finish the job, I used the eyedropper tool to sample the background colour and then painted in the corners using a brush. This worked fine because the background was almost white, and there was no significant colour gradient next to the area I needed to fill.
I was subsequently asked to create some similar shots and, with more time to do the post-processing, decided to try the Generative Fill option in Photoshop instead. This is a relatively new and powerful update, but what I wanted it to do was just the tip of the iceberg of what it can potentially add (or take away).
Generative Fill is available from Adobe Photoshop version 25.0 onwards.
As shot
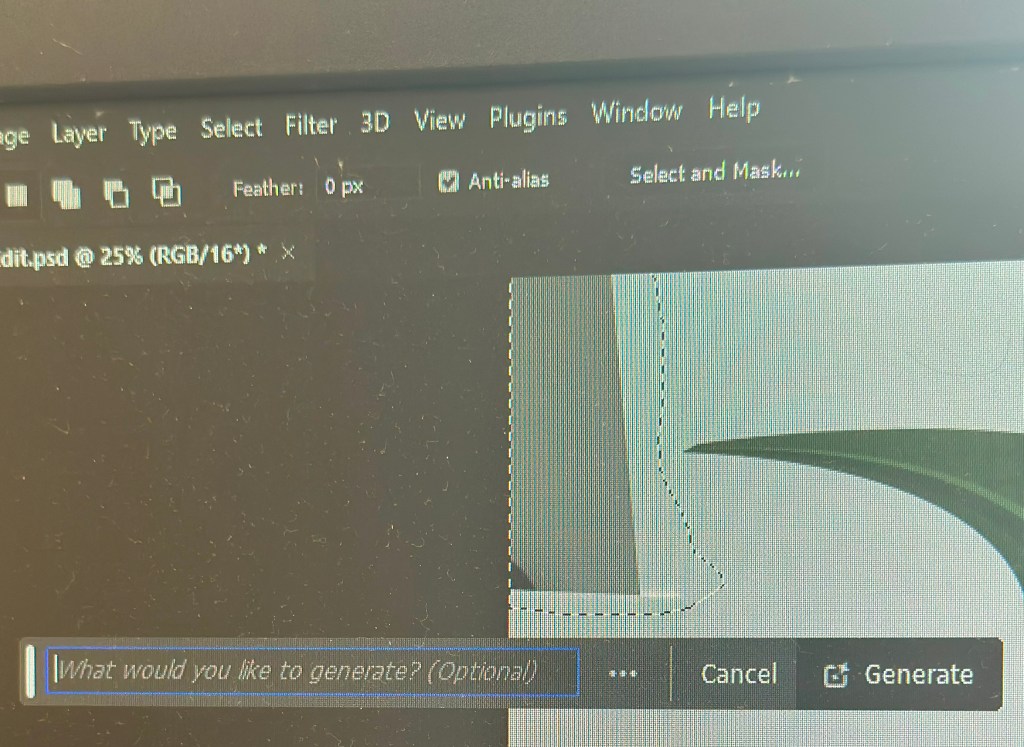
With the image open in Photoshop, I needed to select the area with the missing background, so I chose the lasso tool and traced around as close as possible. As I completed the selection, the floating Contextual taskbar automatically changed to the Generative Fill taskbar.
Note: If you can’t see the Contextual taskbar then click on Window in the Menu bar and look towards the bottom of the long dropdown list and make sure that Contextual Task Bar is ticked.
I pressed the Generative Fill button and then the Generate button. By leaving the “What would you like to generate” box empty, Photoshop automatically filled the area with content based on its immediate surroundings.
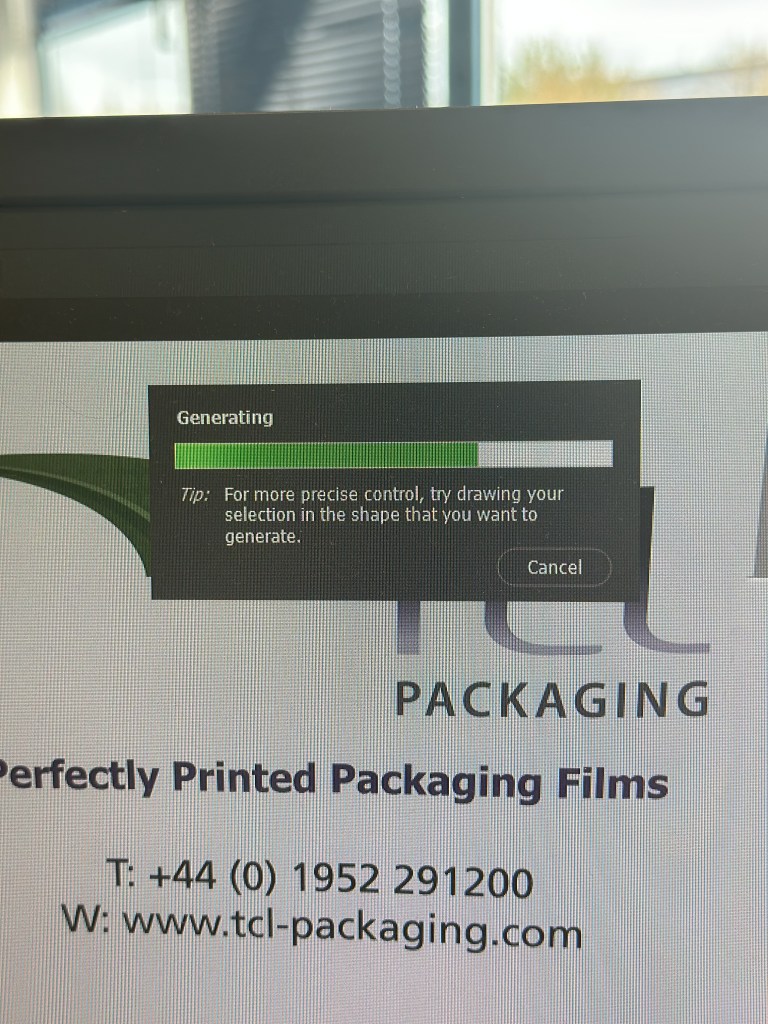
It takes a little time but this is indicated by a progress bar.
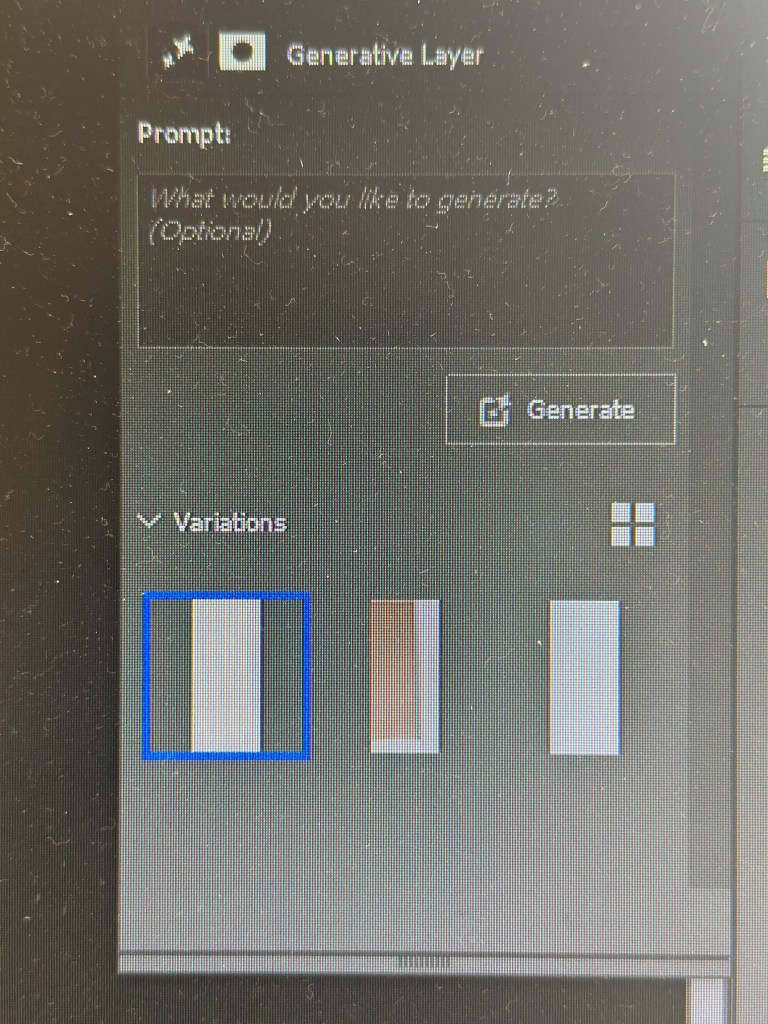
It will then apply the generated content onto the image, but also give you another two variations in the Generative Layer panel to the right. You can press Generate again if you are not happy with the initial three offerings.
The generated image is applied as a layer so you can always go back and change it later if you want.
Generative Fill uses Artificial Intelligence (AI) to decide what to add to the image. In the case above it was used as a shortcut to fill in an area of missing background, but, of course, it could have been used to add something else entirely, maybe something that may be seen as being slightly dishonest. This is the conundrum facing photographers: what is acceptable and what is not? Of course, this is not a new phenomenon; the Cottingley Fairies photographs from 1917 are early examples of ‘generative fill’, albeit without sophisticated software.
What do you do when you are asked to produce some marketing shots in an hour, and your photography gear is 5 miles away at home? Panic? No, improvise.
The finished piece
I used the camera in my pocket (my trusty iPhone), made a makeshift studio by setting up a table in one of the meeting rooms and purloined a marketing pop-up banner from the Sales department to use as a backdrop. It is 6 feet high, so I used some gaffer tape to allow it to remain ‘popped-up’ at a more practical 4 feet. It is also quite narrow and left areas on either side without any background, so I used some white foam board on both sides, knowing that I would need to blend them in during post-processing. I positioned the packaging samples in an arrangement that I thought was ‘artistic’ and used Portrait mode on the iPhone, which I know gives a good result for product shots, as well as people portraits.
Fortunately, I have both Lightroom and Photoshop on my laptop, and with two large monitors attached, I could do the post-processing immediately. Lightroom is more than adequate for these relatively simple edits, and I only used Photoshop to fill in the upper corners where there was no white background. For example, Lightroom’s healing brush made light work of removing the join between the two tables I used as a base.
As shot
The only slight faux pas was that when I emailed over the first proof, the comment I received back was that the editing of the background in the upper corners was noticeable. It had looked acceptable to me, but I quickly realised that the contrast on one of the monitors was set incorrectly and over-exposed my view during the post-processing. Once Lightroom was dragged over onto the other monitor, I could see the issue and was able to quickly adjust the exposure to rectify the problem.
Of course, it didn’t take long before I got the dreaded “while you are doing that, can you do this” and so I also ended up taking some individual shots ‘on white’. I used the two aforementioned foam boards in an ‘L’ configuration to make the background as light as possible and then, in Lightroom, used ‘select subject’, inverted it to select the background, and then over-exposed it to make the background completely white. Once again, Lightroom produced a result in seconds, formerly only possible in Photoshop. Five of the images are being used for a display stand at a forthcoming exhibition.
As shot
After Post Processing
Coincidentally, Lightroom had an update this week which added some more tools, including a beta version of lens blur. If only they could add layers, photographers wouldn’t need Photoshop at all.
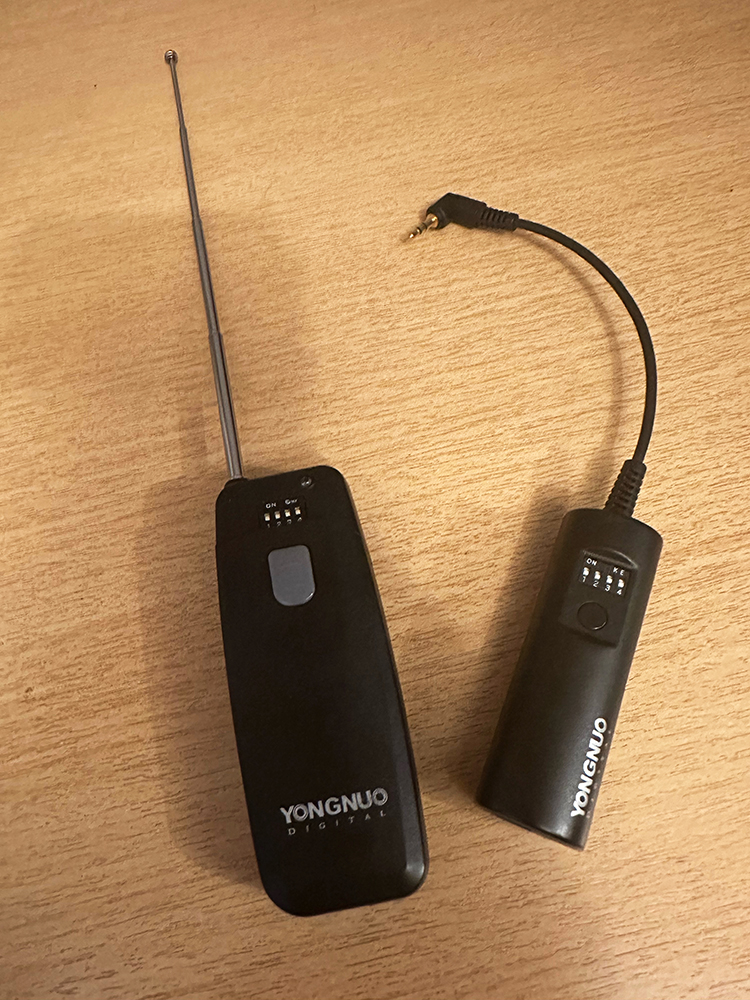
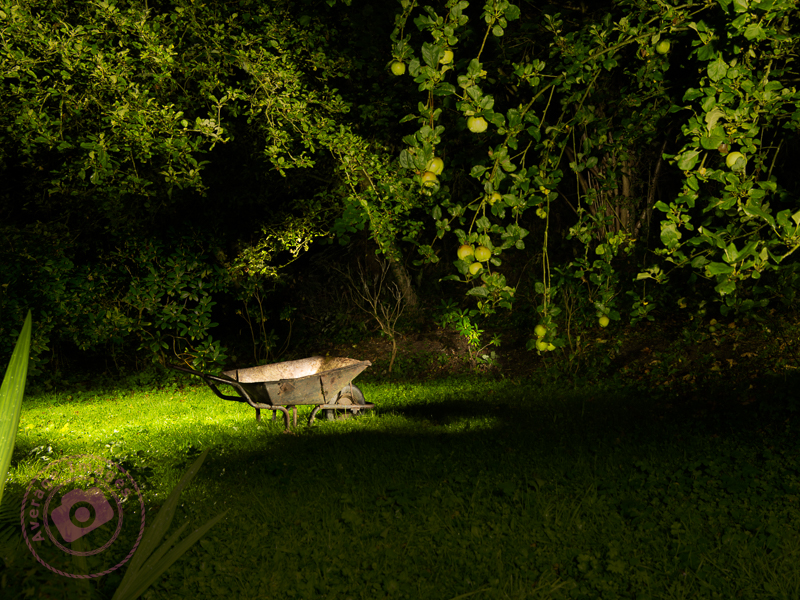
They always say that you should test any kit before you go on a shoot, particularly if it is the first time that you have used it. This was (kind of) the case on my first Painting with light photoshoot, when I tried my Yongnuo WRS II wireless remote as a shutter release.
I’ve had this for more years than I care to remember and I guess I must have used it numerous times in the past. But never with the Pentax 645Z camera and never, as far as I can remember, in bulb mode.
So, there I was, in a wooded area, in darkness, trying out my Painting with light setup for the first time. My first (background) shot needed to have an exposure time of 5 minutes so I activated the shutter with the wireless release and waited for the allotted time (which seemed to take forever when standing in the dark). When the time was up I pressed the release button on the remote release. Nothing happened. I tried again and then tried pressing the shutter on the camera. Nothing.
Incompatible with my camera
I looked at the top plate of the camera and it indicated that the shot was still being taken. I decided to turn the camera off. But still nothing happened – the LCD panel remained lit and the exposure time was still counting. With the camera turned off!
I had no other choice than to remove the battery from the camera. Fortunately, when I reinstalled it and turned the camera back on, all was well. I continued with the shoot but had to manually press the shutter on the camera each time – which meant fumbling my way back to the camera in the dark after each exposure. It worked, but it wasn’t ideal.
The next day, in the comfort of my home, I tried it again – but with the same result. I can only assume that the electronics of this particular remote shutter release are not compatible with the electronics of the Pentax 645Z when in bulb mode (it seems to work fine in any other exposure mode). It’s a bit of a shame, especially when I had just spent £7 on new batteries for it.
Fortunately I remembered that I had an infrared remote shutter release from a previous Pentax camera and tried that. The Pentax 645Z has a forward mounted sensor which means I can use it in front of the camera, and also a red flashing light to show when the shutter is activated, which will make it much easier in the dark to know what is going on. In hindsight, this infrared release may be a much better option.
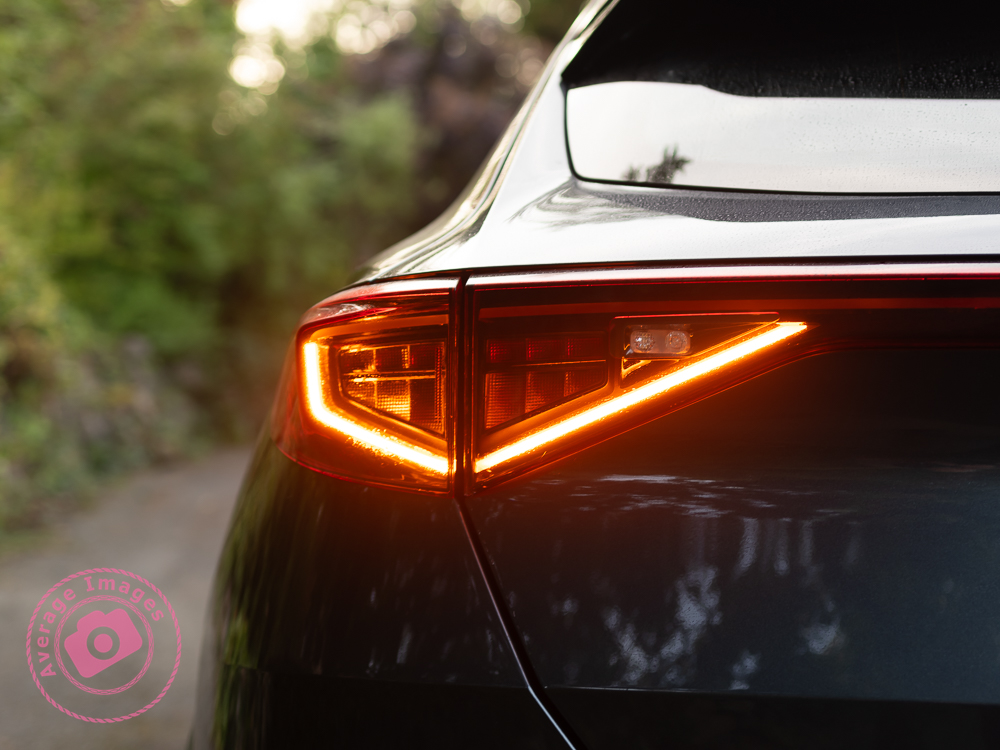
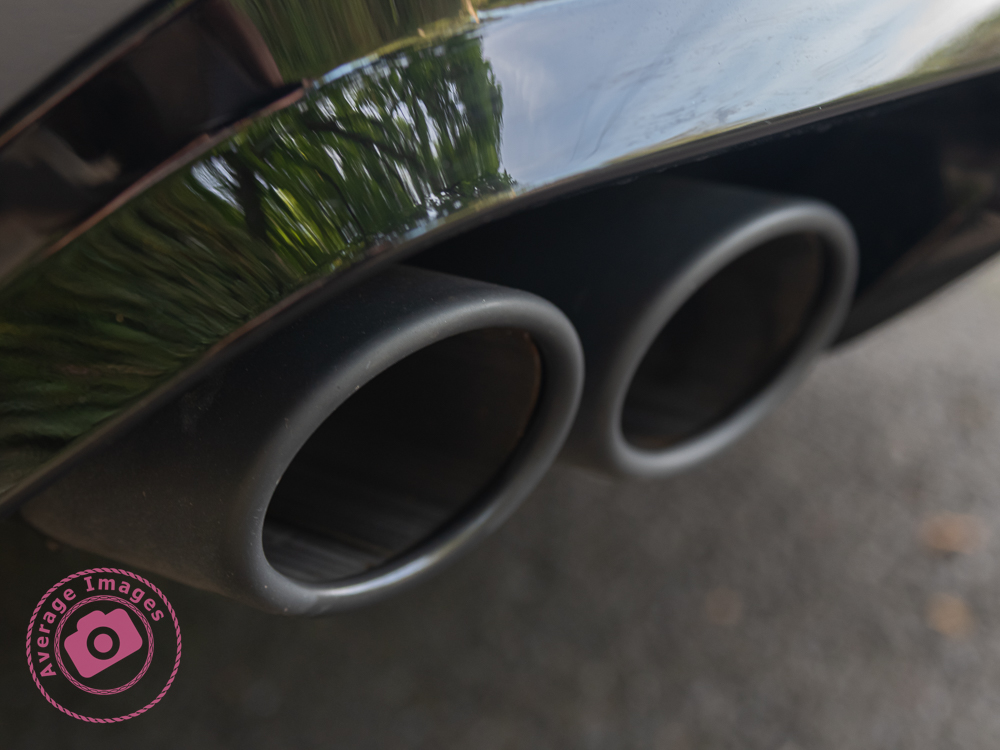
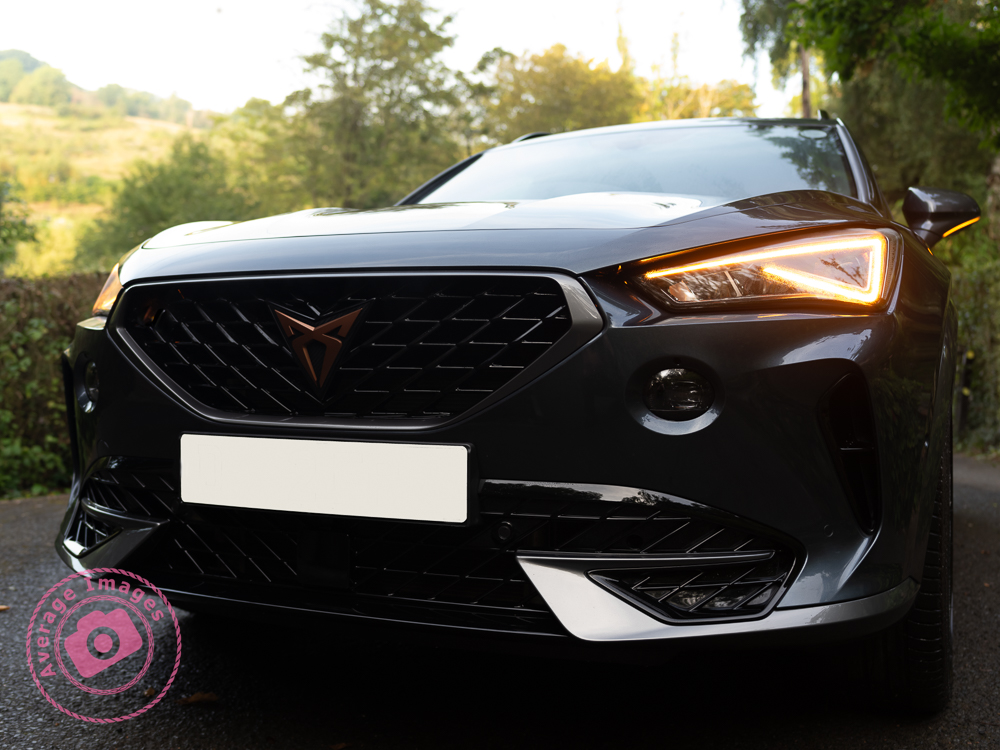
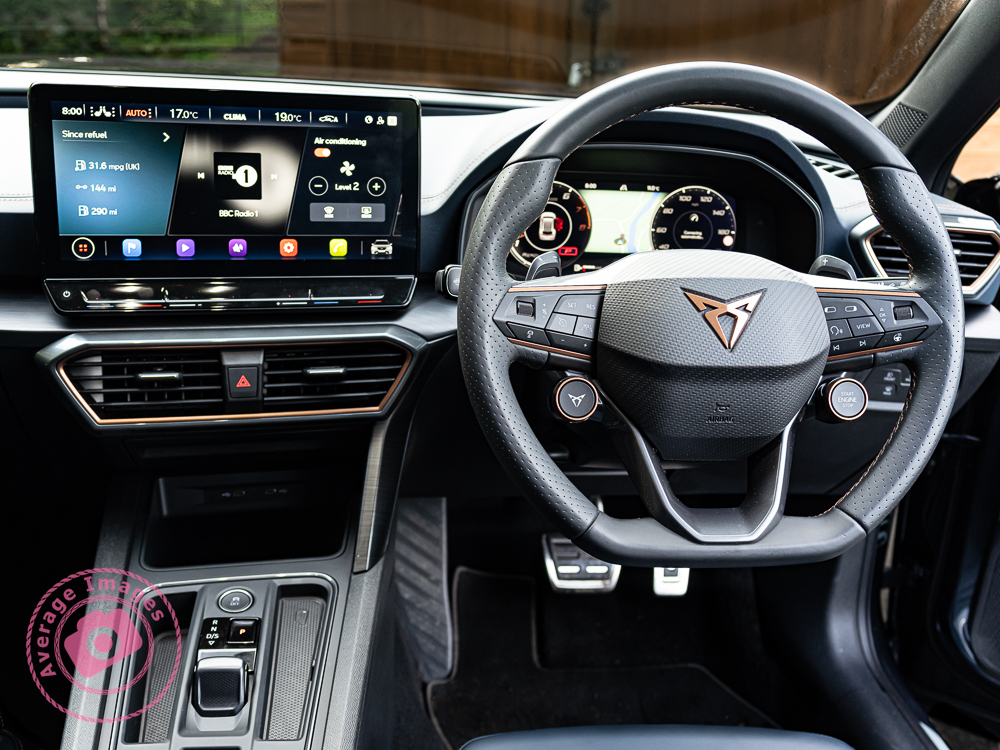
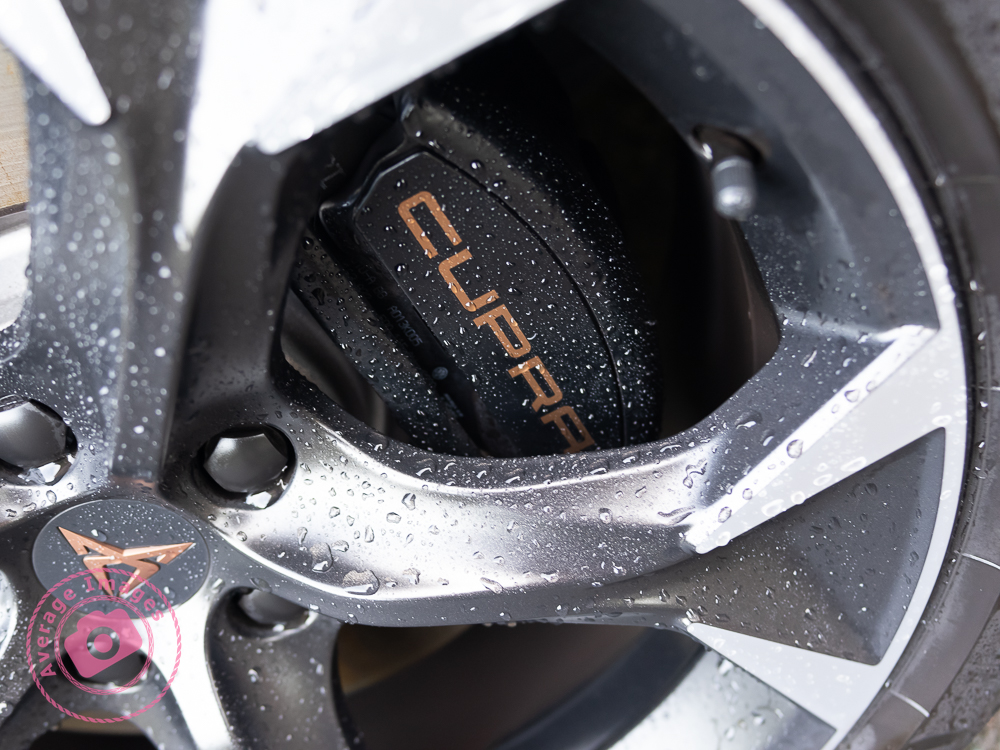
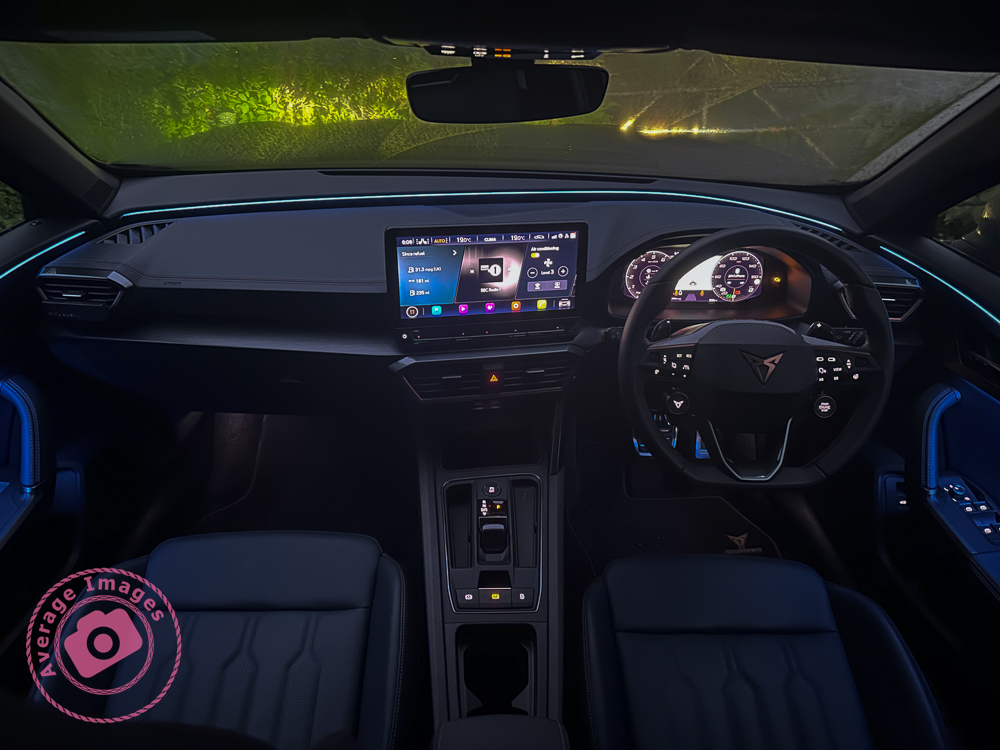
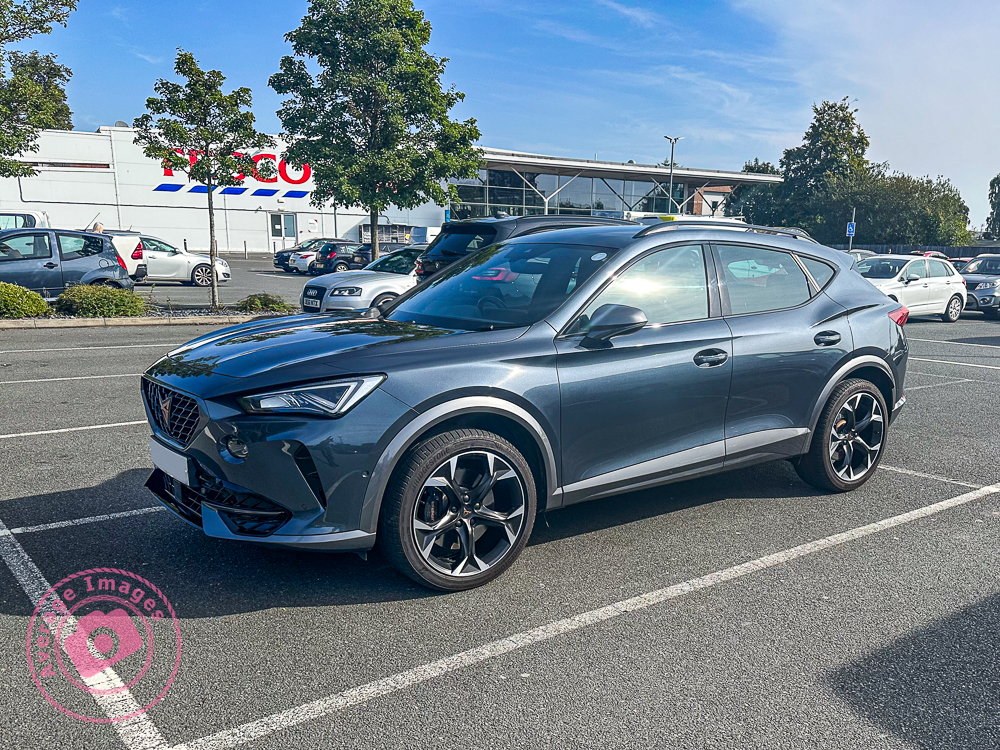
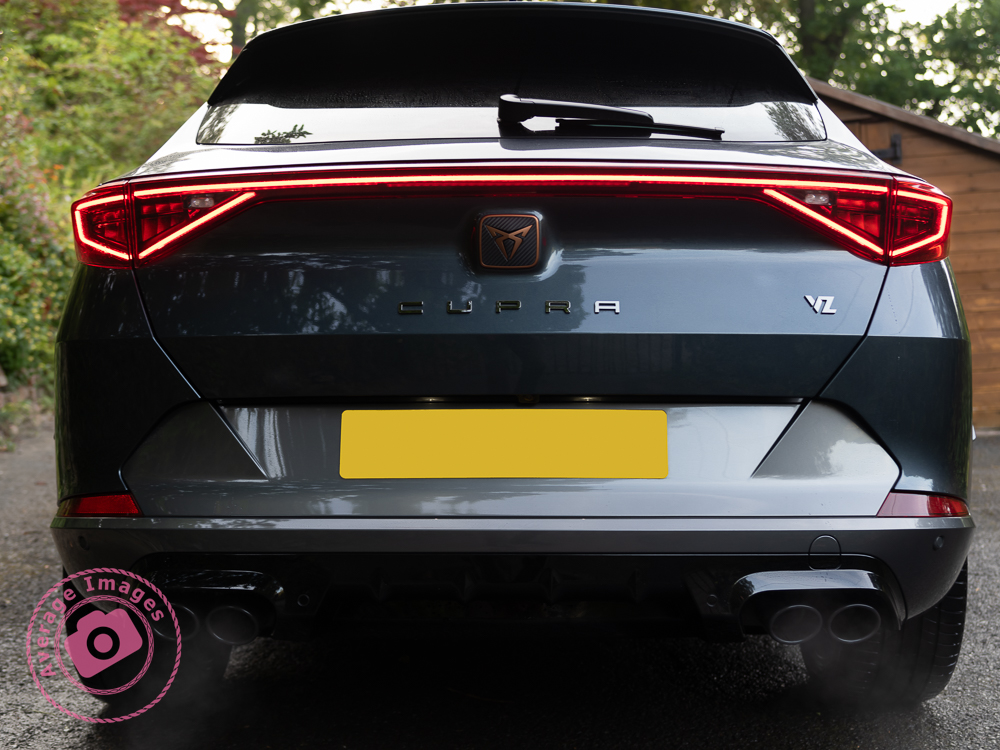
In a change from the type of car shots I have been known to take in the past, here are some automotive detail shots.
The subject of these shots is powered by a petrol-fuelled internal combustion engine (ICE), which, we are led to believe, is a dying breed, as we are shepherded to ditch them in favour of battery-powered vehicles. The ICE has been powering motor vehicles for over 130 years, ever since Carl Benz applied for a patent for his “vehicle powered by a gas engine” in 1886 and yet (suddenly, it seems) they are very ‘bad’ and must be replaced.
Battery-powered vehicles were actually developed at precisely the same time as their ICE counterparts, and yet, up to now, they have never been favoured (apart from niche applications such as milk floats) mainly due to their relatively short range and long recharging times. Of course, battery technology has advanced in recent years, particularly with the development of lithium-ion cells (although there are question marks over their environmental credentials and safety record), but the limitations of range and recharging times still apply.
This culture change being applied to motorists is being mirrored (excuse the pun) in the photography world as Single Lens Reflex (SLR) cameras are being ditched in favour of mirrorless versions (which, coincidentally, rely heavily on a battery). The SLR camera has existed for 160 years, but the first commercial mirrorless camera was launched less than 20 years ago, and it has only recently gained huge popularity, probably due to some clever marketing.
In the case of car engines, we are being coerced into changing by the use of legislation – from electric vehicle (EV) targets issued to manufacturers to charges for using the roads (the recent ULEZ charge in London is a case in point). With cameras, the drive to change is from the manufacturers themselves and, it seems, from the photographic media. In both cases, the consumer (i.e., you and I) will make the ultimate decision by voting with our cash. Maybe this won’t be apparent in the short term, but it will be interesting to see how it pans out over the next few years and whether the tried-and-tested technology remains the people’s choice.
Fortunately, Painting with light doesn’t require a lot of expensive gear. In fact, you may have most of it already. However, to be successful there are some basic requirements and so here are the essentials for your kit bag:
First on the list is a camera suitable for taking long exposures. You don’t need a high-end, expensive camera; it could be a DSLR, mirrorless, compact or even a camera phone. It may seem pretty obvious, but the important thing is that it needs to be able to attach to a tripod (see below) and to be able to take long exposures, sometimes of several minutes (most cameras have 30 seconds as their maximum automatic exposure time). The best solution is a camera with a ‘bulb’ setting (sometimes abbreviated to ‘B’ setting), allowing the shutter to stay open for as long as you press the shutter release.
The ‘B’ or ‘Bulb’ setting is useful for long exposures
‘Bulb’ setting is so-called because in very early cameras, the shutter was activated by a pneumatic rubber bulb which, when pressed, activated the shutter.
Even better is one with the option to attach a remote shutter release (see below), which helps reduce the risk of camera shake because you don’t need to touch the camera for every shot.
Second, on the list of requirements is a sturdy tripod. As you will see from later blog posts, I am taking numerous exposures and blending them together in layers during post-processing. This means I need every shot to be in exactly the same place each time. I do appreciate that there are auto-blending options in some post-processing software, but these are never exact, and it is far better to get it right in camera. It’s not only the tripod, though; you also need to ensure that the tripod head is equally sturdy. Ball-head types can sag slowly, especially with larger lenses. Personally, I use a geared tripod head.
Thirdly, it makes sense to use a remote shutter release so that you are less likely to knock the camera’s position as you activate the shutter. This still means that you have to go backwards and forward to your camera for each shot (in the dark!) so a wireless one is preferable. The only problem with wireless versions is that they are usually only designed to trigger the shutter, not to hold it open; my Pentax 645Z has the option (in ‘B’ mode) to open the shutter with one press and then close it with a second press. Check your camera’s manual to see if this is an option (you may have to activate it in the settings menu).
A wireless infrared shutter release
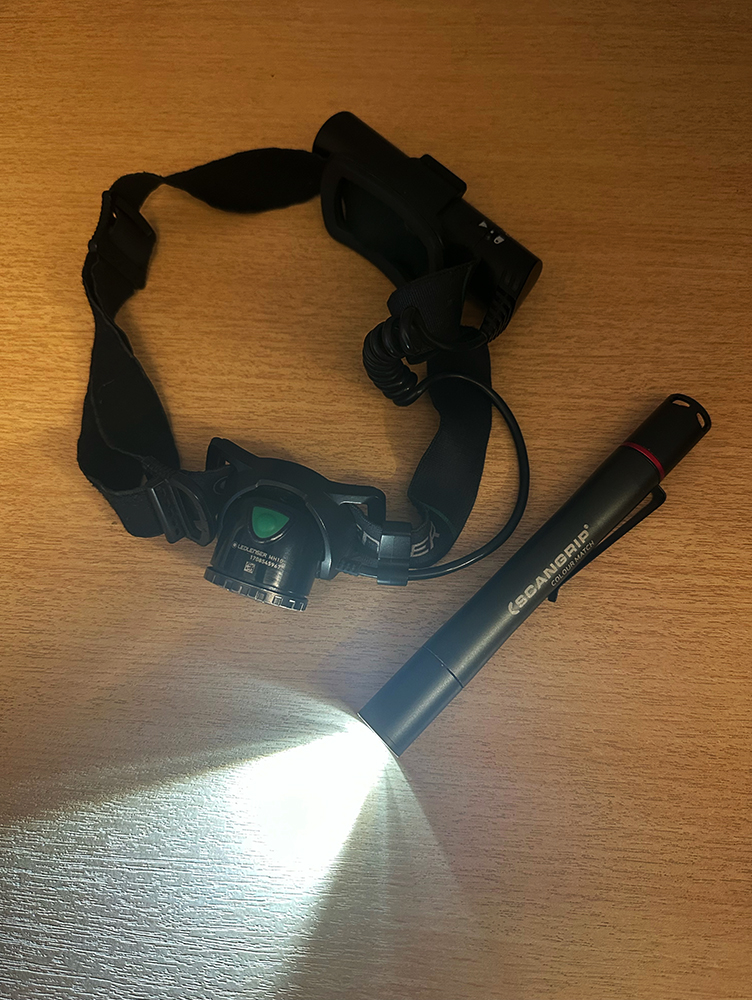
Fourthly, and perhaps obviously, some lights. Torches are more than adequate, and I use a powerful Ledlenser MH10 head torch for the larger areas (and to see when moving about), together with a smaller Scangrip Matchpen pen torch for detailed lighting. The head torch has a zoom function, which is handy for lighting the tops of trees, and the pen torch (which is actually designed for inspecting the paintwork of cars) has two different light temperature settings, which is something I will try out in a later blog post.
My preferred torches
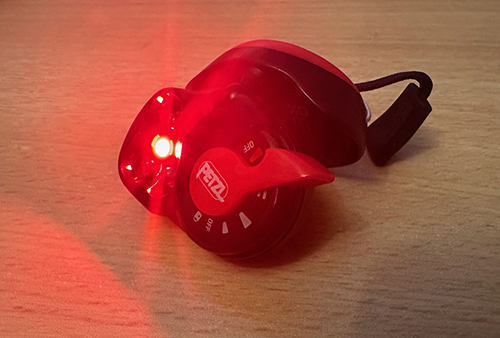
A red light is kinder to your eyes
The pupils of your eyes will naturally open up wide in the dark, which can be somewhat of a shock if you turn on a torch to study your camera settings; some torches come with a ‘red light’ mode which is a bit kinder to your eyes when working close-up. This Petzl E+Lite head torch is small enough to fit into your kit bag (although a bit uncomfortable for long-term use).
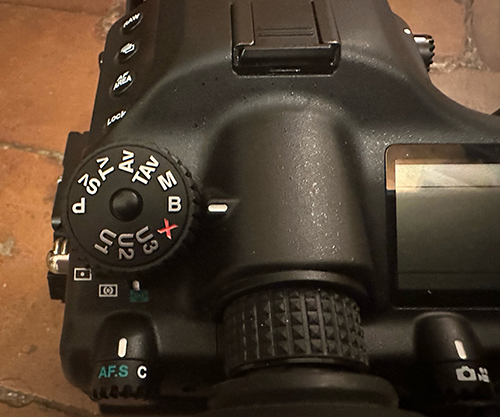
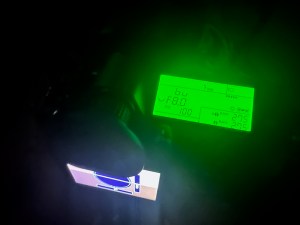
My Pentax 645Z has a handy built-in backlight for the top LED screen, negating the need to use a torch when adjusting camera settings. You just need to familiarise yourself with finding the button position in the dark.
Illuminated Pentax 645Z top plate
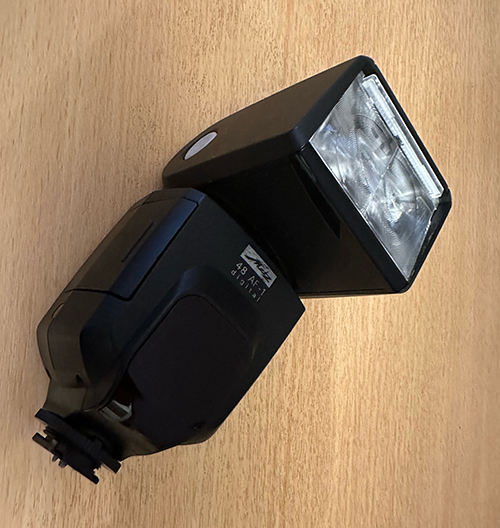
Optional:
Although not a necessity, if you want to light up a large area quickly, or maybe light up the interior of a building, then a flashgun comes in very handy, provided that you can operate it manually.
Metz flashgun
And that is it, so at least my camera equipment isn’t heavy. Of course, when it’s dark, it also goes chilly, so you need to wrap up warm and, whilst you are at it, try and wear some dark clothing that isn’t going to reflect any light. Your camera battery won’t last as long either, so you may want to pack a spare one.
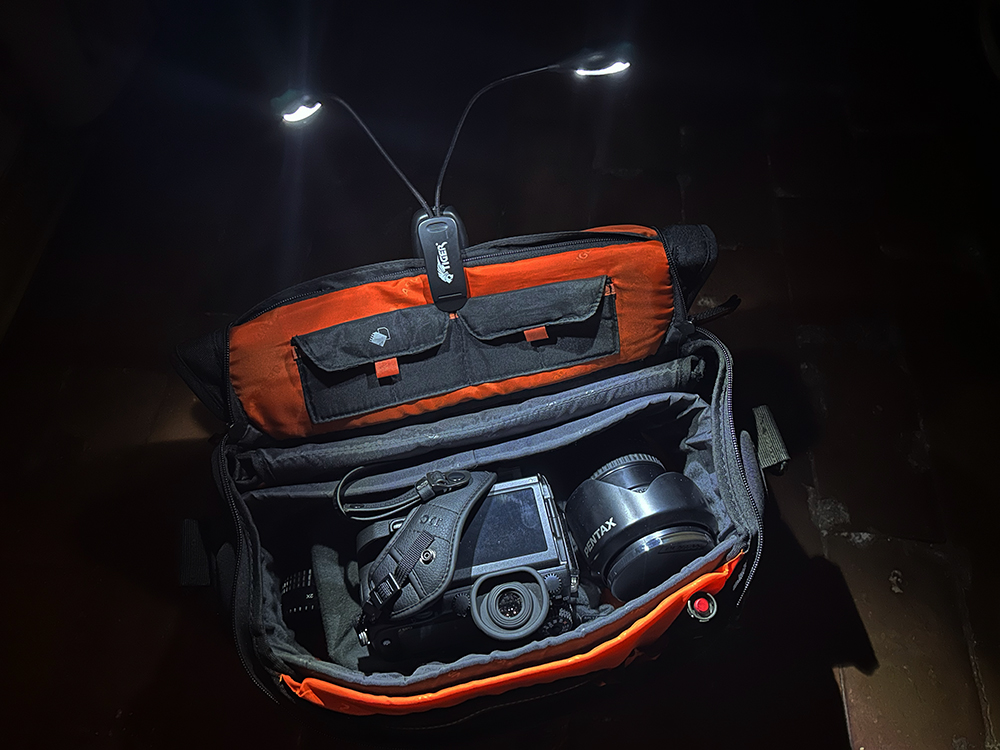
I also use a handy clip-on LED light to illuminate my camera bag