Secret Ironbridge: Transhipment interchange

Coalport. The clue is in the name – it was a ‘port for coal’. It didn’t evolve naturally, like most towns and villages, it was the brainchild of William Reynolds, a local iron master, who, in the late 1790’s, wanted to create a transhipment interchange to transfer coal from barges, brought down from the Shropshire coalfields, onto river boats, so that they could take it downstream to Bristol and the world beyond.

To make this work, he needed people – and so he built a town to house them. It was a ‘New Town’, ironically now located within the ‘New Town’ of Telford.

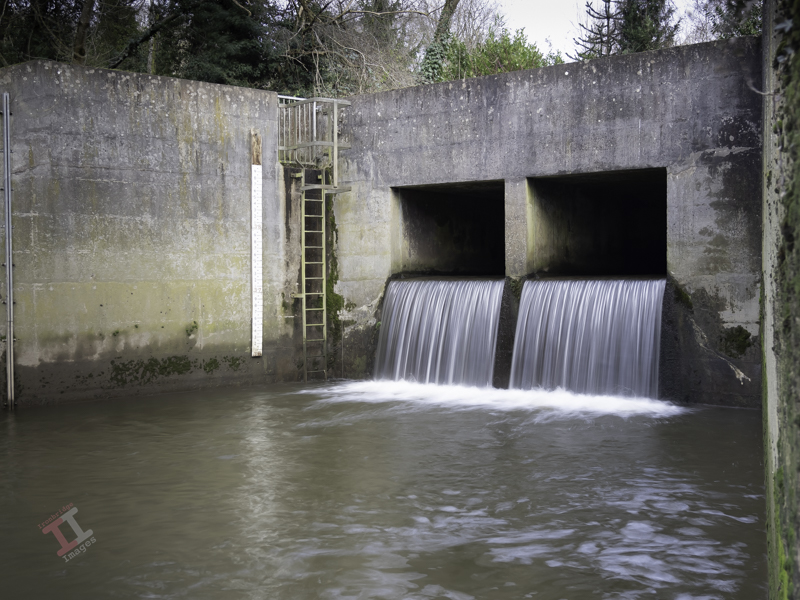
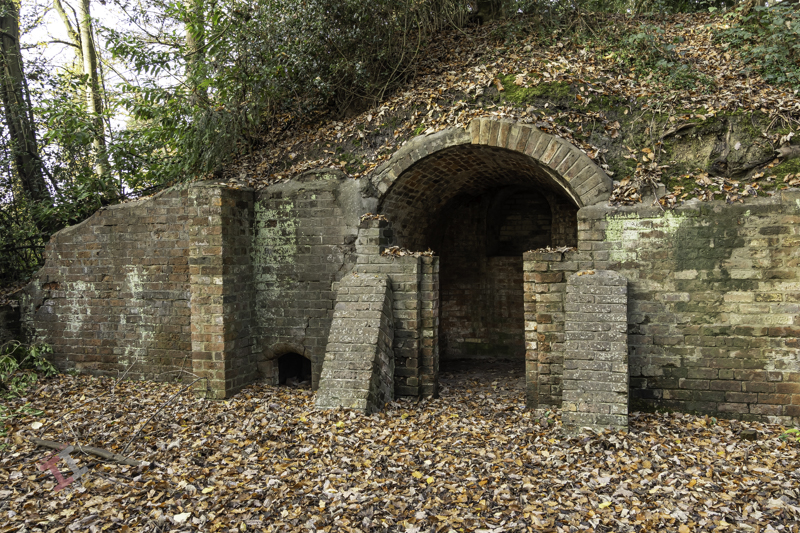
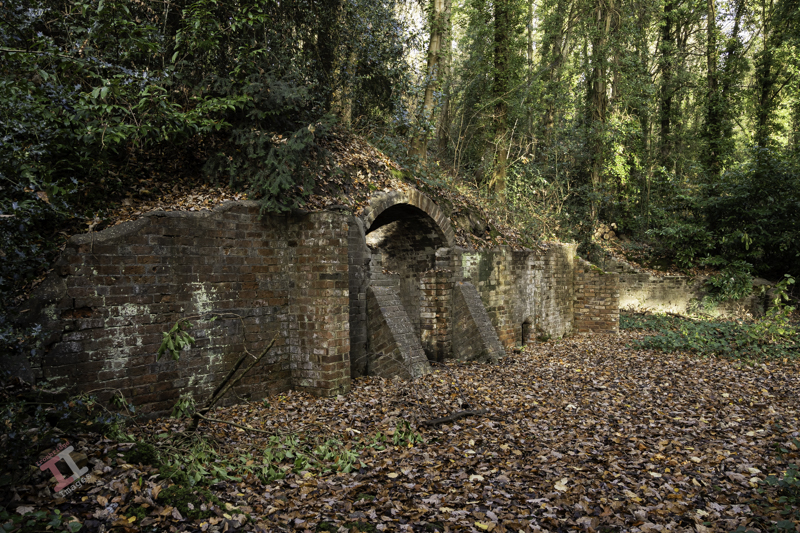
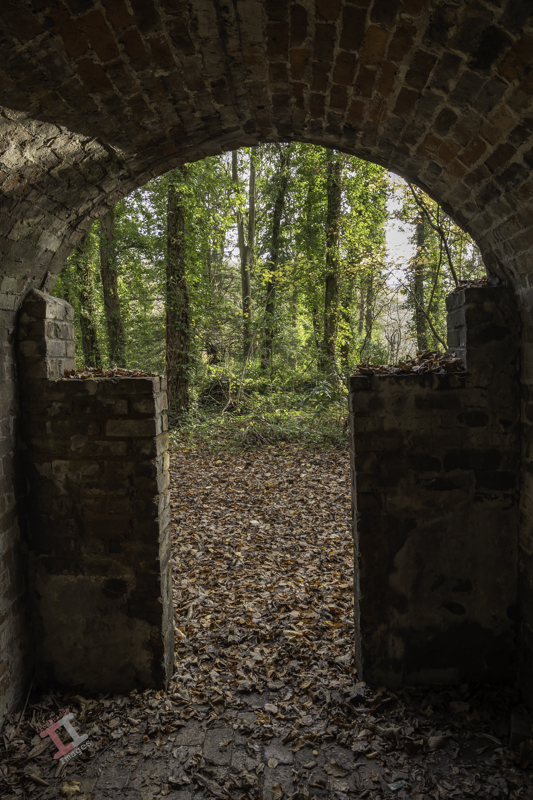
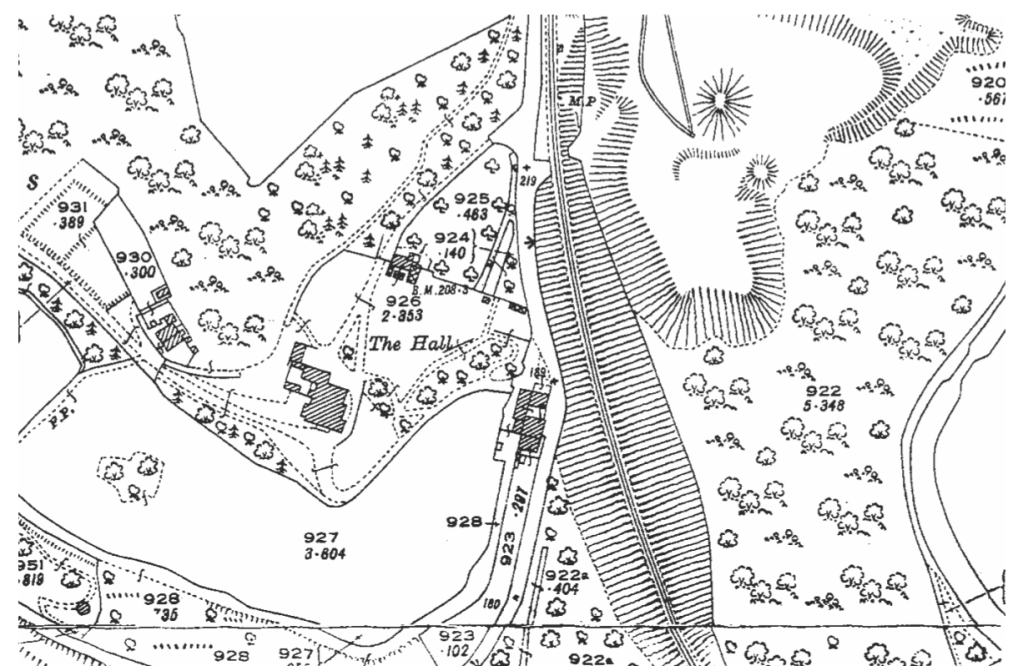
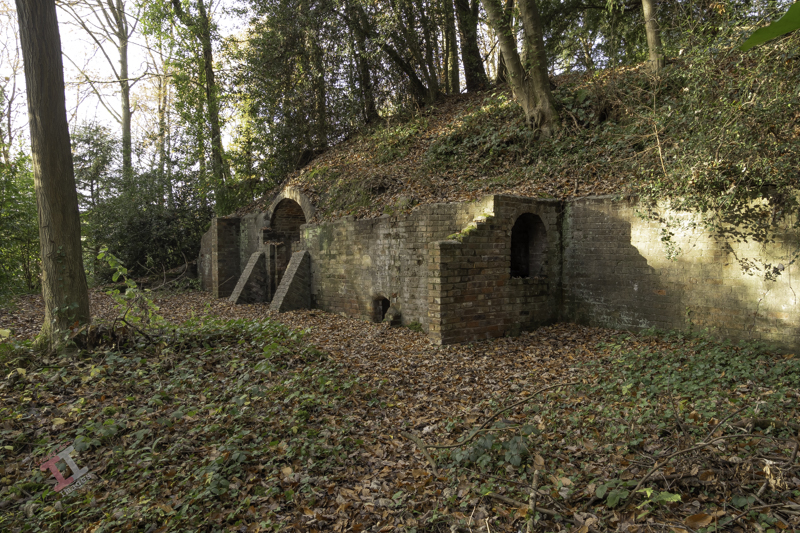
The coal was transferred by canal barge on the Shropshire Canal to Blists Hill and then down the Hay incline plane onto another section of the Shropshire Canal dug parallel to the River Severn. This lower section of the canal actually ran for about a half-mile and was served by warehouses, wharves, quays, and cranes to allow the transfer of coal from the barges to the river boats (called Sprys) and, of course, goods being transferred in the opposite direction.

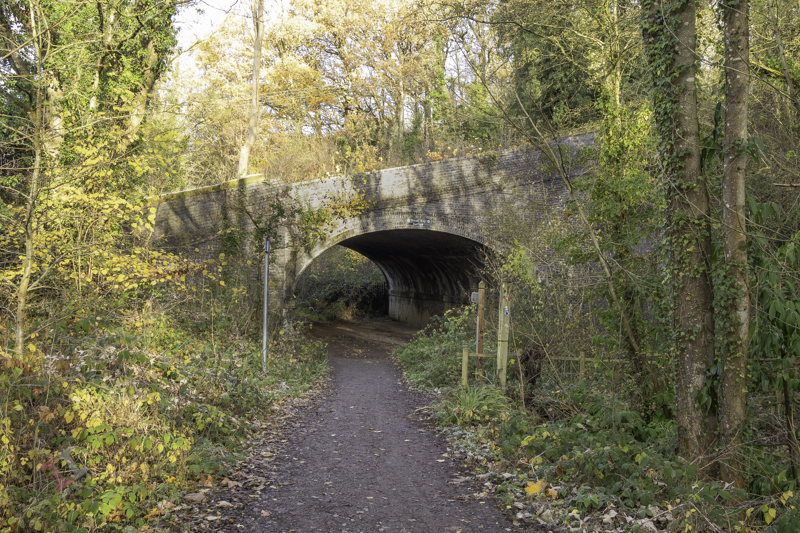
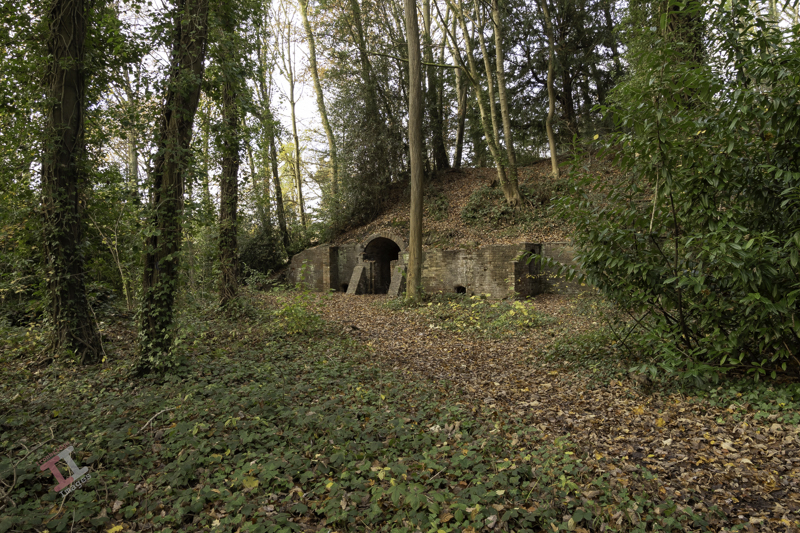
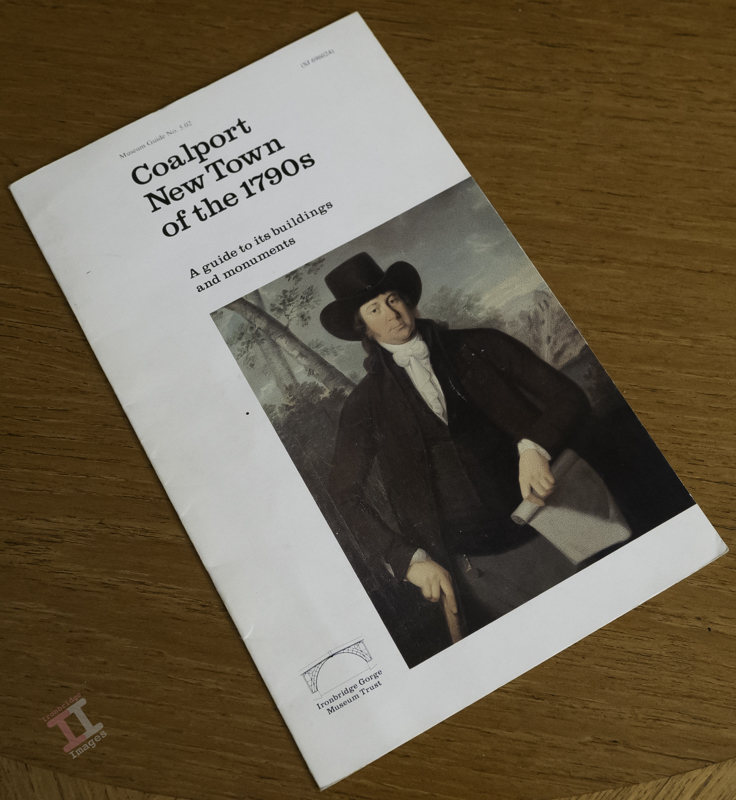
The transhipment interchange finally closed in 1907, its demise partly accelerated by the arrival of the LNWR railway line (see Secret Ironbridge: London and North Western railway), and went into disrepair. In 1978, the Ironbridge Gorge Museum Trust published a booklet “Coalport New Town of the 1790’s” and stated, on page 10 “The interchange is one of the most important archeological sites in the Ironbridge Gorge….“.

Sadly, the lure of profit led the Trust to sell the land for housing, and modern townhouses now cover the site.

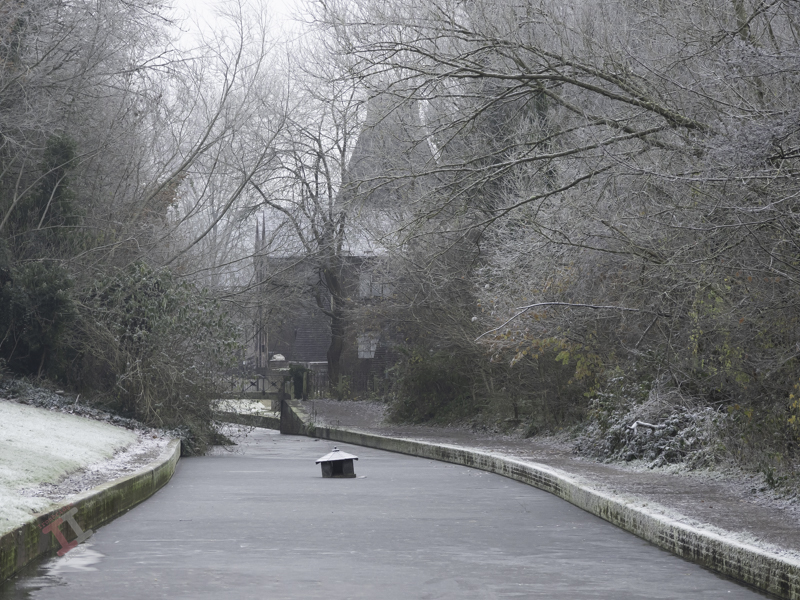
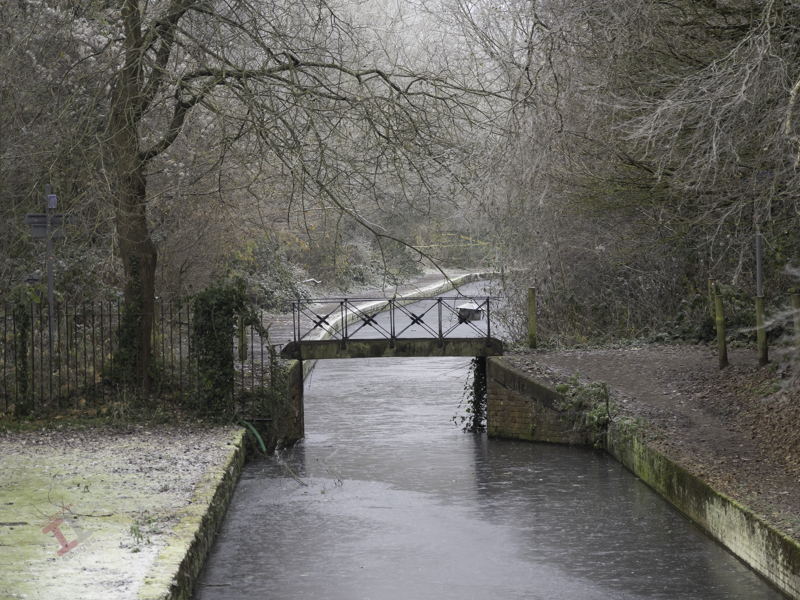
A short part of the Shropshire Canal has been restored, from the bottom of the incline plane to the Coalport China Works. A small iron footbridge crosses the canal, although this is not original to the site. Further on, the line of the canal has been (sort of) marked with coloured tarmac on the road through the modern houses.

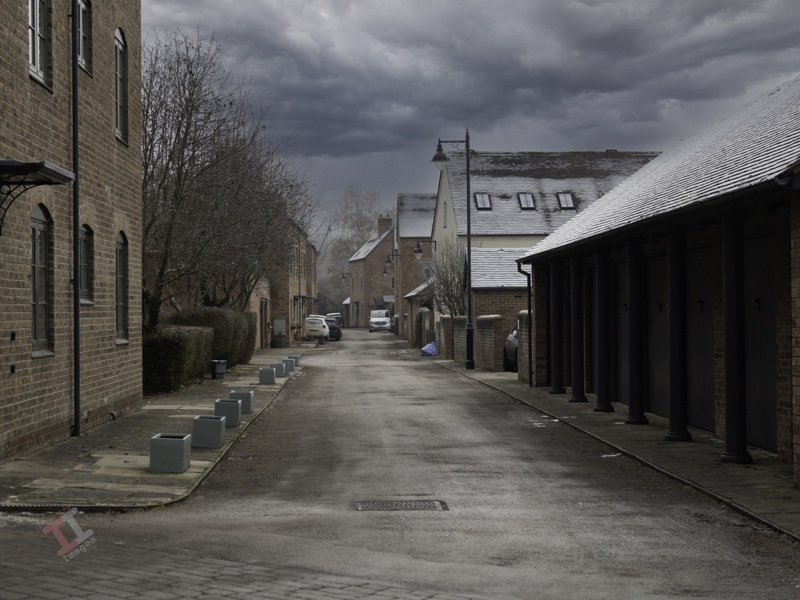
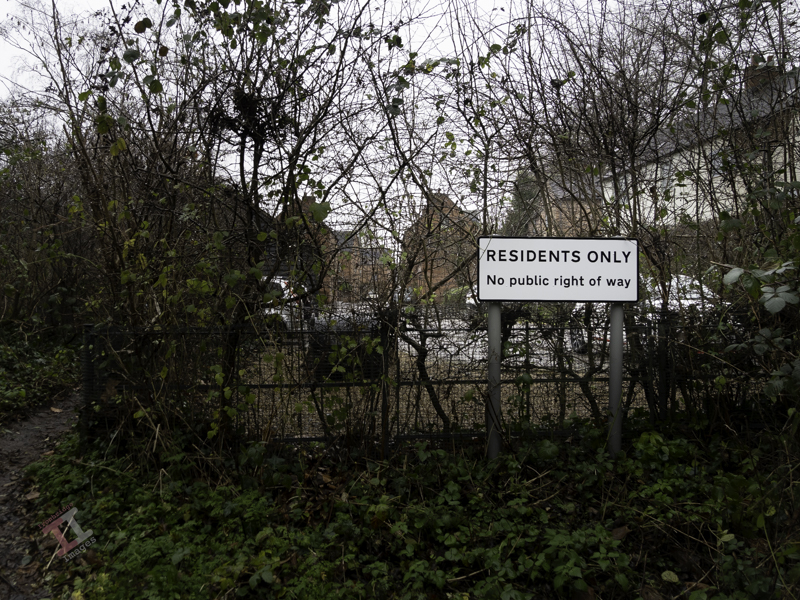
At one time you could still walk down the entire length of the old canal, but the inhabitants of these modern houses (now called Reynolds Wharf) have had the footpath closed off with a locked gate to create their own private enclave. It’s ironic that the area that led to the creation of the village is now out-of-bounds to the majority that live there.

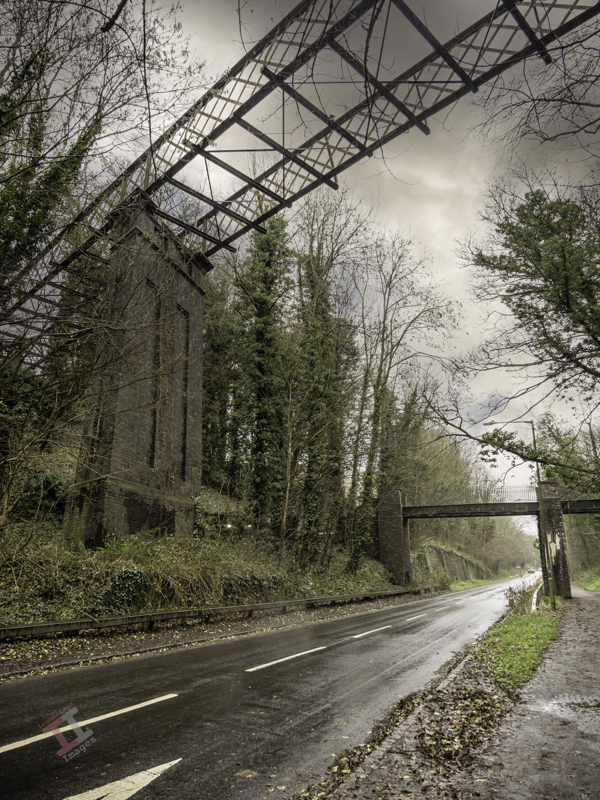
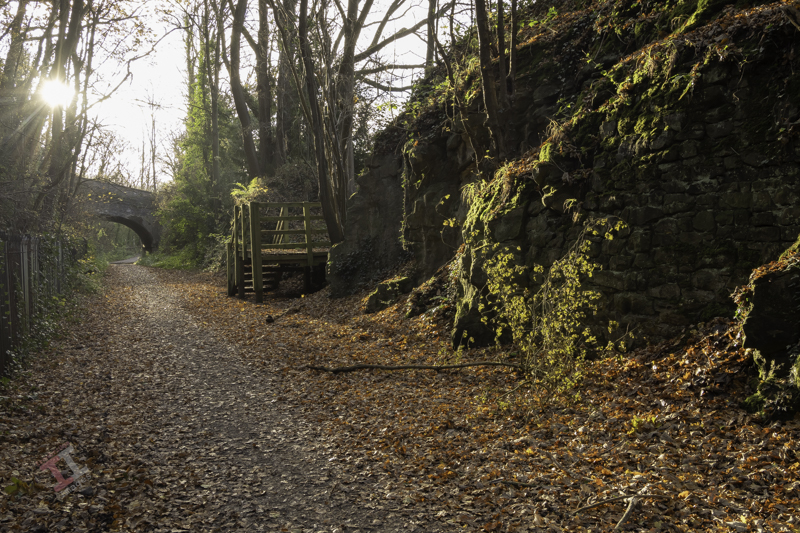
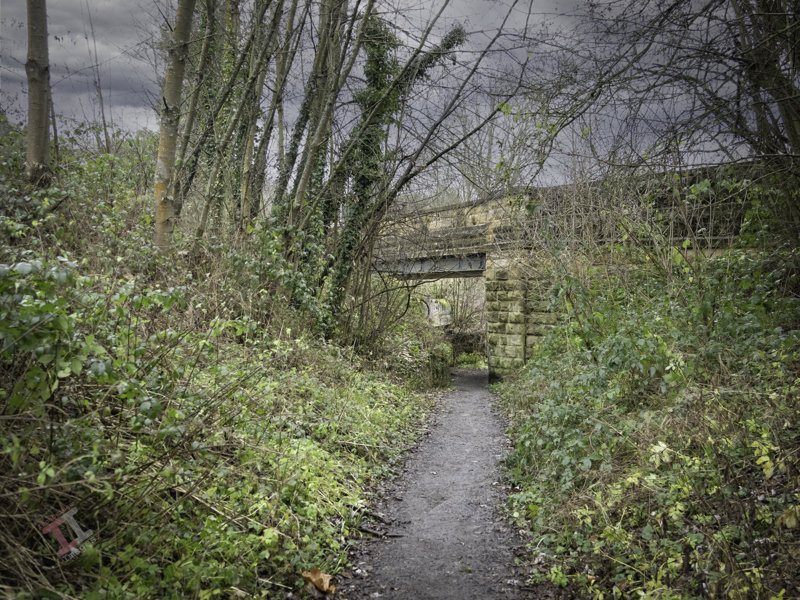
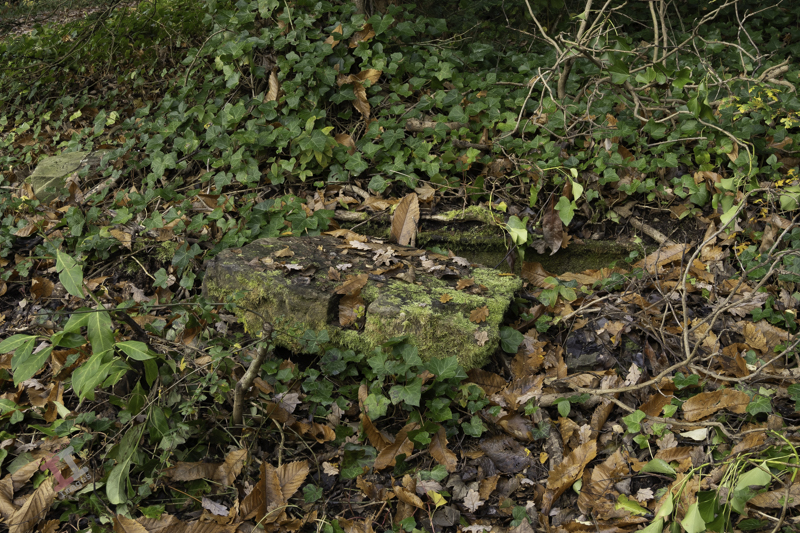
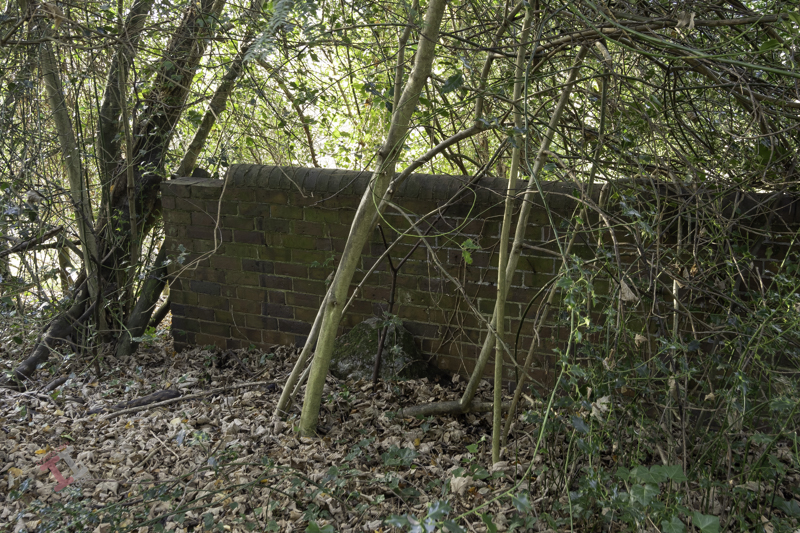
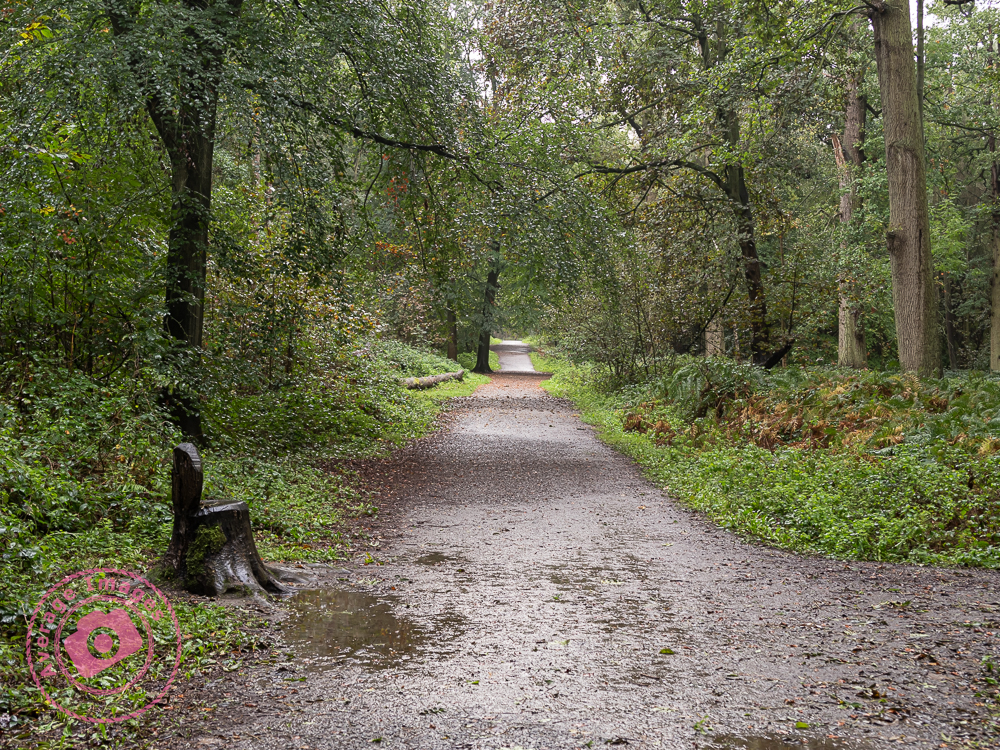
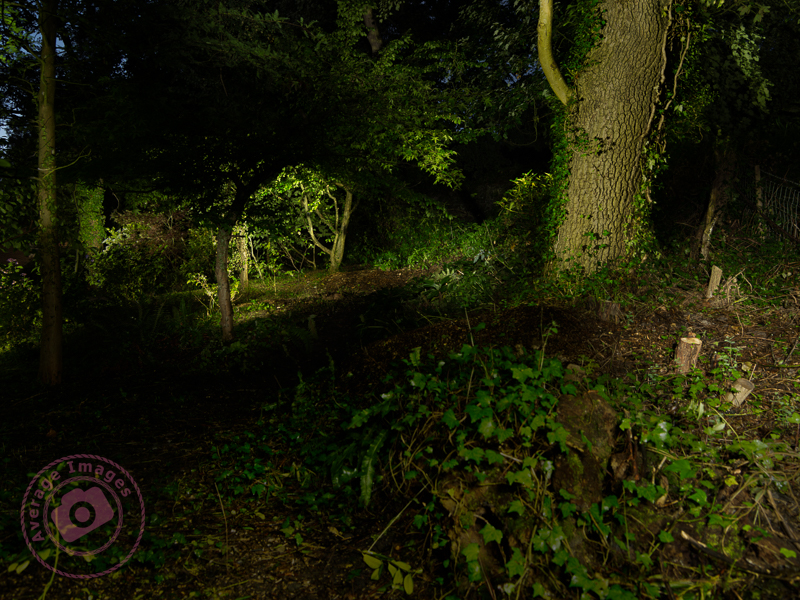
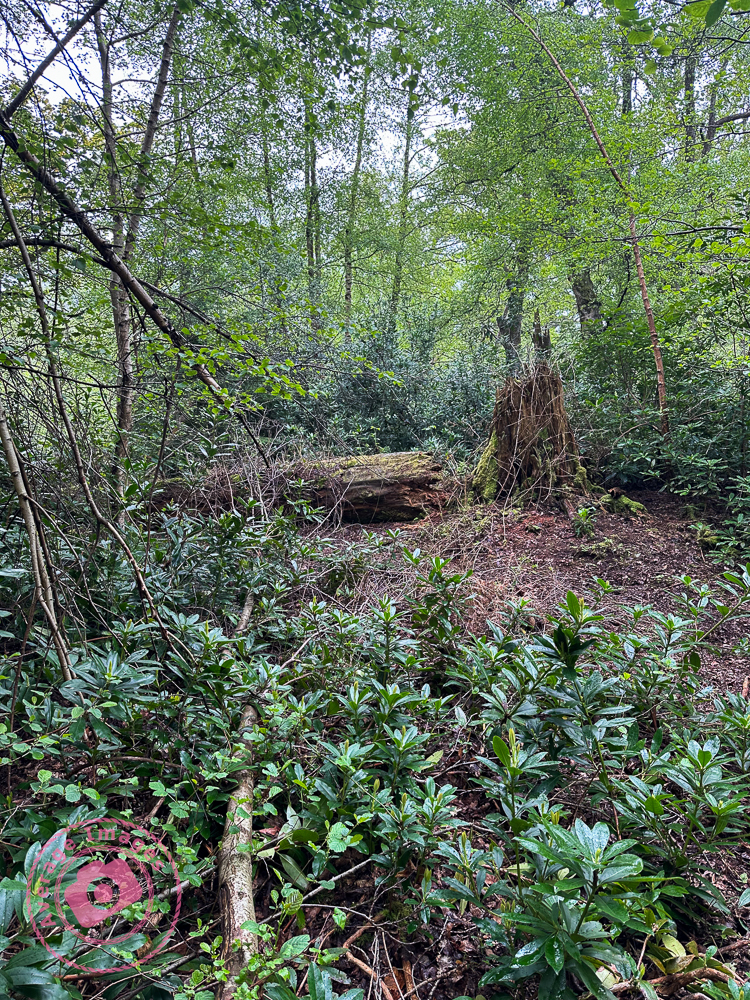
Once past the housing, the distinct indentation of the canal can still be seen in the undergrowth, almost up to another iron bridge, which crosses the river at the eastern end of Coalport village.

Secret Ironbridge: The fuel pump

As you pass through Coalport village, you may find it strange to see an old fuel dispensing pump standing in front of a terraced house. However, if you look at the large ‘garage-like’ building close by, you may start to appreciate that this was once the base for a small haulage company, W. Woodhall & Son (Haulage) Ltd.

Directly opposite are the former offices of Nuway Matting, and Woodhalls used to provide transport for them, as well as a sheet metal & gasket company called Chillcotts, both of which operated on the site of the old Coalport China works. I can still recall their small fleet of red, flat-bed trucks struggling to climb up the bank out of the village, diesel fumes spewing forth. Diesel which had been dispensed from their own private pump outside of their house.

The haulage company has long since gone. But the fuel pump and garage remain a testament to the industry that once graced this quiet village.

Of course, Nuway Matting, Chillcotts and W.Woodhall & Sons (Haulage) Ltd were not the first industry in the village. It all started with a transhipment interchange. More of that in the next ‘Secret Ironbridge’ blog post.

Happy new floods

We enter the new year with flooding across the UK, not least at Ironbridge close the where I live. The flood barriers have been deployed, although it seems that they may not have been required this time. As someone who has lived by the river for the majority of my life, it does seem that the frequency of flooding is on the increase. Global warming or building on the flood plains? You decide.

Memorial visit

Today we took a trip to the National Memorial Arboretum in Staffordshire – our first visit, even though it opened in 2001.

It’s probably not the best season to be able to appreciate the landscaping but we were able to take the dogs (on a lead, of course) and saw a fair few (but certainly not all) of the 400+ memorials on the site. It is a vast area (150 acres) and easily a full day if you want to see everything. It also has a very nice shop with a good range of good quality gifts and a large cafe (the jacket potato with chilli was very tasty).

There’s not much more to say, other than it was a very pleasant day out, great to catch up with Tina & Russell (who travelled up from Hertfordshire to meet us there) and we plan to return when it’s not so wet.

Painting with light: Rear light

When taking Painting with light landscape shots it is best to think like an artist (perhaps a painter), who first sets up a canvas on an easel before even starting to put paint onto the palette. Similarly, a landscape Painting with light often needs to have a background shot for the resulting composite on which all of the other shots will sit (you can think of this as the canvas on which you are going to work).

This initial (background) image is unlikely to be completely black – you may want the sky to be lighter to show the silhouette of trees, or to see the moonlight, or the stars. The rest of the images you take will be completely black, all apart from the elements intentionally lit up by your torch.

So, how do we decide on what exposure settings to use to have a very dark background image, but not completely black? It is going to be largely by trial-and-error, because no two scenes are going to be the same. But with a low ISO (to minimise noise) the resultant shutter speed is going to be at least 30 seconds, maybe several minutes. Taking multiple shots at these shutter speeds to find the right one could take a long time.

The answer is to remember the six-stop rule. This simply states that:

Why is this important? Well, if you set your ISO to 6400 you can take some test shots quite quickly in order to find the optimum shutter speed (which will be seconds rather than minutes). You can then reset your camera to ISO 100 and use the same number, but this time as minutesand you will get the same overall exposure.

For example; if you have your camera set to ISO 6400 and, after a few shots, determine that the best exposure time is 2 seconds, when you reset your camera to ISO 100 you will need an exposure time of 2 minutes to achieve the same image.

I’m sure that there are many who will now be saying to themselves “Hold on, if I can get the same image in 2 seconds as I can in 2 minutes why would I bother?”. The answer is ‘Reduced noise‘. Remember, the background image isn’t going to be completely black, there should be elements of detail (clouds, tree silhouettes, etc.) that need to be as crisp and sharp as possible. This will be possible at ISO 100 but not so much at ISO 6400.

For the feature shot above, I wanted the sky to be visible above the horizon and so took that shot first. Fortunately it wasn’t too dark and so the test shot at ISO 6400 took half-a-second. I then re-set the ISO to 100 and took the another shot for half-a-minute. This created just enough light in the sky to act as my background shot.

Of course, once you have your background shot ‘in the bag’, you now have to concentrate on your ‘hero’ and ‘supporting cast’.

The feature shot above isn’t a painting with light in the true sense, because the hero (the public house) is already lit up with its own lights. To be honest, it really doesn’t work for me, but it helped illustrate the six-stop rule, which is why I used it.

Secret Ironbridge: London & North Western Railway

If you travel into the Ironbridge Gorge from the town of Madeley, you will pass down a road called Legges Way, named after George Legge, who owned the Blists Hill brickworks from 1912 to 1938.

Although it may not be immediately apparent, the first part of this road is actually laid over the bed of the London & North Western Railway (LNWR), one of three railway lines that once ran into the Ironbridge Gorge. This branch left the main Wellington to Stafford line and ran down to Coalport (East) station and its terminus.

After travelling down Legges Way for less than a half-mile, you will see two bridges crossing the road. The much taller one is called the Lee Dingle Bridge, built in the 1860s with impressive, tall, blue abutments carrying a lattice-girder frame. It was designed to carry a tramway, carrying coal from the nearby Meadow Pit colliery to the Blists Hill ironworks. Initially, it was painted cream, then blue, and it was much later in the 1960s when it was overpainted with its current grey colour. The smaller one was built as a footbridge when the railway was built, probably to allow workers to reach the Blists Hill ironworks and brickworks from Madeley town.

Just after these two bridges, the line of the railway drifts off the roadway to the left. Fortunately, you can still follow this because it is a footpath known as the Silkin Way, which leads you to a short tunnel which supports the main entrance to the old Blists Hill Ironworks.

At first glance, you may think this is just not high enough for a steam train to pass under – and you would be correct. In the 1960s, a huge double-pipeline was installed to take the storm water from the southern end of the newly developing New Town of Telford. Rather than dig a trench, they just laid the pipeline on top of the old railway track bed and covered it over. Hence, the pathway is much higher than the original railway track.

A little way after the tunnel, some metal fencing denotes the point at which the pipeline leaves the old railway line and continues downwards through the trees to the outflow into the River Severn. The pathway then reverts to the original level of the railway line.

Further on, you pass under a much more interesting bridge. Built in around 1860, it supports the Hay Incline Plane – built some 70 years previously to transfer flat-bottomed iron tub boats down the steep valley side from the upper section of the Shropshire Canal in Madeley to the riverside section of the same canal in Coalport.

The bridge is unusual because bridges are usually flat on top to take paths, roads, and railways, but this one was designed to support an incline plane, so the top is distinctly angled. It is also a ‘skew’ bridge – in that the arch runs at an oblique angle to the spandrels that support it. At first, this may seem unimportant – until you think about the complexity of the brickwork and that it was built over 160 years ago before any computer-aided design. These types of skew bridges became increasingly necessary in the nineteenth century as the railway networks expanded and had to cross existing roads and canals without disrupting them too much.

The railway line then starts to level out and run parallel to the river and eventually passes under yet another bridge, which, unusually for the Ironbridge Gorge, has stone parapets rather than brick ones. This road crossing is only single-file and crosses at a sharp angle – meaning it is ‘blind’ to drivers in either direction (reversing often ensues). Beneath, a retaining brick wall has failed due to constant subsidence, letting the soil spill down – and now a large sewerage pipe takes up some of the space. It’s hardly believable that once this bridge was wide enough to accommodate two railway tracks (although only one ever went beneath, the second terminating just before).

Not much further is another road bridge, which signifies the terminus of this LNWR line. It originally had cast iron riveted sides, but these were removed and replaced with brick in the late 1980s. The platform of Coalport Station (East) was situated underneath this bridge – although all signs of this have now long gone, and adjoining this was a railway yard, built in the 1860s, which was surprisingly lavish, with a large engine shed, a palatial double carriage shed, a goods shed, a water tower and, initially, an engine turntable. It survived for 100 years until the line was eventually closed in 1960.

It’s easy to get nostalgic and have a vision of a small steam train chugging through the trees overlooking the river in the sunshine – but the reality was that this was an industrial area, dominated by chimneys belching out black smoke from the furnaces that powered the Industrial Revolution, operated by workers who lived in quite squalid conditions. It certainly wasn’t somewhere to come on your holidays.

Railways declined throughout the UK in the 1960’s due to the rise of cheaper and more flexible road haulage. Even the small village of Coalport had its own haulage company. More of that in the next blog post of this series.

If you want to see more about Secret Ironbridge, subscribe to this blog (for free!) to keep up-to-date via your email inbox or the Reader app

Secret Ironbridge: Ice house

This is a new series of photographic blogs called Secret Ironbridge, featuring photographs and descriptions of areas of the Ironbridge Gorge in Shropshire that, although not exactly ‘secret’, are certainly overlooked by the tourism industry that now dominates the four towns and villages that lie in the valley:

  • Ironbridge
  • Coalbrookdale
  • Jackfield
  • Coalport

This blog series is a good excuse for me to get out, take photographs, and share some history of an area I have lived in all my life.

This first post features an ice house – the underground cellar from the long-demolished Madeley Wood Hall in the Lloyds Coppice, between Coalport and Ironbridge.

An ice house was used for storing ice throughout the year before the invention of the electric refrigerator (or indeed, electricity) and was typically located wholly or partly underground to utilise the natural insulation it provided. During the winter, ice and snow would be taken into the ice house, which would stay frozen for many months, allowing for the storage of perishable foods, cooling drinks and making cold desserts.

Of course, they tended to be associated with larger houses and halls, and this particular one was built for the Anstice family, owners of large areas of land and industry in the area. It was allegedly quite grand, brick-built, 3-storeys high, with a large entrance porch supported by four stone columns. Nearby was a couple of semi-detached houses (also now demolished) and a stable block serving the hall.

Here is a section of an old map from 1927 showing that the hall was quite substantial in size. The ice house is the upper-most outbuilding and was detached from the main hall (sensible, I guess, if it was full of ice). You can also see the semi-detached houses to the left and the landscaped area that used to be the tennis court.

To the upper right is another building that was, presumably, a gatehouse. On the right is the only remaining building – the stable block for the horses (now a beautiful private dwelling). The lack of trees and the grassed area to the front of the hall would have allowed magnificent views down the valley.

If you refer to the above map, you may see the heavily contoured area to the right of the hall. This was the London & North Western Railway (LNWR) line that ran from Coalport (East) station to Wellington. More of that in the next Secret Ironbridge series.

A walk in the park

The National Trust had an Autumn deal which gave free entry to their properties and so we chose to visit Attingham Park in Shropshire. This is very local to where we live but neither of us can recall ever visiting before and it was an opportunity to give the dogs a good walk in a change of scenery. Given the bleak forecast of rain all day we were all wrapped up accordingly, but fortunately it stayed relatively dry throughout the time that we were there. The grey, drab, overcast sky meant that photographic opportunities were few and far between, but I managed to take a few to justify carrying my gear around.

Painting with light: Making light work of it

Making light work of it

Once you have worked out the camera settings required for landscape Painting with light, you can take some photographs. Or can you? There are some things that you need to plan first if you are working outdoors:

Time of day:

I suppose it goes without saying that you need it to be dark (although maybe not pitch black). Therefore we are looking at either first thing in the morning or last thing at night, so a lot depends on whether you are a morning or nighttime person. I suppose that a night shoot is probably best – if you overrun your time in a morning shoot, everything will get lighter as the sun rises, spoiling the mood.

Time of year:

Fortunately, the best seasons for Painting with light are those when it stays dark later in the morning and gets darker earlier at night, i.e. Autumn and Winter. During these seasons, you get the autumnal golden foliage, snow and frosts – all of which make for some great shots.

Weather:

Since we have already ascertained that Autumn and Winter are good times of the year, I think it is reasonably apparent that it may get cold. However, you need to avoid very wet and foggy days. These diffract the light too much and the shots will look out-of-focus and lack detail. Also, because you will be making long exposures you won’t want a breezy day (unless you want to show the movement of the trees).

Location:

We will look at composition in a later blog post, but you need to find locations that lend themselves to having elements illuminated while creating an attractive picture. You also need somewhere relatively secluded so that you have the time to take multiple exposures whilst walking around with your torch without getting accosted by well-meaning strangers.

Single shot or composite?

Although you can do Painting with light in a single shot, it does make it a rather trial-and-error process. If you don’t light up the correct areas, you get some stray light glaring back into the lens, or you get yourself in the shot, it’s all for nothing and you have to start all over again. It is far better (provided that you are happy carrying out the post-processing) to take multiple shots with different areas lit, and then create one composite image from all of them.

Company:

It is best to have a companion with you during these shoots if possible. Not only are you working in the darkness (and so could stumble and require assistance), but you are working with expensive camera equipment and often some distance away from it. Unfortunately, some in society would gladly take it away from you, so stay safe and take someone with you (preferably someone with much patience!)

As a footnote to this post I should mention that during post-processing of this image I found that I couldn’t open the images in Photoshop directly from Lightroom. If I chose ‘open as layers in Photoshop’ (as I normally do) all that happened was that the Photoshop window opened, but no images. After some Googling it appeared that the way around it was to uninstall and then reinstall both Photoshop and Lightroom. It was a long-winded faff, but it worked. I have no idea why this occurred; it was working fine the day before and there had been no updates or other changes. Strange.

Painting with light: Shed light on the matter

So what settings do we use for Painting with light? I think (or at least hope) that most people will already guess that we will be using some long shutter speeds and choosing these manually rather than letting the camera try to work it out. But what about the rest of the settings. There are no hard-and-fast rules, so here are the settings I tend to use, not forgetting the basic exposure triangle of sensitivity, aperture and shutter speed.

Top Tip: Turn down the brightness of your LCD preview screen otherwise, in the dark it will make your images seem very bright when, in actual fact, they may be underexposed. Alternatively, use your histogram rather than relying on the image.

Sensitivity (ISO):

Whenever you are taking long exposures in low light there is always a risk of getting too much noise (which manifests itself as a grainy appearance on the image). Therefore you ideally need as low an ISO as possible, and so I always aim to use ISO 100 as standard (which goes back to my days of using film). Of course, there may be instances when you need use a higher ISO, but always bear in mind the noise it will introduce.

Post-processing may have noise reduction settings built in, but they always come with a price of increased softness (although the latest Adobe Denoise addition to Lightroom Classic does an exceedingly good job).

Aperture:

The aperture chosen depends very much on how much of the shot you want to be in focus (as with any other genre of photography) whilst bearing in mind that the smaller the aperture, the longer the exposure time will need to be. As a general rule though, an aperture of f/8 to f/11 will be fine.

Shutter speed:

You will be using a shutter speed of seconds rather than portions of a second. The exposure of each shot will be dictated by the intensity of the light from your torch and the surface being lit rather than the length of time that the shutter is open. A glossy white surface (e.g. a painted wall) will take much less exposure time than a rough, matt and dark surface (e.g. the bark on an old tree). You will be using the ‘Bulb’ setting on your camera which keeps the shutter open whilst you walk around the shot with your torch.

The exposure time of the image will be dictated by how long you shine your torch at the surface being lit. Generally this will be between 5 and 10 seconds. Don’t leave the shutter open in bulb mode for more than a minute though, otherwise ambient light (from the moon, stars, street lights, etc) will start to lighten the overall image.

White balance:

The white balance chosen can have a drastic effect on the ‘mood’ of the image because it controls the overall colour cast. In the early stages you may wish to leave it set on ‘auto’, but as you progress you may decide to choose it manually, with lower settings (around 2500K) producing a cooler/bluer image, whilst higher settings (around 10,000K) producing a warmer, orange image. It is all down to personal preference.

Of course, if you shoot in RAW (see below) you can adjust this easily in post-processing.

Shoot RAW:

With this type of photography you really want to retain as much data as possible from the image file, especially as you will be post-processing the image later on. Whenever possible always shoot RAW (rather than JPEG). This will also give you the option to adjust the white balance (see above) in post-processing to alter the overall colour balance of the shot or, if you follow my advice to shoot numerous images to blend together, to alter the colour balance in specific parts of the image.

Focussing:

You don’t want your camera hunting for a focus point in the dark every time you press your shutter button so either focus manually or use back-button focussing (whilst shining your torch on the focus point).

Horizon:

It is easy to become slightly disoriented in the dark and, without being able to see the image clearly in the viewfinder, set up the camera on a tilt – which is only apparent when you get home and view your images on your monitor. Of course, you can align the image in post-processing but, at the same time, you will end up cropping off the corners.

It is far better to use the electronic horizon (if your camera has that option) and levelling the camera on your tripod before you start.

Painting with light: Travelling light

Wheelbarrow by night

Fortunately, Painting with light doesn’t require a lot of expensive gear. In fact, you may have most of it already. However, to be successful there are some basic requirements and so here are the essentials for your kit bag:

First on the list is a camera suitable for taking long exposures. You don’t need a high-end, expensive camera; it could be a DSLR, mirrorless, compact or even a camera phone. It may seem pretty obvious, but the important thing is that it needs to be able to attach to a tripod (see below) and to be able to take long exposures, sometimes of several minutes (most cameras have 30 seconds as their maximum automatic exposure time). The best solution is a camera with a ‘bulb’ setting (sometimes abbreviated to ‘B’ setting), allowing the shutter to stay open for as long as you press the shutter release.

The ‘B’ or ‘Bulb’ setting is useful for long exposures

‘Bulb’ setting is so-called because in very early cameras, the shutter was activated by a pneumatic rubber bulb which, when pressed, activated the shutter.

Even better is one with the option to attach a remote shutter release (see below), which helps reduce the risk of camera shake because you don’t need to touch the camera for every shot.

Second, on the list of requirements is a sturdy tripod. As you will see from later blog posts, I am taking numerous exposures and blending them together in layers during post-processing. This means I need every shot to be in exactly the same place each time. I do appreciate that there are auto-blending options in some post-processing software, but these are never exact, and it is far better to get it right in camera. It’s not only the tripod, though; you also need to ensure that the tripod head is equally sturdy. Ball-head types can sag slowly, especially with larger lenses. Personally, I use a geared tripod head.

A geared tripod head can prevent the camera from drooping during a long exposure || © Average Images

Thirdly, it makes sense to use a remote shutter release so that you are less likely to knock the camera’s position as you activate the shutter. This still means that you have to go backwards and forward to your camera for each shot (in the dark!) so a wireless one is preferable. The only problem with wireless versions is that they are usually only designed to trigger the shutter, not to hold it open; my Pentax 645Z has the option (in ‘B’ mode) to open the shutter with one press and then close it with a second press. Check your camera’s manual to see if this is an option (you may have to activate it in the settings menu).

A wireless infrared shutter release

Fourthly, and perhaps obviously, some lights. Torches are more than adequate, and I use a powerful Ledlenser MH10 head torch for the larger areas (and to see when moving about), together with a smaller Scangrip Matchpen pen torch for detailed lighting. The head torch has a zoom function, which is handy for lighting the tops of trees, and the pen torch (which is actually designed for inspecting the paintwork of cars) has two different light temperature settings, which is something I will try out in a later blog post.

My preferred torches
A red light is kinder to your eyes

The pupils of your eyes will naturally open up wide in the dark, which can be somewhat of a shock if you turn on a torch to study your camera settings; some torches come with a ‘red light’ mode which is a bit kinder to your eyes when working close-up. This Petzl E+Lite head torch is small enough to fit into your kit bag (although a bit uncomfortable for long-term use).

My Pentax 645Z has a handy built-in backlight for the top LED screen, negating the need to use a torch when adjusting camera settings. You just need to familiarise yourself with finding the button position in the dark.

Illuminated Pentax 645Z top plate

Optional:

Although not a necessity, if you want to light up a large area quickly, or maybe light up the interior of a building, then a flashgun comes in very handy, provided that you can operate it manually.

Metz flashgun

And that is it, so at least my camera equipment isn’t heavy. Of course, when it’s dark, it also goes chilly, so you need to wrap up warm and, whilst you are at it, try and wear some dark clothing that isn’t going to reflect any light. Your camera battery won’t last as long either, so you may want to pack a spare one.

I also use a handy clip-on LED light to illuminate my camera bag

Titterstone Clee

Titterstone Clee ruins

Today we took the dogs for a walk on Titterstone Clee, a hill in Shropshire close to the town of Ludlow. I can’t remember exactly when I last visited, even though it is only 30 miles from home, and my only (vague) memories are visiting as a child with my parents.

The summit has a multitude of derelict buildings protruding from its sides. Given it’s splendid viewpoint over the Shropshire plains it would be easy to think that these had a military history, but the reality is that these are from years of quarrying – due to the abundance of Dolerite, a stone which is widely used for road building. The buildings are of industrial archaeological interest because they are early examples of the use of reinforced concrete. At one time over 2,000 people were employed at these quarries – it must have been a bleak place to work in the Winter.

A little higher up the hill, on the summit, are a couple of ‘golf balls’ (as they are known locally). In the Second World War a RAF radar station was established here. It closed in 1957 but was later reactivated as part of the National Air Traffic Services monitoring the UK airspace – the larger ‘golf ball’ monitors aircraft within a 100-mile radius, the smaller one is a Met Office weather radar station

Not unlike a scene from a James Bond movie

It was a fascinating place (and good weather) and so worthy of some photographs. These were taken with my iPhone and once again shows what great images these phones can produce. However, it would be good to make a repeat visit with my medium format camera and take some detailed shots of those derelict buildings.

One of the locals didn’t take too kindly to our presence

And finally, although I am not altogether comfortable with having my photograph taken (preferring to be the other side of the camera), Mrs H did take one that I may use as an avatar:

Painting with light: By the light of the silvery moon

In a departure from my usual type of photography, I have just tried some Painting with light. I have seen plenty of long exposure night photographs over the years (in fact I’ve taken a number myself), but they have generally been the light trails from cars, illuminated architecture, or spinning balls of glowing wire wool. Then I came upon Dirk Ercken, who previously inspired some of my flower photography (see April showers may bring flowers), and who also does Painting with light photography, often on a small scale – sometimes the interior of buildings or small woodland scenes. This is much more appealing to me, so I thought I’d give it a go.

At the time of writing (30th August), the UK was due the brightest and largest moon of 2023. This full moon is referred to as a Blue Moon; but it has nothing to do with its colour, it is just the name given to the second full moon of any given month (there is an excellent explanation of the names of full moons on the Royal Museums Greenwich website). However, it is also a Supermoon because it occurs at a period when the moon is closer to the Earth, making it appear larger in the sky than normal. To have both a Blue Moon and a Supermoon at the same time is quite rare and, on average, only occurs every 10 years.

I therefore decided to make the most of the occasion and capture a Painting with light whilst including the Supermoon. Of course, the moon is nowhere near as large as you imagine when photographed, but at least it adds an interesting background to the shot, even when partially hidden behind the trees.

There is much more to Painting with light than it first seems and it has certainly stimulated my photography. I have therefore decided to write a series of blog posts following my ‘journey’, just in case someone else wants to give it a try during the long Winter months ahead. You will be able to spot which ones they are because they will all have the word ‘light‘ added spuriously somewhere in the title. Keep checking back.

And finally….

Painting with light: I’ve seen the light

Even at my age, I am always surprised when the Summer Solstice (the longest day) arrives at the end of June; Summer seems to have hardly started, and yet the mornings are going to get darker and the evenings shorter. For some time, I have thought about utilising the dark mornings and evenings in my photography, and now is the time to do so, and I’ve decided to do a bit of Painting with light.

So, what is “Painting with light?” I hear you ask. It is simply taking a photograph in the dark and then lighting select parts of the scene with portable lighting during a long exposure, in an attempt to create an ethereal view.

“Is Painting with light the same as Light painting?”. The boundaries are a bit blurred, but light painting generally refers to the act of recording the shapes or patterns of moving lights during a long exposure, with the light source itself becoming the focus of the image, whereas in painting with light the objective is never to see the light source, only its effect. In reality, both terms seem to be interchangeable

OK, so why Painting with light?“. Although it looks relatively easy, there can be more to it than meets the eye. I haven’t done a lot of low-light photography, so it means I will learn something along the way. And not only is there the physical part of taking the images in the first instance, but there is also the post-processing of those images to create one finished landscape. It makes it a bit more interesting to see where I can take it.

So above is my first attempt – and what have I learnt?

  • The image hasn’t really got a focal point, which means you are searching for something to concentrate on. I need to work on my physical composition.
  • The lighting was done quite quickly and from the same height. This makes the image a bit ‘flat’. I need to light from different heights and take my time.
  • I should have lit further back into the shot to create more depth.
  • I need to use a smaller aperture. This was shot at f/8.0 but the foreground is noticeably out-of-focus.

Overall, though, I’m quite pleased with how it has come out and it was fun to do. And isn’t that the point?

In later blog posts, I’ll discuss the gear required for painting with light, the camera settings I use, and my post-processing workflow.

And finally, just to give you an idea about how dark it really was, here’s just one of the 17 images that make up the final shot:

‘Loades’ of walking

Today we took our three dogs for a nice walk around the Dudmaston estate, near Bridgnorth in Shropshire, starting and ending at Hampton Loade, which is probably best known for its (now closed) passenger river ferry. We took the ‘Captain Geoffrey’s Note 1 Woodland Walk’ which, at some 6 miles long Note 2, circumnavigates Dudmaston Hall, running alongside the river Severn for some way, passes by 4 large pools , through the village of Quatt, and ends after crossing a number of (barely signposted) fields.

It was a very pleasant walk and the dogs enjoyed it immensely. Some of the paths were extremely muddy following a month of wet weather but those in the main part of the estate grounds are well maintained and there is very little road work apart from a couple of brief sections on the main A442. We stopped for a drink and some cake at the Quatt Farm Shop & Cafe who also provided complimentary sausages for the dogs!

Experience tells me that trying to mix photography with dog walking is destined for failure and so the medium format gear stayed at home. I did, however, take my iPhone with me and took a selection of images along the way proving, once again, that the best camera is the one that you have with you.

Note 1: The walk is named after Captain Geoffrey Wolryche-Whitmore (1881–1969) who was agent of the Dudmaston estate in the early 1900’s and who’s vision and estate management is lauded with saving the estate from financial ruin by changing the focus from farming to forestry.

Note 2: The Captain Geoffreys Woodland Walk is the longest planned route at just over 6 miles long. Other dog friendly walks around the Dudmaston estate are also available from just over 1 mile and, of course, you can mix-and-match them to suit. Parking at the National Trust car parks is £5 for the day (non-members).