Secret Ironbridge: A nasty accident

In 1898 the local newspaper carried a report of a nasty accident that occurred to a young girl on a bicycle in Jackfield:

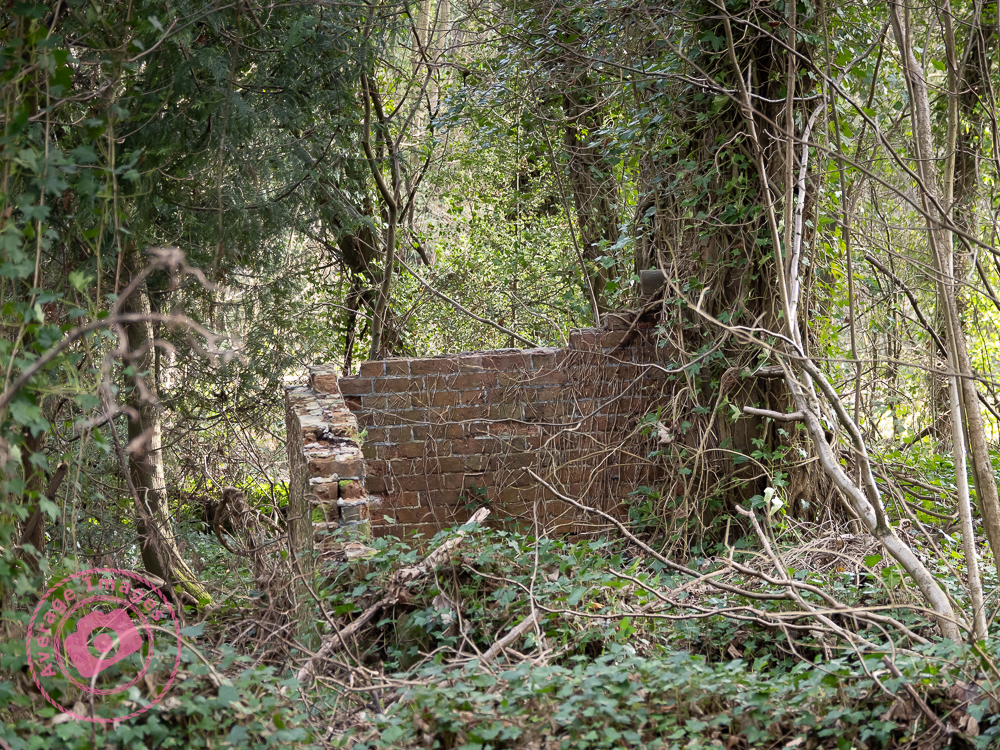
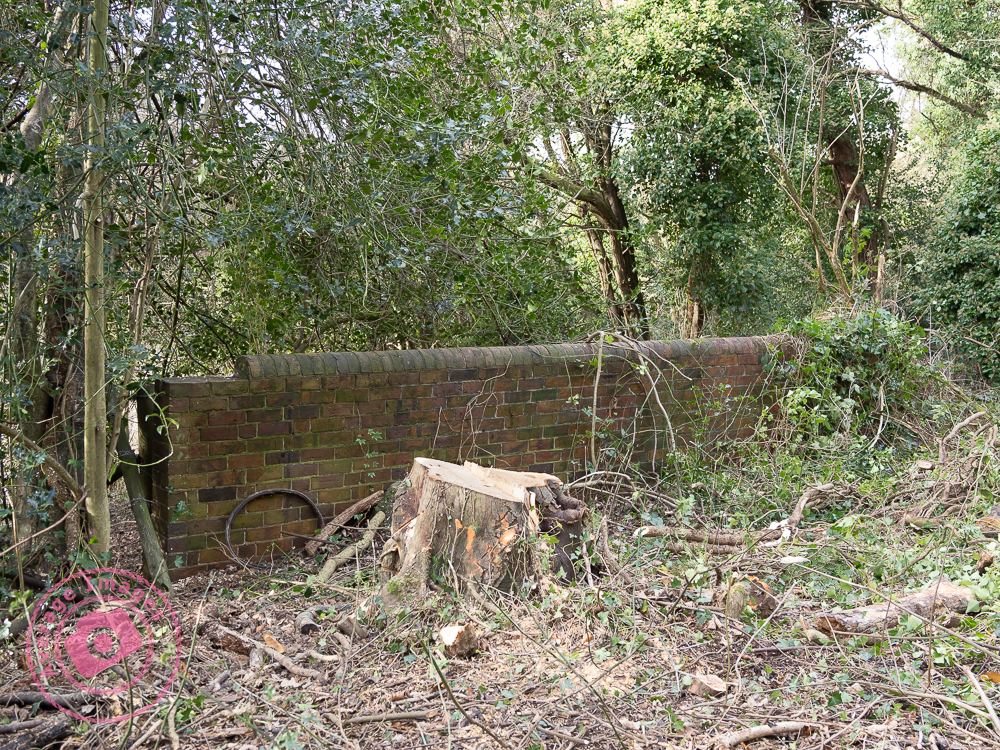
On Saturday Miss Milly Pritchard of Ellsmere met with a serious accident. It appears that Miss Pritchard (who was on a visit at Mrs Doughty’s, Tuckies House) went for a bicycle ride with Miss Doughty, proceeding from the Tuckies House down the road leading from the Dingle to the Severn. From some cause or another Miss Pritchard lost control of the machine, which travelled at great speed, passing under the railway arch, and then swerved around and with great force came in contact with Mr Charles Perks’s garden wall. The unfortunate rider sustained a compound fracture of the jaw, also a compound fracture of the left knee, and the machine was smashed. Mr and Mrs Perks carried Miss Pritchard into their house and placed her upon the sofa, after which Miss Thompson (district nurse) and Mr George Bunnager (member of St. John Ambulance Association) rendered first aid. Dr. Collins of Broseley was sent for, and under his care Miss Pritchard is progressing as favourably as can be expected.

Wellington Journal, 30th April 1898

It doesn’t say how old the girl was, or what the after-effects of the accident were – although with compound fractures of both the jaw and the knee it can be assumed that it was a lengthy recovery. This was 50 years before the founding of the National Health Service in the UK which perhaps explains why the poor girl wasn’t taken to a hospital – because they were only available to the wealthy.

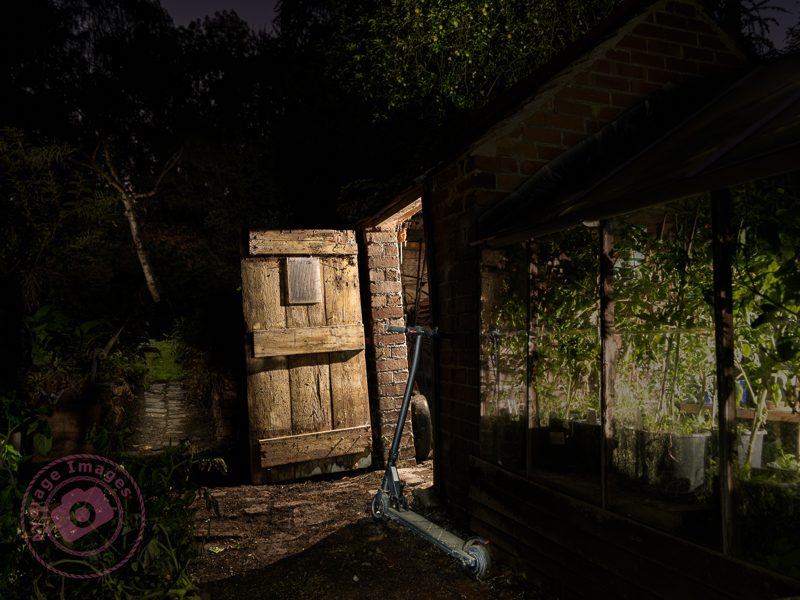
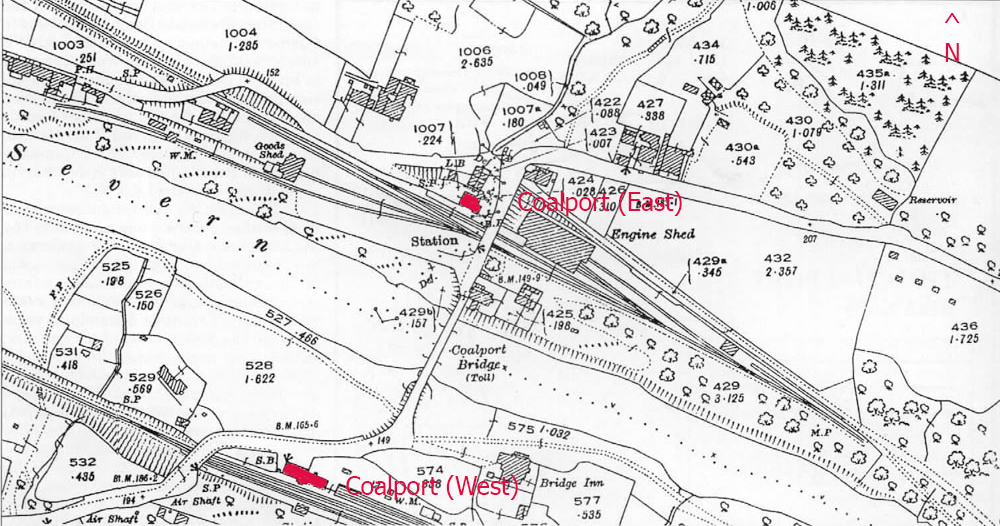
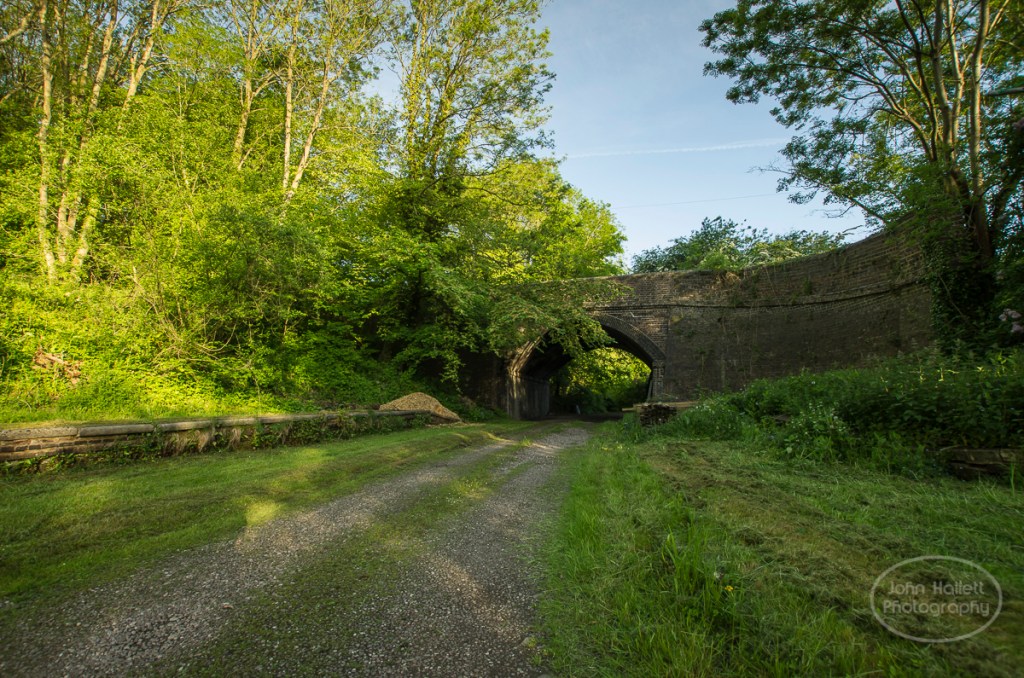
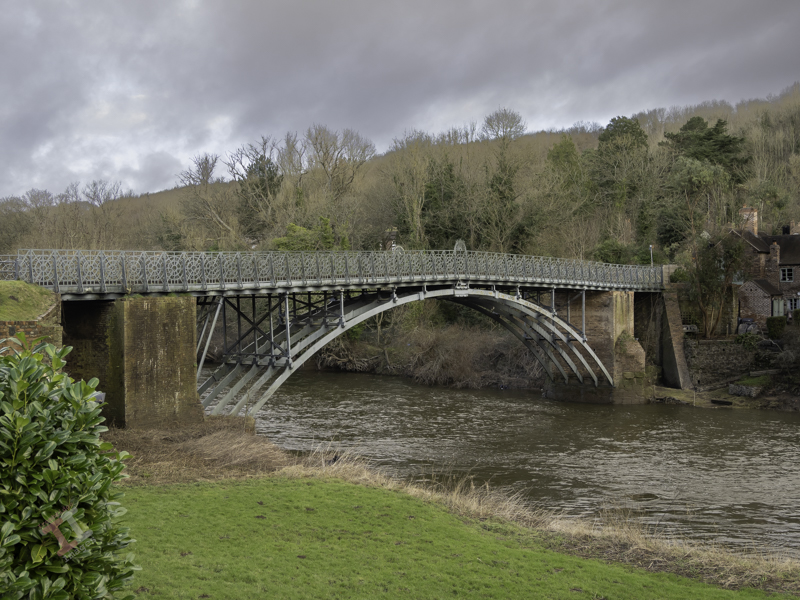
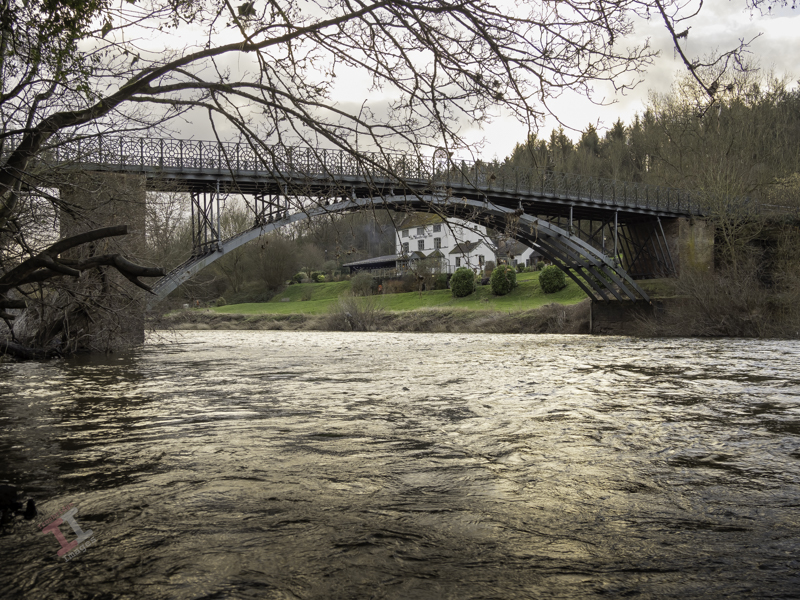
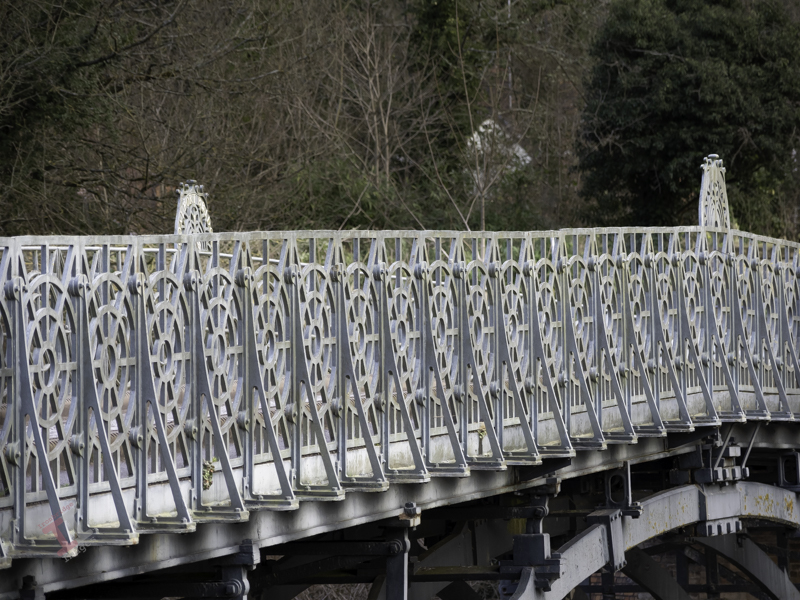
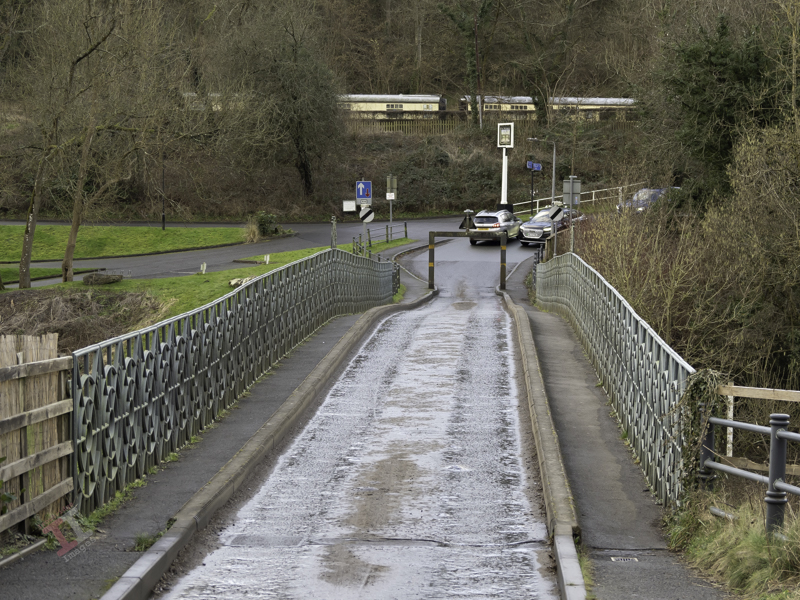
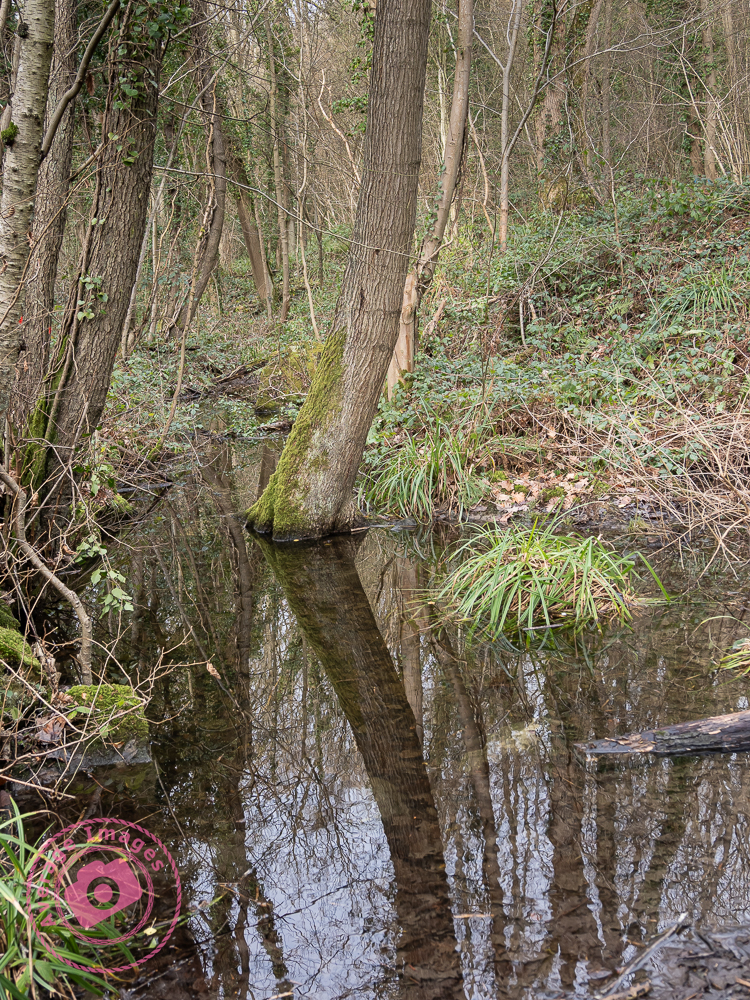
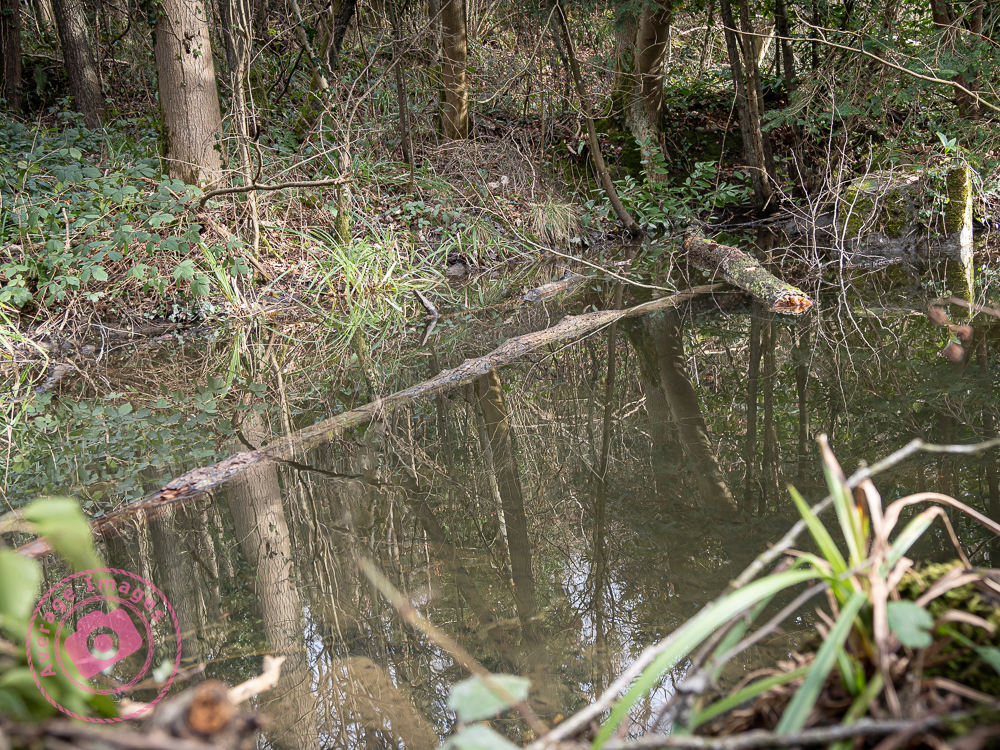
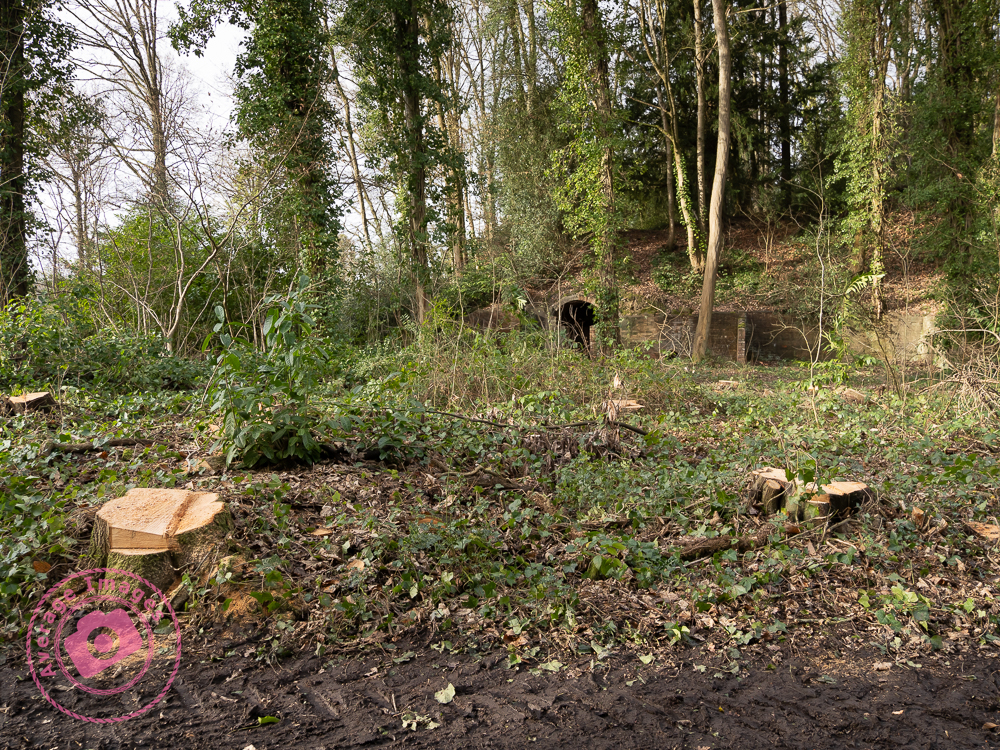
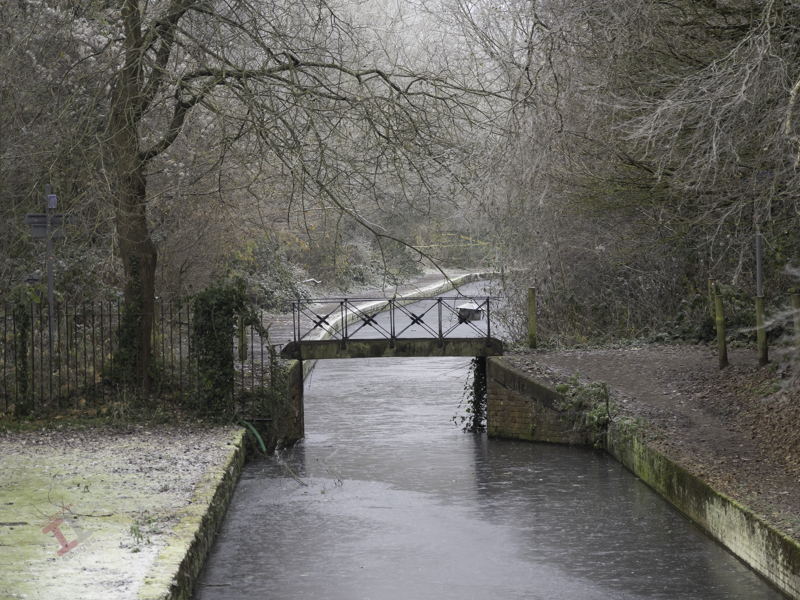
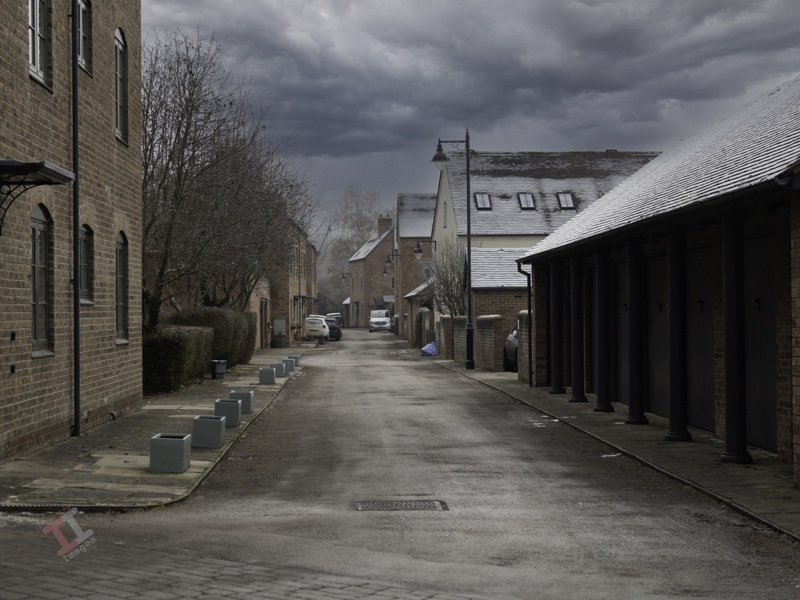
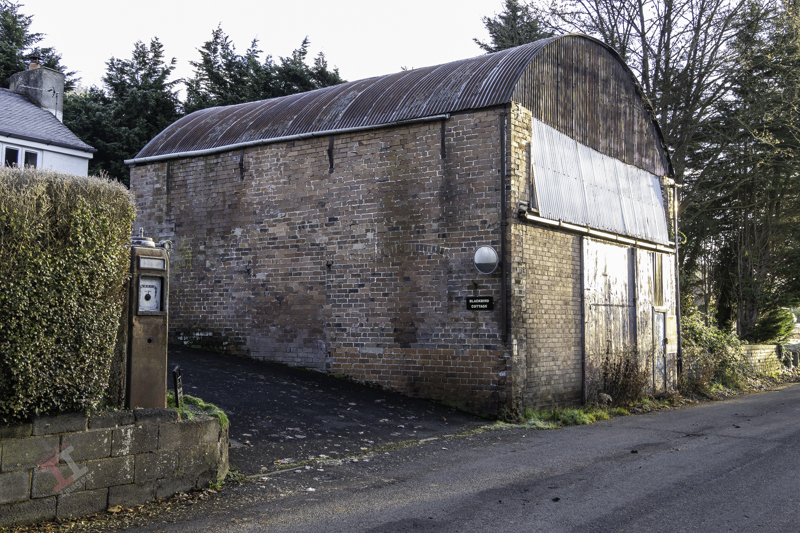
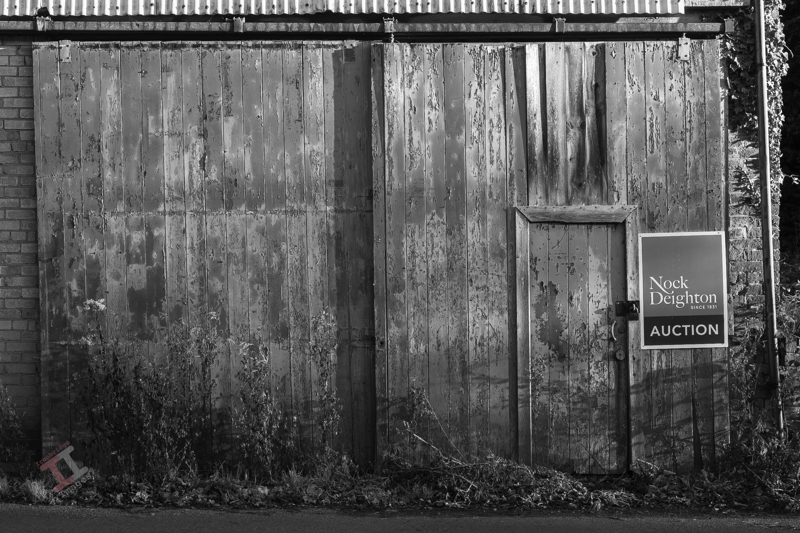
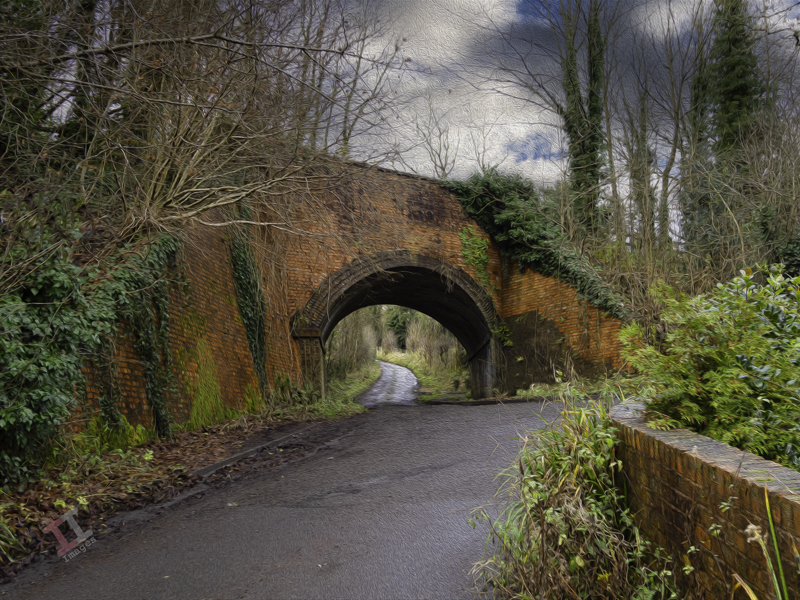
Here is the view that Milly must have seen as she careered down the lane, under the railway bridge carrying the Great Western Railway, and onwards into the wall beyond:

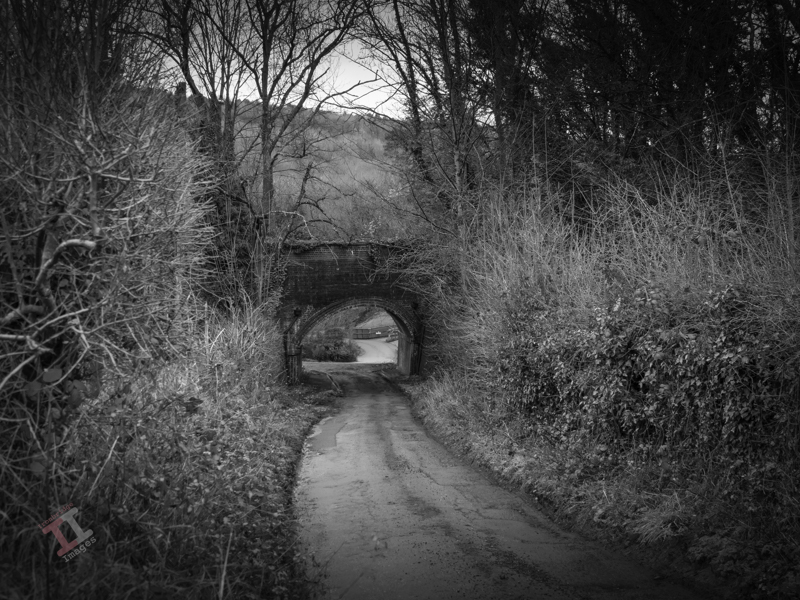
In reality the scene is littered with street furniture: height restriction signs, a salt bin, various random signposts and some plastic bollards leaning at odd angles. I removed them all in post-processing to recreate the picture as it would have looked at the time.

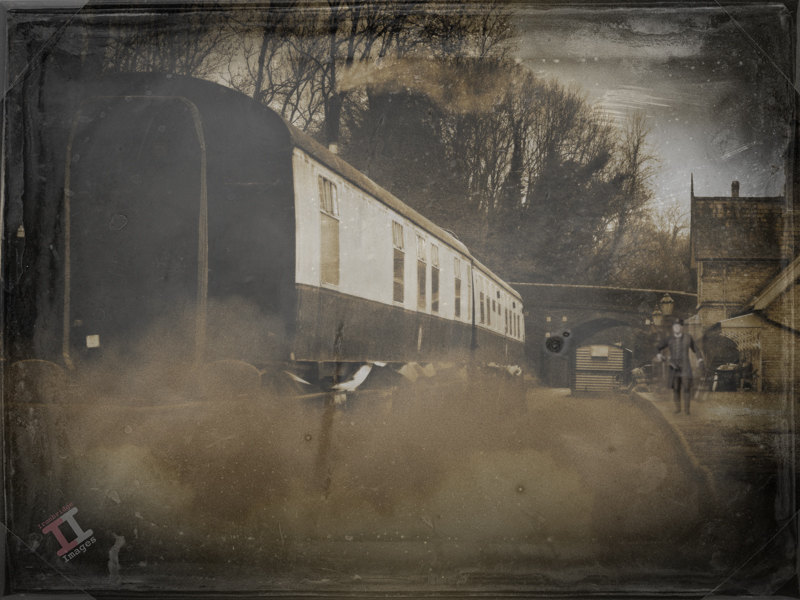
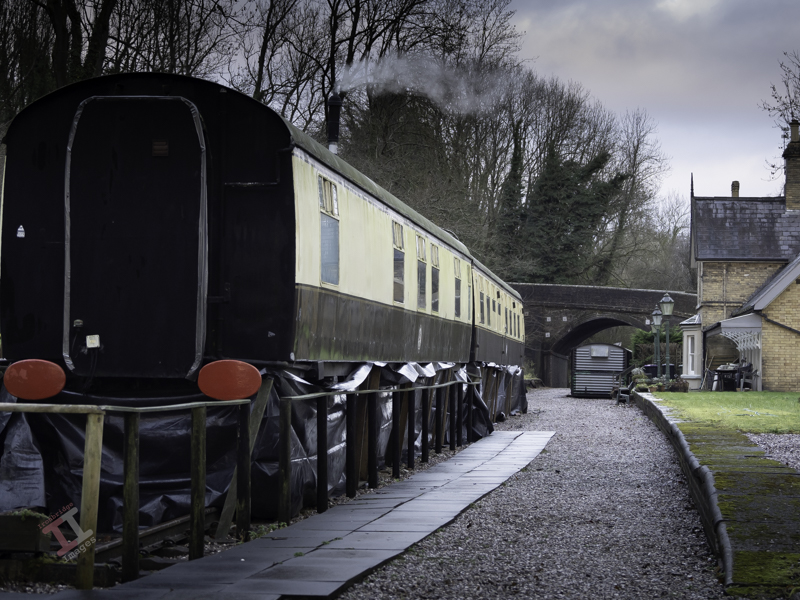
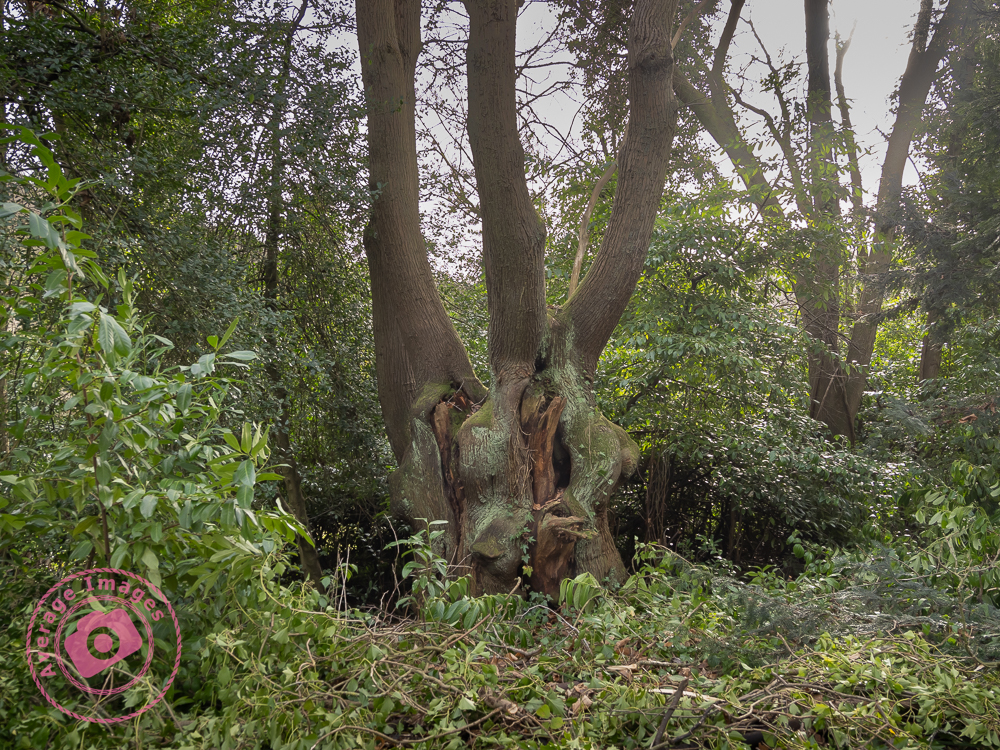
I had an idea to add “a Victorian girl on a bicycle” to one of the images using the ‘Generative Fill’ function of Photoshop, which uses Artificial Intelligence (AI) in order to create elements within an existing image. Here are the suggestions it gave me:

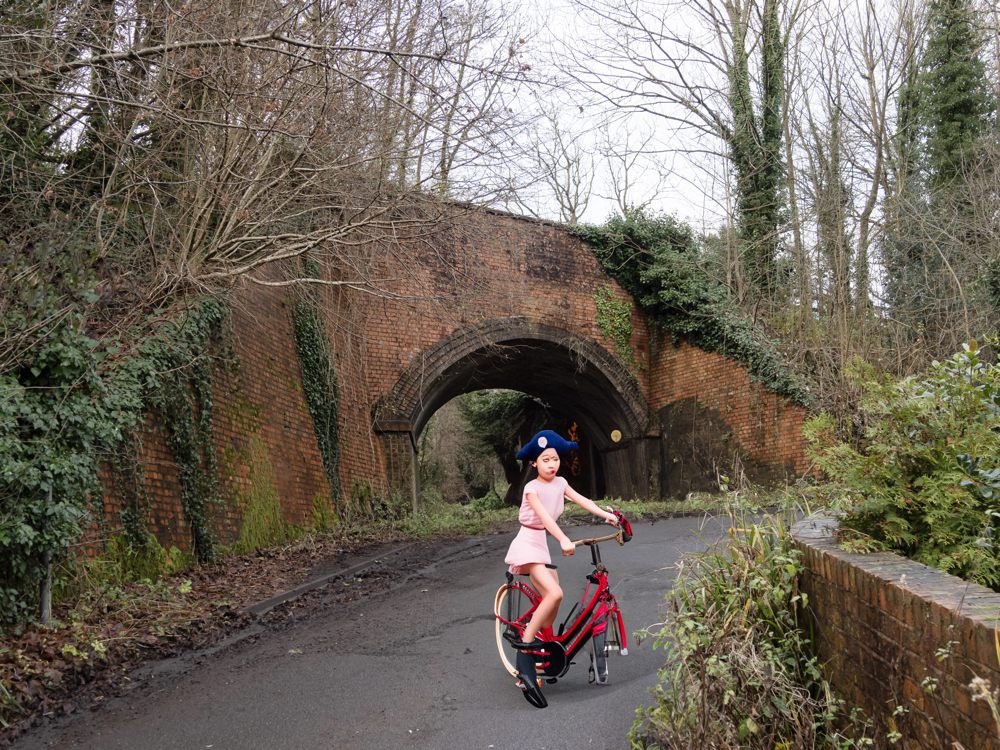
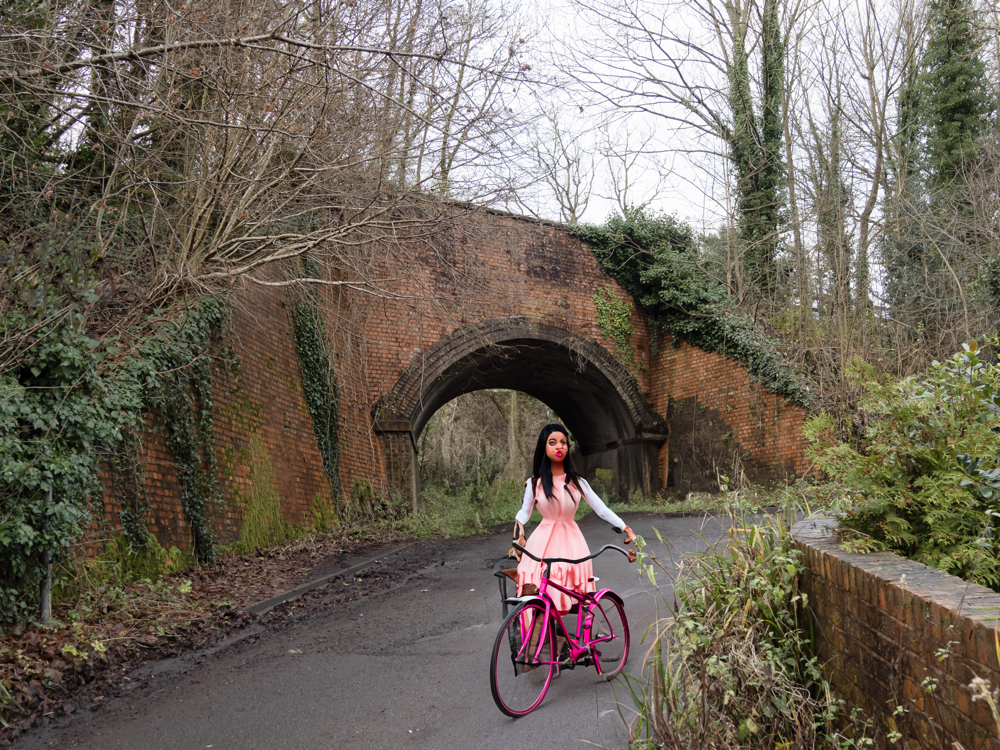
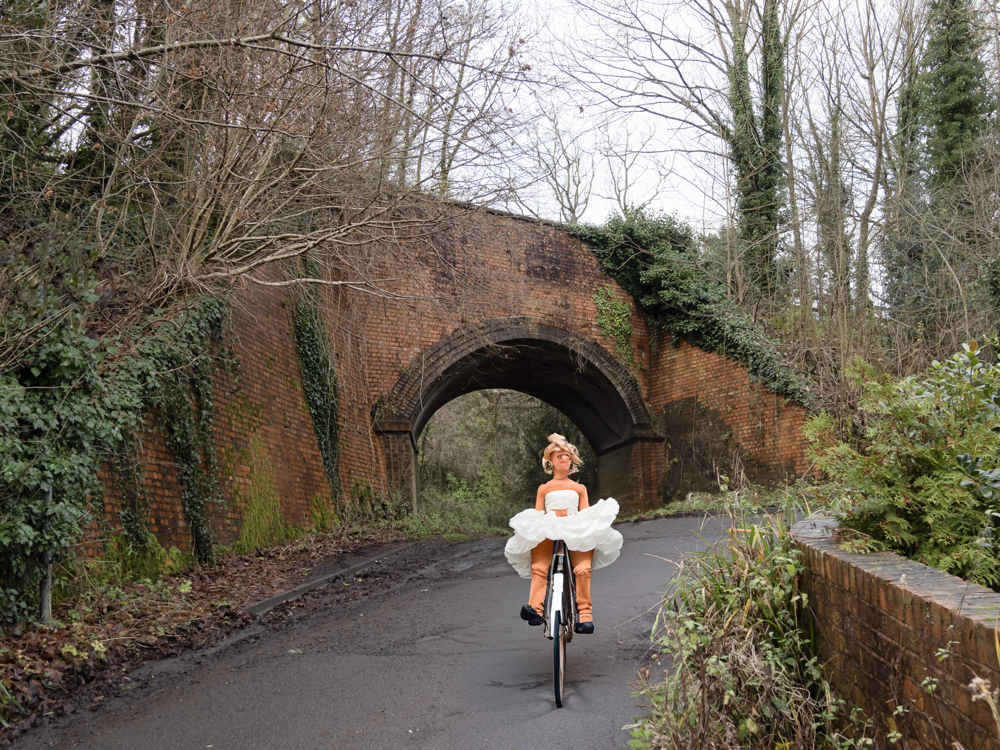
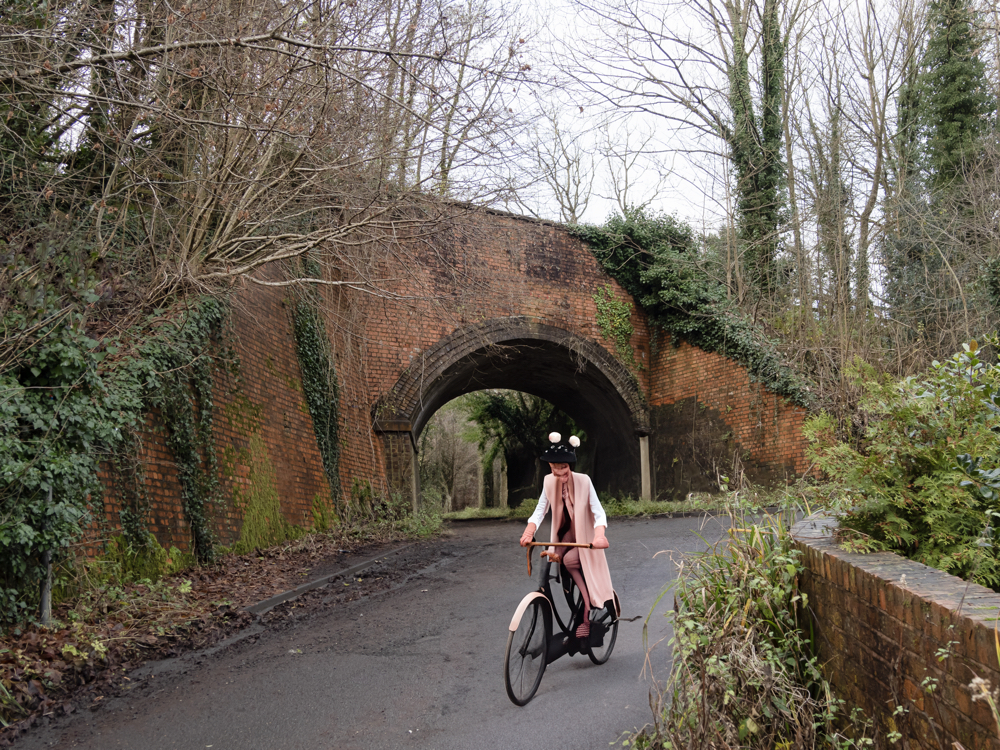
Those of you who think that photography is dead because of artificial intelligence, clearly don’t need to worry just yet!


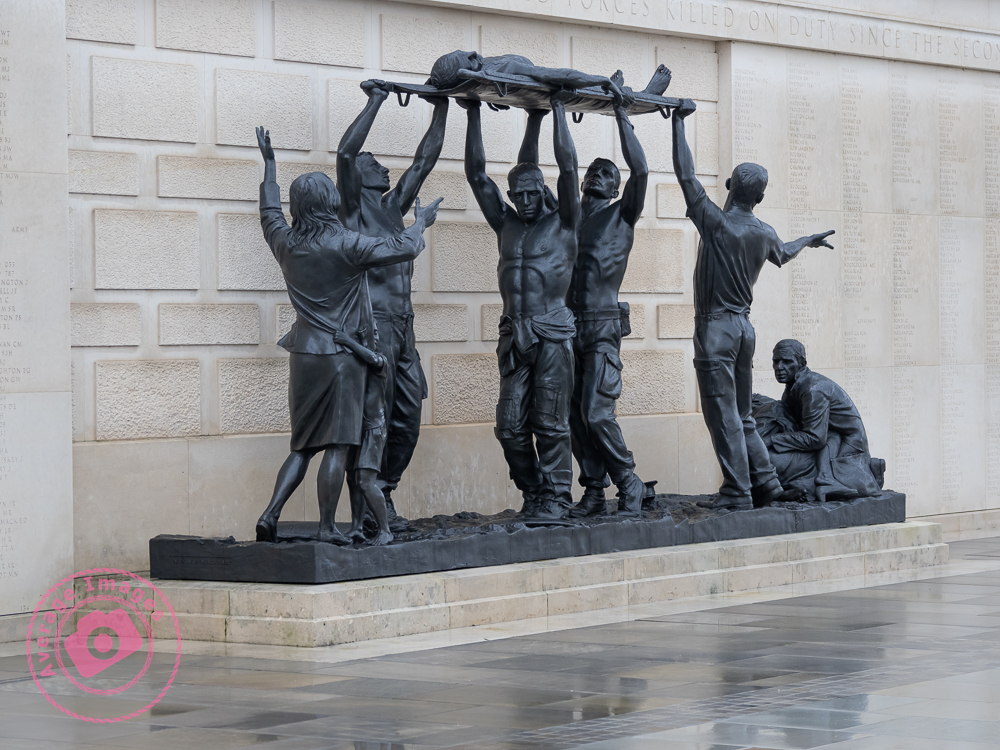
Milly may have survived the accident, but there was worst to come. Just 16 years later, the Great War (World War One) broke out which, as we know, was a brutal period in our history. Many died, including those from this small community, and a unique memorial was created in their honour. More of this in the next Secret Ironbridge blog post.

Painting with light: A trick of the light

So, ‘that’s a wrap”, as I believe they say in the film industry. This is the final post in my Painting with light series, but before I sign off, here are some advanced tips and tricks to make your Painting with light stand out from the crowd:

  • Don’t just shine your torch whilst standing behind your camera; the image will look flat and 2-dimensional. Move to the sides and paint the light from there. This will bring out shadows and texture to give the image depth.
  • Don’t paint the light from the same height every time. Stoop down or hold the torch above your head to vary the direction of the light beam. This will also give depth to the image.
  • Move the beam of light in strokes (a bit like a paintbrush) – slow, overlapping strokes to create brighter areas, and faster, sparser strokes for duller ones. The image will be far more interesting with varying intensities of light.
  • Keep the light moving at all times to reduce the chance of hot spots.
  • Remember that different surfaces react differently to the light; dark, rough surfaces require more lighting than pale, smooth ones.
  • Unless you are standing directly behind something solid, don’t point the torch back towards the camera otherwise you will create flare (or use a modifier).
  • Try to include some ambient light into outdoor images, maybe the faint glow of the sky, moonlight or stars.
  • Used coloured gels to create interesting variations in the lighting of your image.

And some post-processing tips:

  • Take many shots of small areas of the scene to create multiple layers – you can then adjust each one individually to create a detailed final image.
  • Create a layer mask for each layer and paint out everything other than the torch-lit area. This gives you full control of each element of the final image.
  • Vary the opacity to reduce the brightness of each layer to change how imposing they are in the final image.
  • Create an individual adjustment layer for specific layers so that you can change the exposure, contrast, light balance and even colour.
  • Keep your monitor clean. When working with very dark images, every smear or speck of dust shows up โ€“ and I’ve lost track of how many times I’ve tried to remove a blemish using Photoshop only to find out it’s actually on my monitor!

You can keep up-to-date with all of my blog posts by subscribing for free to receive updates via your email inbox or the Reader app:

Secret Ironbridge: Lost village

Some claim it to have been a village, others that it was just a suburb of the village of Jackfield, but either way The Werps now ceases to exist.

The Werps lay on the southern side of the River Severn, immediately opposite the Coalport china works.

A map from 1883 show at least 22 separate dwellings, some quite large with substantial gardens. A later 1925 map shows that it was largely unchanged, albeit by that time the Werps Inn had changed its name to the General Gordon.

It is variously reported that two tragedies occurred here, 34 years apart:

On Friday night a sad accident, terminating fatally, happened to one of the twin sons of Mr George Stephan, at the Werps. The children were put to bed by the servant, a small fire having been previously lighted in the room. Shortly afterwards a scream was heard and the father rushed to the apartment. One of the children, Eustace, was in flames. These were quickly extinguished by the energetic and agonised parent. The injuries sustained were not sufficient of themselves to account for death, but the shock given to the nervous system was too severe to be resisted, and death followed in consequence.

THE IRONBRIDGE WEEKLY JOURNAL 31st December 1870

On Thursday an inquest was held by Mr Coroner Potts on the body of a little girl named Stephan, the daughter of Mr G. Stephan, landlord of the General Gordon Inn, who had died form the effects of burns. On Monday morning, during the momentary absence of the mother, the child’s clothing caught fire, and although medical aid was obtained, she died from the effects of the burns and shock. The verdict of the Jury was one of “Accidental death”.

The Wellington Journal 1904

Note: Further checking shows that the little girls name was Beatrice Stephan and her father was the twin of Eustace, who died in similar circumstances 30 years prior.

After reading the Journals from the early 20th century, it does seem that child fatality rates for burns was quite high, probably due to the use of open fires and candles. However, for two related children to die in the same manner 30 years apart is very, very sad.

The buildings at The Werps still show on a map from 1957, although it is not clear if they were still inhabited at that time.

I spent some time looking through the undergrowth and trees to see if I could identify any remains of the Werps, but all I could find was one small corner of brickwork. It seems that some concerted effort was made to raze the community to the ground.

The riverside path that runs in front of the Werps has a post blocking vehicles that, for some unknown reason, is in the form of a missile. It is an ironic marker post for a village that has been wiped from the face of the Earth.

The missile is also ironic in that it is very close to a unique war memorial, which we will visit in a later Secret Ironbridge blog post, after we visit the scene of a nasty accident.

Secret Ironbridge: Great Western Railway

Considering that Coalport is only a small village, you may find it surprising that it had two railway stations.

I have already mentioned Coalport (East) in my post Secret Ironbridge: London & North Western Railway โ€“ but directly on the opposite side of the river (in the Coalport hamlet of Preens Eddy) was another station โ€“ Coalport (West) – which served the Great Western Railway (GWR) that ran from Kidderminster & Bridgnorth, and onwards to Ironbridge & Shrewsbury.

Confused? – you will be“. If you look at the map (above) from 1925 you will see that Coalport (East) is only slightly in a more easterly direction than its counterpart. If I had been in charge of station names I would have been tempted to call them Coalport (North) and Coalport (South) – not least to eliminate the confusion that the line from Coalport (East) only takes you West! Maybe there is a station-naming protocol that I am unaware of. If so, please let me know.

The old GWR railway track has long been removed, although the original course of the line can be clearly seen, and most of it is now a footpath called the Severn Valley Way. The station, however, still stands and has been tastefully converted into a house. In addition, two Mark1 railway carriages stand on tracks near the platform and are let out as self-catering holiday accommodation.

Just west of the station is Sweyney bridge, which carries the road from the Coalport to Broseley, and is still an important route to the river crossing mentioned in Secret Ironbridge: Another bridge of iron.

Back in 2003, I conducted a small project called “Bridges of the Ironbridge Gorge”, when I photographed all 25 of them, ranging from the iconic Iron Bridge over the river Severn to a much smaller footbridge that crosses the Shropshire canal. The (then) owners of Coalport (West) Station kindly allowed me onto their land to capture the shot below to help complete the project:

And now – an admission. The ‘old’ photograph above is not “Coalport (West) station in its heyday”, it is actually a photograph I took a couple of weeks ago (from public land) and manipulated in Photoshop for a bit of fun. The lack of any railway tracks and the AI station master may be a bit of a clue.

We’ll be seeing more of the GWR line as we follow it up the Ironbridge Gorge to uncover some more Secret Ironbridge, including a lost village and the site of a nasty accident.

Painting with light: Light at the end of the tunnel

Continuing with our Painting with light post-processing; now that you have all of the individual images displayed as layers (see Painting with light: Light duties), we can start blending them together. This is the fun part, and it is fascinating to turn individual layers on and off to see their effect on the overall composition. Bear in mind that the post-processing may take some time (maybe hours), and that you may even want to leave it for a day or so, and then go back to it to rethink how it looks. Make sure you save the file often so you don’t lose all your hard work.

Germ warfare

You will, of course, need some post-processing software. Personally, I use Adobe Photoshop, but there are various other alternatives in different price brackets. It is a pre-requisite for creating composites that you need software that can work with layers, so that you can blend multiple images together. You also need a computer with plenty of Random Access Memory (RAM) because working with layers (I often blend 20 or more together to create one composite) can slow your computer down considerably.

This isn’t a tutorial on using a specific post-processing program, and so I am not going to indicate which key to press to achieve a specific action. I’m going to assume that you have a decent grasp of the program that you use – and that you understand layers, masks and blending modes, although you only need a small number of options to create a Painting with light (hopefully, you have read my blog post: Painting with light: Bringing to light – an introduction to layers, blending modes and layer masks).

I am going to assume that you have followed my earlier blog post: Painting with light: Light duties, and so you have all of the chosen images in layers, all in order and with visibility switched off, on all but the background layer.

The first step is to ensure that the background layer is exactly as you want it – because this will be the foundation onto which all the other layers sit. You need to make sure that any parts of that background layer that are not required (light overspill, for example) are removed. If you need to carry out adjustments, it is always better to create a duplicate layer and then add a layer mask to that, rather than adding it to the original background layer. In this way, the original is always untouched.

This was the layer I chose as the background. I adjusted the exposure so that the marble-effect table-top was correct, ignoring the rest of the image, knowing that I was going to add to it later.

Once you are happy with the background layer you can start adding more layers to it. Choose the next layer (usually the next one up the list of layers in the layer panel) and turn its visibility on. It will immediately cover the background layer, hiding it from view.

Go to the ‘blending mode’ drop-down box and choose ‘lighten’. This will show the background layer again, and with it, all of the light areas from the new layer, ignoring its darker, shadowed areas.

Again, add a layer mask and use a black brush on the mask to remove any areas of the new layer that are not wanted.

I chose the layer with the correctly-exposed microscope as my second layer, because this is the ‘hero’ of the shot.

There was some overspill of light on the bottles and the microscope base and so I added a layer mask and, with a black brush, removed that areas of the layer that I didn’t like.

Here you can see my layers ready to be added. Only the bottom two are currently visible, as denoted by the ‘eye’ icon. You can also see the layer mask applied to the second layer.

The same shot after the layer mask had been added and the extraneous light removed.

I then added a more subtle layer (I had deliberately created some vertical light reflections in the bottles using the wand tool).

Now I added a layer that had the red box lid exposed.

It was just too bright, and so I added a brightness/contract adjustment layer, making sure that I checked the box to clip it to that layer only, rather than the entire composite.

Instead of using an adjustment layer I could have lowered the intensity by using the Opacity slider. Either way, the result is a more balance image.

I continued adding and adjusting layers from the 15 images that I took in total. Many of the layers weren’t used because they didn’t add anything to the final vision of what I was trying to achieve.

If I was short on storage space or my computer was running slowly, I could have deleted the unused layers, but I chose to keep them just in case I change my mind later.

Remember, that each layer can be revisited and re-adjusted later on, so it is not critical that you get it right the first time – and as the composite builds up with more layers, you may find that earlier layers need to be adjusted to suit.

Finally you can save the completed composite as a single, merged layer. At this point you may want to crop it, adjust the overall exposure or add vignettes, for example.

We are nearing the end of the Painting with light series now (just one more blog post to go). I am surprised that this isn’t a more popular genre of photography, particularly for still-life imagery, given its ease andโ€‚low cost compared with studio lighting set-ups, and that it is a good learning curve for layers, blending modes and layer masks, but I will leave the entire series published for those few who want to give it a try.

Secret Ironbridge: Another bridge of iron

There has been a bridge over the river Severn at the eastern end of Coalport for many, many years. The original bridge was made of wood and was erected in 1780 and hence explains the name of the Woodbridge Inn adjacent to it (although it was originally called the “Bridge Inn’ until the late 1920’s).

At that time the bridge was more commonly known as Preens Eddy bridge (Preens Eddy being the name of this hamlet of Coalport) and was erected by Robert Palmer, a Madeley timber merchant. This original bridge had two spans with a central stone pillar.

In 1795 the bridge was severely damaged by floods (which were so high that the river washed over into the canal at the transhipment interchange) and, during its restoration, the central stone pillar was removed and the existing wooden superstructure was then supported by three arches of cast iron which spanned the full width of the river. There is no record of where these arches were cast.

In 1817, one of the arches of the bridge cracked in two places and the following year it was replaced, two more arches were added, and the wooden deck was replaced by iron plates. This was done by the firm of John Onions, whose initials, together with the date 1818, are recorded on the parapet โ€“ which belies the fact that the bridge existed some 38 years earlier.

The showpiece bridge at Ironbridge has meant that this cast iron bridge at Coalport is often overlooked. But it shouldn’t; unlike its nemesis, Coalport Bridge still carries vehicular traffic and acts as an important functional river crossing to this day. It is much more conservative with its use of metal, with every piece designed for a function, and so is actually more of a technological marvel than its upstream cousin.

Like many river crossings of time, there was a toll charged to use the bridge. The payment window of the toll house is still clearly visible today.

To try and preserve the bridge, it is single-file traffic only, with height restrictors to prevent vans and lorries from overloading it. This often causes some congestion, especially at peak times in the morning and evening.

In the background you can see railway carriages at Coalport (West) station, the subject of the next Secret Ironbridge blog post.

Painting with light: Bringing to light

As mentioned in earlier Painting with light blog posts, it is easier to take multiple exposures and then blend them together during post-processing, than to try and capture the scene in one shot. However, this assumes a basic knowledge of some post-processing tools, namely; layers, blending modes and layer masks. Knowing how to use them is useful in all genres of photography, not just Painting with light, and so it is worth having a go.

The first part of this blog post is actually taken from a series of post-processing tutorials that I published on a previous incarnation of this web site way back in 2008. It just goes to show that, although the interface of programs such as Photoshop may have changed, the basic principles still remain.


Layers:

Imagine that you have a photographic print lying on the table in front of you (we can call this the background image). Now place a clear sheet of glass on top of the print and write some text onto the sheet of glass.

As you look down you see both the original image on the print – and the text – as if it were one. But the print itself is exactly as it was and has not been altered in any way. You change the text on the glass, move it so that the text is in a different position, or delete the glass altogether; all without affecting the original print.

Now add a second sheet of glass over the first one – but a sheet of glass with a grey tint to it.

Now, as you look down, you see a darker image than before, because the grey glass has darkened the appearance of the original print and the text on the first piece of glass. You can still go back to the first piece of glass and alter the text or move its position. If you don’t like the darker version you can take the second piece of glass and throw it away. If you want the original print darker but the text with the original exposure you can swap the order of the sheets of glass, so that the text layer is on top.

This analogy describes how layers work. They can be altered individually to change the overall appearance of the image, but it is non-destructive, and so the original image remains untouched at all times.


Blending modes:

Blending modes dictate how a layer interacts with the layers beneath it.

For example; Here we have the first ‘background’ image from my earlier shot of the small lathe. The background is correctly exposed, with the lathe itself completely in shadow.

If we add another layer over the top, which has the lathe correctly exposed but the background in darkness, it completely covers the background layer below, almost as if it doesn’t exist.

By choosing the ‘lighten‘ blending mode, it allows all of the light areas from the background layer to show through, to blend with the uppermost layer.

Of course, the above example is only blending two layers together, but you can blend an unlimited number – which is how we can build up a Painting with light composite.

There are lots of different blending modes (26 of them in Photoshop), all of which have their own individual uses depending on the type of image that you are processing and the effect that you are after. However, for Painting with light you will nearly always need the ‘lighten’ blending mode.


Layer masks:

So what if you actually don’t want to see part of a layer at all? This is where layer masks come into play. As the name implies, it masks part of a layer.

For example: If we don’t want to see the right-hand side of the lathe as lit by the torch, we open a layer mask and, with a black brush, paint over that section.

This then allows the layer beneath (in this case, the background image) to show through. This is very useful in Painting with light because you can mask out any light overspill on individual layers.

Note that here we haven’t actually painted onto the image, but only onto the mask, allowing the original exposure to show through.

I think that Painting with light is an ideal way to understand how layers, blending modes and layer masks work together, because it is a step-by-step process and very easy to see how one layer interacts with another, and in the next blog post of this series I will go through the entire process from start to finish on one image. Once you get to grips with layers, blending modes and layer masks, you can take them forward into other genres of your photography.

The above is only a very brief description of layers, blending modes and layer masks, because it would be impossible to provide full details in the space available here. If you want to learn more, there are plenty of websites, books and YouTube videos available to guide you on how to use your particular processing program.

Painting with light: Turn light

Lighting a close-up with Painting with light is far more difficult than with a still life or landscape shot – it is very easy to over-expose the shot and far more difficult to limit the amount of light over-spilling onto an adjacent area. For the shot below, I only managed 6 shots before I had lit every area, compared with over 20 in some of my earlier blog post shots. I used my small snoot tool, but possibly need to create an even smaller one for future close-up shots.

Other than that, Painting with light for close-up (or macro) shots is pretty much the same as with a landscape: take multiple shots with different areas lit, and then combine the shots in post-processing.


I have an old bench-top lathe that belonged to my father (who was a watchmaker) that he utilised to turn down new watch cogs when a direct replacement wasn’t available. It was his pride and joy for many years, and my mother used to joke that if he ever left home, the first thing that he would pack would be his lathe.

I decided, for this shot, to photograph a close-up of the lathe with a small watch cog and use the Painting with light technique to illuminate the scene. At the same time, I wanted to try out a function on my Olympus E-M1 Mark iii, called Live Time.

Live Time allows you to watch the exposure gradually develop on the Live View screen. Basically you use the cameras Bulb mode and press once to open the shutter, and press a second time to close it. When the shutter is open, you can shine your torch at the subject, whilst watching the screen to see how the exposure looks, in ‘live time‘. It worked quite well, albeit that the exposure times were quite short because of how close the light was to the subject. It may work better with still life shots, although not so effective with landscapes, when you need to leave the back of the camera in order to operate the torch.

There is another function on the camera called Live Composite. This works in a similar manner and is something that I will try out in a later blog post.

If you go down to the woods today

… you are in for a bit of a shock. Or you will be if the particular woods you are going to are located at The Lloyds Coppice near Ironbridge in Shropshire, England – because there is a lot of tree-felling going on. It is being carried out in order to manage the woodland, in particular, felling any ash trees due to the widespread problem of ‘ash dieback’ (also known as Chalara dieback of ash), a disease that has spread across Europe.

Ash dieback is caused by a fungus, Hymenoscyphus fraxineus, which causes lesions where older branches meet the trunk and eventually envelops the tree and kills it. During the infection stage, branches can fall off, causing danger when trees are close to public footpaths, which explains the localised felling of the trees in the woods here. Fortunately, ash trees grow like weeds in the Ironbridge Gorge and so it won’t be long before they are naturally replenished.

Thinning out the trees has uncovered more evidence of the buildings that surrounded the old Madeley Wood Hall, as mentioned in my post Secret Ironbridge: Ice House. The ice house itself is now more visible from the path:

If you decide to visit the coppice please be mindful of the works going on and that the path is quite muddy, and covered in tree debris. Take care.

Secret Ironbridge: Transhipment interchange

Coalport. The clue is in the name – it was a ‘port for coal’. It didn’t evolve naturally, like most towns and villages, it was the brainchild of William Reynolds, a local iron master, who, in the late 1790’s, wanted to create a transhipment interchange to transfer coal from barges, brought down from the Shropshire coalfields, onto river boats, so that they could take it downstream to Bristol and the world beyond.

To make this work, he needed people – and so he built a town to house them. It was a ‘New Town’, ironically now located within the ‘New Town’ of Telford.

The coal was transferred by canal barge on the Shropshire Canal to Blists Hill and then down the Hay incline plane onto another section of the Shropshire Canal dug parallel to the River Severn. This lower section of the canal actually ran for about a half-mile and was served by warehouses, wharves, quays, and cranes to allow the transfer of coal from the barges to the river boats (called Sprys) and, of course, goods being transferred in the opposite direction.

The transhipment interchange finally closed in 1907, its demise partly accelerated by the arrival of the LNWR railway line (see Secret Ironbridge: London and North Western railway), and went into disrepair. In 1978, the Ironbridge Gorge Museum Trust published a booklet “Coalport New Town of the 1790’s” and stated, on page 10 “The interchange is one of the most important archeological sites in the Ironbridge Gorge….“.

Sadly, the lure of profit led the Trust to sell the land for housing, and modern townhouses now cover the site.

A short part of the Shropshire Canal has been restored, from the bottom of the incline plane to the Coalport China Works. A small iron footbridge crosses the canal, although this is not original to the site. Further on, the line of the canal has been (sort of) marked with coloured tarmac on the road through the modern houses.

At one time you could still walk down the entire length of the old canal, but the inhabitants of these modern houses (now called Reynolds Wharf) have had the footpath closed off with a locked gate to create their own private enclave. It’s ironic that the area that led to the creation of the village is now out-of-bounds to the majority that live there.

Once past the housing, the distinct indentation of the canal can still be seen in the undergrowth, almost up to another iron bridge, which crosses the river at the eastern end of Coalport village.

Painting with light: Light duties

Once you have completed your set of Painting with light images, you can import those images from your camera into your chosen post-processing software. If you use presets during the import process, ensure they apply to every image in the set.

Personally, I import into Adobe Lightroom. I can then quickly scan through the images and delete duplicates or apparent failures. It is crucial at this stage not to crop any of the images or make any adjustments that will make it difficult to blend in with the others (white balance, for example) later on.

Because I will be using multiple images and blending them into one composite, I need to work with layers – and since Lightroom cannot do that (yet), I transfer the chosen images into Adobe Photoshop for the actual creation of the composite. To do this, I select them all, right-click and choose ‘Edit in Photoshop as individual layers’. This will open Photoshop with all the shots as one file in a series of layers created from each torch-lit shot.

At this point, you can do some housekeeping of the layers. For example, change the order they show or label them with identifying names. You also need to switch off the visibility of all layers (apart from your background layer) so that you can build up the composite one by one.

As you save this file in Photoshop during post-processing, it will automatically show in Lightroom, making it very handy for subsequent cataloguing and exporting. I will cover the post-processing in the next blog post.


The featured shot “Warm hands” uses a phenomena called ‘Extension Distortion‘, which is a type of perspective distortion caused by wide angle lenses. It makes nearby objects appear much larger than they actually are compared to the background. I used it here to make the mannequin (which is only 40cm tall) look life-size, compared with the large fireplace behind, by using a 30mm focal length, with the camera positioned quite close to the subject.

We stopped using the fireplace last year due to smokeless fuel (which is pretty much all that you can get now) burning so badly, and giving out so little heat, that it isn’t worth the time and effort lighting it. Therefore, to give the effect of a blazing fire, I placed some white paper into the fire grate and used coloured gels over the torch as I painted the light onto it.

This is one of the benefits of the Painting with light process – it would have been challenging to create the same effect with studio lighting.

Secret Ironbridge: The fuel pump

As you pass through Coalport village, you may find it strange to see an old fuel dispensing pump standing in front of a terraced house. However, if you look at the large ‘garage-like’ building close by, you may start to appreciate that this was once the base for a small haulage company, W. Woodhall & Son (Haulage) Ltd.

Directly opposite are the former offices of Nuway Matting, and Woodhalls used to provide transport for them, as well as a sheet metal & gasket company called Chillcotts, both of which operated on the site of the old Coalport China works. I can still recall their small fleet of red, flat-bed trucks struggling to climb up the bank out of the village, diesel fumes spewing forth. Diesel which had been dispensed from their own private pump outside of their house.

The haulage company has long since gone. But the fuel pump and garage remain a testament to the industry that once graced this quiet village.

Of course, Nuway Matting, Chillcotts and W.Woodhall & Sons (Haulage) Ltd were not the first industry in the village. It all started with a transhipment interchange. More of that in the next ‘Secret Ironbridge’ blog post.

Happy new floods

We enter the new year with flooding across the UK, not least at Ironbridge close the where I live. The flood barriers have been deployed, although it seems that they may not have been required this time. As someone who has lived by the river for the majority of my life, it does seem that the frequency of flooding is on the increase. Global warming or building on the flood plains? You decide.

Memorial visit

Today we took a trip to the National Memorial Arboretum in Staffordshire – our first visit, even though it opened in 2001.

It’s probably not the best season to be able to appreciate the landscaping but we were able to take the dogs (on a lead, of course) and saw a fair few (but certainly not all) of the 400+ memorials on the site. It is a vast area (150 acres) and easily a full day if you want to see everything. It also has a very nice shop with a good range of good quality gifts and a large cafe (the jacket potato with chilli was very tasty).

There’s not much more to say, other than it was a very pleasant day out, great to catch up with Tina & Russell (who travelled up from Hertfordshire to meet us there) and we plan to return when it’s not so wet.

Painting with light: Rear light

When taking Painting with light landscape shots it is best to think like an artist (perhaps a painter), who first sets up a canvas on an easel before even starting to put paint onto the palette. Similarly, a landscape Painting with light often needs to have a background shot for the resulting composite on which all of the other shots will sit (you can think of this as the canvas on which you are going to work).

This initial (background) image is unlikely to be completely black – you may want the sky to be lighter to show the silhouette of trees, or to see the moonlight, or the stars. The rest of the images you take will be completely black, all apart from the elements intentionally lit up by your torch.

So, how do we decide on what exposure settings to use to have a very dark background image, but not completely black? It is going to be largely by trial-and-error, because no two scenes are going to be the same. But with a low ISO (to minimise noise) the resultant shutter speed is going to be at least 30 seconds, maybe several minutes. Taking multiple shots at these shutter speeds to find the right one could take a long time.

The answer is to remember the six-stop rule. This simply states that:

Why is this important? Well, if you set your ISO to 6400 you can take some test shots quite quickly in order to find the optimum shutter speed (which will be seconds rather than minutes). You can then reset your camera to ISO 100 and use the same number, but this time as minutesand you will get the same overall exposure.

For example; if you have your camera set to ISO 6400 and, after a few shots, determine that the best exposure time is 2 seconds, when you reset your camera to ISO 100 you will need an exposure time of 2 minutes to achieve the same image.

I’m sure that there are many who will now be saying to themselves “Hold on, if I can get the same image in 2 seconds as I can in 2 minutes why would I bother?”. The answer is ‘Reduced noise‘. Remember, the background image isn’t going to be completely black, there should be elements of detail (clouds, tree silhouettes, etc.) that need to be as crisp and sharp as possible. This will be possible at ISO 100 but not so much at ISO 6400.

For the feature shot above, I wanted the sky to be visible above the horizon and so took that shot first. Fortunately it wasn’t too dark and so the test shot at ISO 6400 took half-a-second. I then re-set the ISO to 100 and took the another shot for half-a-minute. This created just enough light in the sky to act as my background shot.

Of course, once you have your background shot ‘in the bag’, you now have to concentrate on your ‘hero’ and ‘supporting cast’.

The feature shot above isn’t a painting with light in the true sense, because the hero (the public house) is already lit up with its own lights. To be honest, it really doesn’t work for me, but it helped illustrate the six-stop rule, which is why I used it.