
Continuing with our Painting with light post-processing; now that you have all of the individual images displayed as layers (see Painting with light: Light duties), we can start blending them together. This is the fun part, and it is fascinating to turn individual layers on and off to see their effect on the overall composition. Bear in mind that the post-processing may take some time (maybe hours), and that you may even want to leave it for a day or so, and then go back to it to rethink how it looks. Make sure you save the file often so you don’t lose all your hard work.

You will, of course, need some post-processing software. Personally, I use Adobe Photoshop, but there are various other alternatives in different price brackets. It is a pre-requisite for creating composites that you need software that can work with layers, so that you can blend multiple images together. You also need a computer with plenty of Random Access Memory (RAM) because working with layers (I often blend 20 or more together to create one composite) can slow your computer down considerably.
This isn’t a tutorial on using a specific post-processing program, and so I am not going to indicate which key to press to achieve a specific action. I’m going to assume that you have a decent grasp of the program that you use – and that you understand layers, masks and blending modes, although you only need a small number of options to create a Painting with light (hopefully, you have read my blog post: Painting with light: Bringing to light – an introduction to layers, blending modes and layer masks).
I am going to assume that you have followed my earlier blog post: Painting with light: Light duties, and so you have all of the chosen images in layers, all in order and with visibility switched off, on all but the background layer.
The first step is to ensure that the background layer is exactly as you want it – because this will be the foundation onto which all the other layers sit. You need to make sure that any parts of that background layer that are not required (light overspill, for example) are removed. If you need to carry out adjustments, it is always better to create a duplicate layer and then add a layer mask to that, rather than adding it to the original background layer. In this way, the original is always untouched.
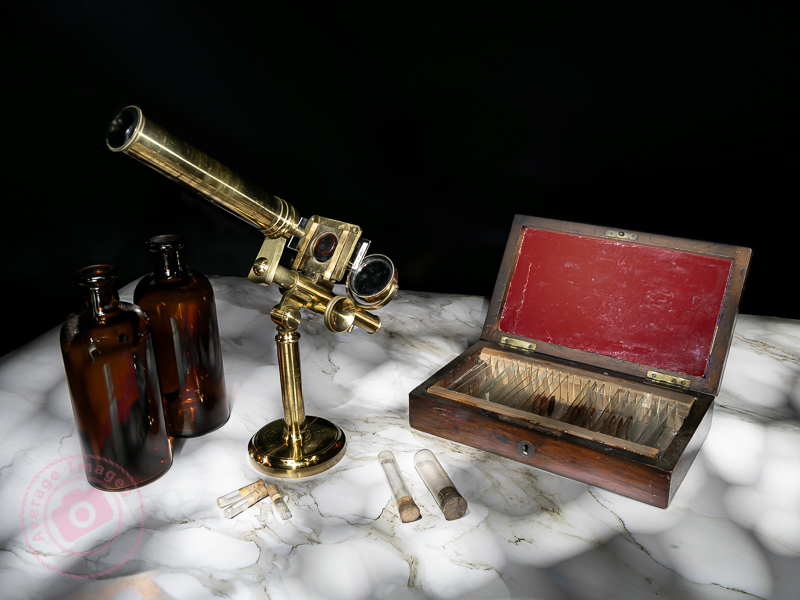
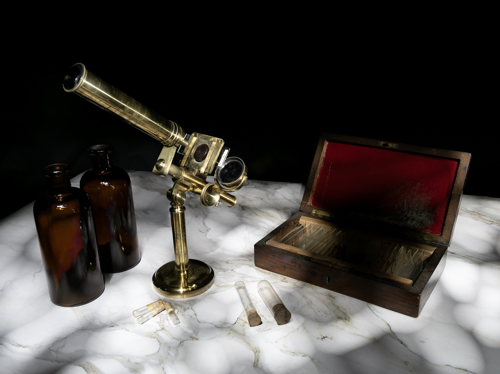
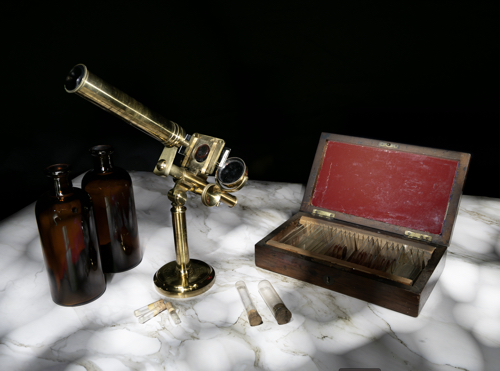
This was the layer I chose as the background. I adjusted the exposure so that the marble-effect table-top was correct, ignoring the rest of the image, knowing that I was going to add to it later.
Once you are happy with the background layer you can start adding more layers to it. Choose the next layer (usually the next one up the list of layers in the layer panel) and turn its visibility on. It will immediately cover the background layer, hiding it from view.
Go to the ‘blending mode’ drop-down box and choose ‘lighten’. This will show the background layer again, and with it, all of the light areas from the new layer, ignoring its darker, shadowed areas.
Again, add a layer mask and use a black brush on the mask to remove any areas of the new layer that are not wanted.
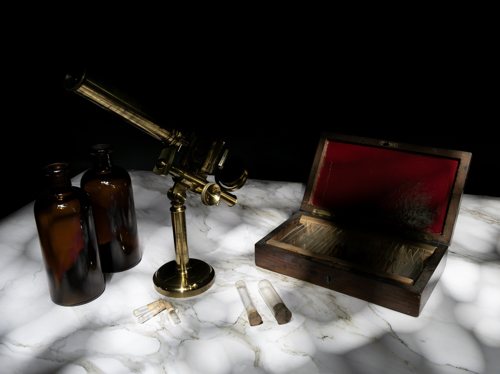
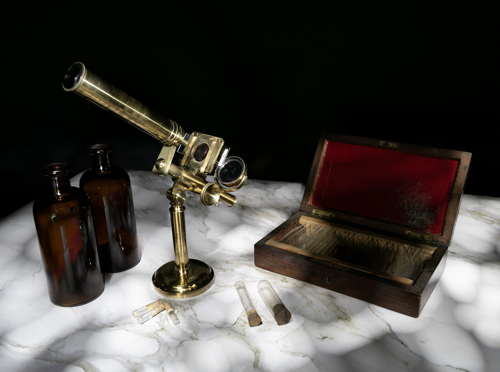
I chose the layer with the correctly-exposed microscope as my second layer, because this is the ‘hero’ of the shot.
There was some overspill of light on the bottles and the microscope base and so I added a layer mask and, with a black brush, removed that areas of the layer that I didn’t like.
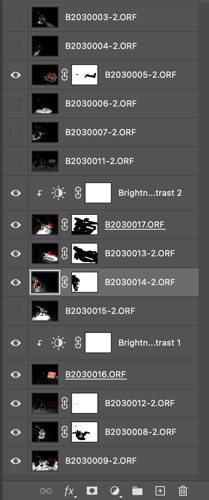
Here you can see my layers ready to be added. Only the bottom two are currently visible, as denoted by the ‘eye’ icon. You can also see the layer mask applied to the second layer.

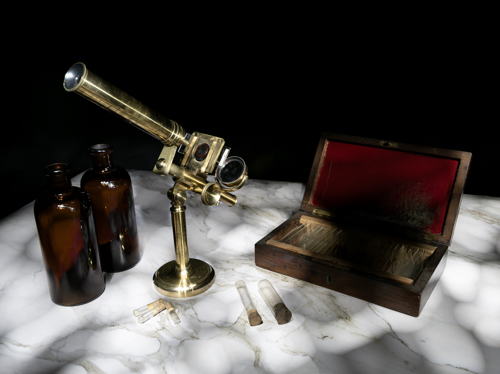
The same shot after the layer mask had been added and the extraneous light removed.
I then added a more subtle layer (I had deliberately created some vertical light reflections in the bottles using the wand tool).
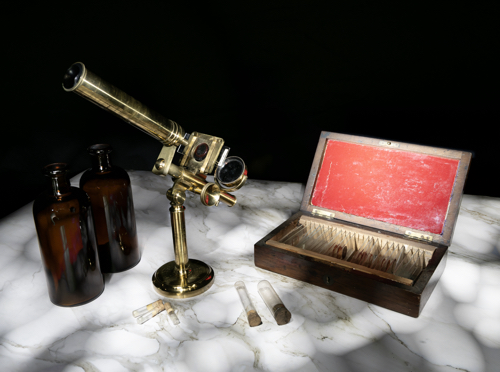
Now I added a layer that had the red box lid exposed.
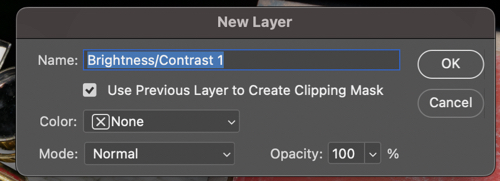
It was just too bright, and so I added a brightness/contract adjustment layer, making sure that I checked the box to clip it to that layer only, rather than the entire composite.
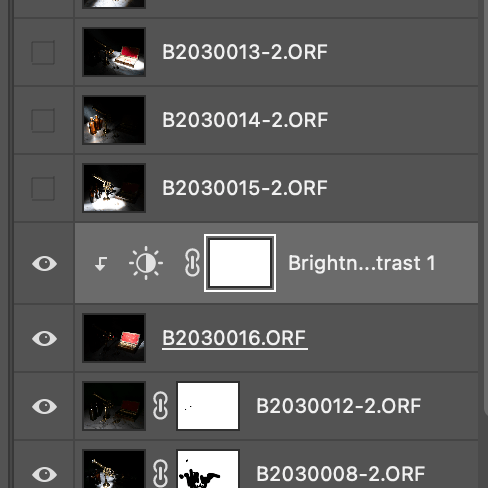
Instead of using an adjustment layer I could have lowered the intensity by using the Opacity slider. Either way, the result is a more balance image.
I continued adding and adjusting layers from the 15 images that I took in total. Many of the layers weren’t used because they didn’t add anything to the final vision of what I was trying to achieve.
If I was short on storage space or my computer was running slowly, I could have deleted the unused layers, but I chose to keep them just in case I change my mind later.
Remember, that each layer can be revisited and re-adjusted later on, so it is not critical that you get it right the first time – and as the composite builds up with more layers, you may find that earlier layers need to be adjusted to suit.
Finally you can save the completed composite as a single, merged layer. At this point you may want to crop it, adjust the overall exposure or add vignettes, for example.
We are nearing the end of the Painting with light series now (just one more blog post to go). I am surprised that this isn’t a more popular genre of photography, particularly for still-life imagery, given its ease and low cost compared with studio lighting set-ups, and that it is a good learning curve for layers, blending modes and layer masks, but I will leave the entire series published for those few who want to give it a try.
Discover more from Ironbridge Images
Subscribe to get the latest posts sent to your email.

