
When taking Painting with light shots, it is best to think of it as a two-step process (even though there will inevitably be more than two shots). Step one is to take the initial image, which will be the ‘hero’ of the finished work. Step two is to take a series of shots with individual elements lit up within the scene. These will be the ‘supporting cast‘ to the hero, ultimately blending together to produce the final output.

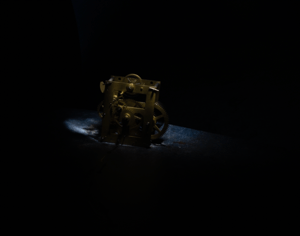
In this shot, “Hands of time” the hero is clearly the clock movement, even though it is in the rear of the shot. The viewer’s eye needs to land on it, and the supporting cast (in this case, the clock face and the hands) are there to help. Using positioning, lighting and compositional techniques, you can ensure that the supporting cast doesn’t take the attention away from the hero while still adding support.
The first shots were taken with the clock movement in focus, each with the light shining from a different angle. These shots were later merged in Photoshop using blending modes and layer masks.


I then refocused on the clock hands and took several shots, adjusting the focus as I got closer to the clock face. I wasn’t concerned with the light spilling from my wand because all of that section of the image would be blocked out with a layer mask. It is essential to have the camera fixed firmly on a tripod so that it doesn’t move as you adjust the focus.
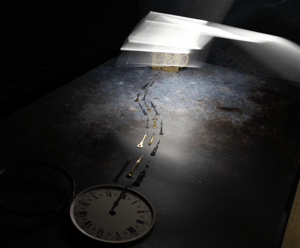
Once I had got to the foreground, I refocused again on the clock face and took several shots, which, again, were merged together with blending modes and layer masks.

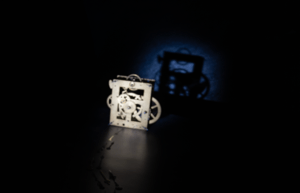
The final shot was back at the clock movement again to create the shadow on the background. I actually forgot to refocus on the movement, but it didn’t matter because I removed that part of the image with a layer mask and just kept the shadow.
So in total, I took 23 shots but only used 13 of them in the final image. For me, the most entertaining part of Painting with light is that you never really know how each image will contribute to the overall composition until you add its layer in Photoshop. Some of them surprise me with the effect that they give, while others are underwhelming and can be ignored.
Note: All of the small images above are cropped for the purpose of the description. Each image, as taken, was full size.
Discover more from Ironbridge Images
Subscribe to get the latest posts sent to your email.

