

For my Painting with light composites, I use Adobe Photoshop to blend two or more images together, but I often find that using a mouse is not very accurate – which can be annoying, especially when making detailed adjustments. I was therefore toying with the idea of buying a graphics tablet – but a decent Wacom Intuos Pro is £200 just for the small one, which is a lot to spend if I subsequently found I didn’t get on with it (I should mention at this point that many years ago I had a graphics tablet but never really used it – although I wasn’t using Photoshop in the same manner back then, and it was only a cheap one).
As I was reviewing alternative models, it reminded me that I could use my iPad, not only as a second display but also as a second input – thus also utilising my underused Apple Pencil. Now I had already tried this before and was less than impressed. However, I had heard that the process has improved with later software upgrades, so I decided it was worth another try.
These are the minimum requirements in case you are considering trying the same thing: You will need to be running MacOS Catalina or above on your main computer and iPadOS 13 or above on your iPad.
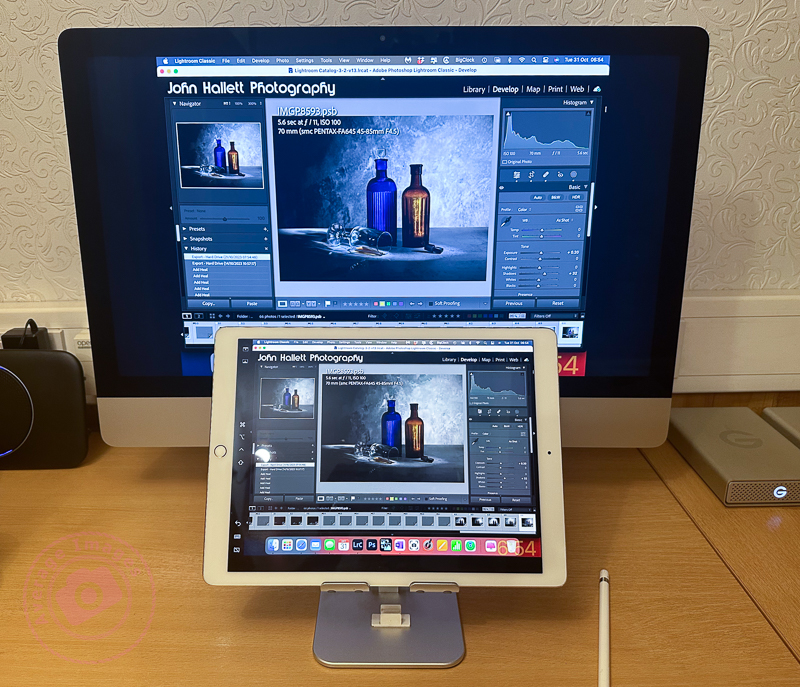
As soon as I tried it, I remembered why I didn’t like it the first time. If I set the iPad as a duplicate monitor, the aspect size on the primary monitor changed to suit the aspect size of the tablet. The program screens also moved into new positions, which meant relocating them before starting. The editing itself worked OK once everything was in the correct position (see below) but it was somewhat disconcerting to have the program screens a different size and position from normal. If I set the iPad as a secondary monitor, I then had to drag Photoshop onto the tablet and do the editing on that. Although the Apple Pencil gave much better precision than a mouse, I was now working on a much smaller screen – which was all somewhat counterintuitive.
The other problems were that the Apple Pencil isn’t detected until it actually touches the screen, which means you are working ‘blind’ when trying to locate the pencil on the image to start editing (this is worst when using the duplicate monitor setting, and you are using the pencil on the iPad but looking at the image on the primary monitor) – and that the area being edited by the pencil didn’t seem to match the position of the cursor exactly which created some error when making fine adjustments.
Unfortunately, despite trying hard to make it work (I really wanted to find a good use for the Apple Pencil), I ultimately decided there were too many compromises. I therefore took the plunge and ordered a Wacom Intuos Pro. Look out for the follow-up blog post to find out how I got on.
Discover more from Ironbridge Images
Subscribe to get the latest posts sent to your email.

